00196376-0102_UM S-Feeder_EN.pdf - 第34页
Tape Feeder Modules Operating Tape Feeders - General Emptying the Foil Container 34 User Manual SIPLACE S-Feeder 2.1.7 Emptying the Foil Container Foil containe r ► Open the foil container flap (1) at the back of the fee…
Tape Feeder Modules
Setting the Foil Pretension Operating Tape Feeders - General
User Manual SIPLACE S-Feeder 33
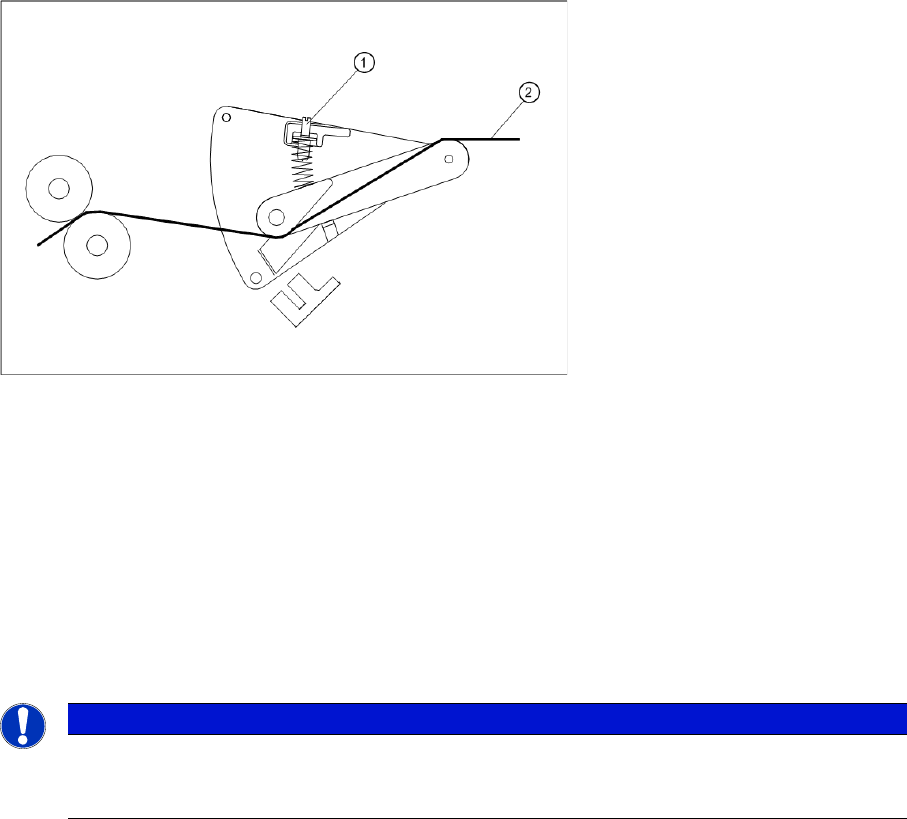
2.1.6 Setting the Foil Pretension
If the foil tears frequently or has not been correctly removed, you will need to set the foil pretension.
Example of how to set the foil pretension
The foil pretension is set with the setting screw (1) on the spring of the foil tensioner.
►If the foil pretension is too low (foil is not removed properly), increase the pretension by turning the
screw in a clockwise direction.
►If the foil pretension is too high (foil tears), reduce the pretension by turning the screw in an anticlock-
wise direction.
Legend:
1 Setting screw
2 Foil
NOTICE
When you release the screw, make sure that the spring slides back into place (especially when
the foil pretension was at its maximum before). If the spring does not slide back properly, the
foil pretension will not slacken.
Tape Feeder Modules
Operating Tape Feeders - General Emptying the Foil Container
34 User Manual SIPLACE S-Feeder
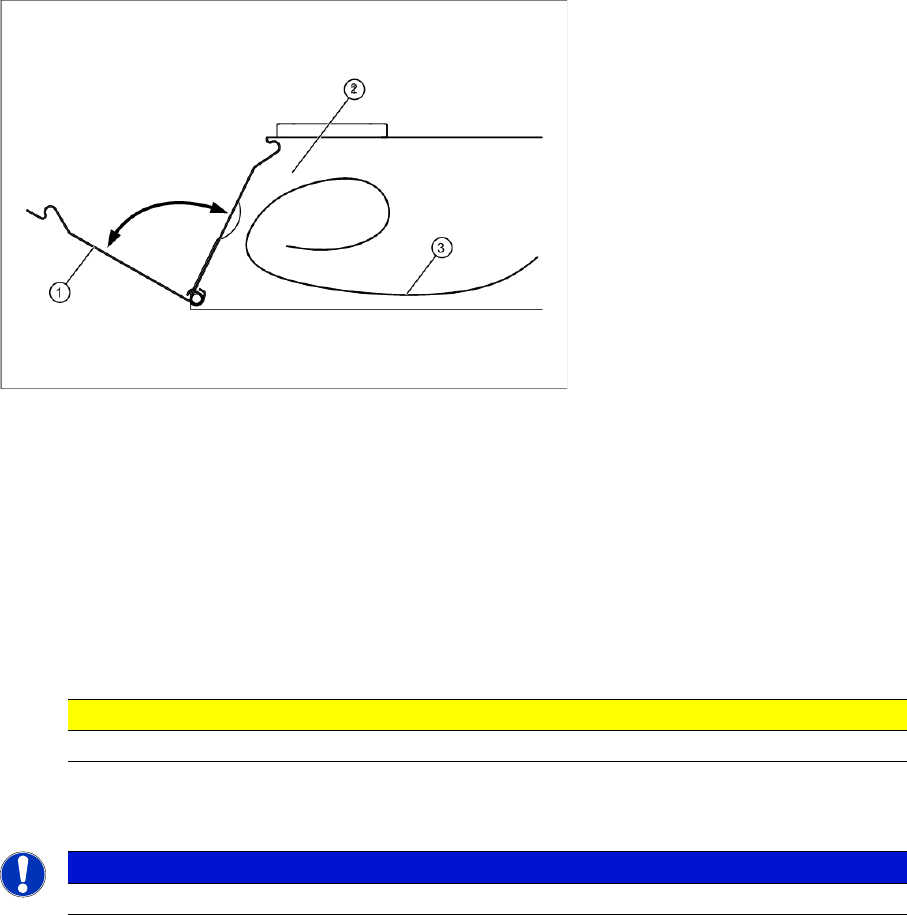
2.1.7 Emptying the Foil Container
Foil container
►Open the foil container flap (1) at the back of the feeder.
►If necessary, use a pair of tweezers to grip the foil (3) in the foil container.
►Carefully pull the foil out of the foil container, towards the back.
►Cut the foil.
►Close the flap.
Legend:
1 Foil container flap
2 Foil container
3 Foil
CAUTION
Do not tear off the foil as a "stretched" foil could lead to malfunctions at the foil removal point.
NOTICE
Empty the foil container each time you change the tape and each time you splice a tape.
Tape Feeder Modules
Splicing the Foil Operating Tape Feeders - General
User Manual SIPLACE S-Feeder 35
2.1.8 Splicing the Foil
►Cut the tape edge and the cover tape on the old tape so that they are level with one another.
►Leave 5 to 10 mm of the new tape overlapping the cut tape edge.
►Place the overhang of the new foil over the end of the old foil.
►Fix the adhesive strip over the center of the foil edge on the new tape.
For more information about foil splicing, refer to the "Tape Splicing Tool" section of the "Job Guide -
Feeders".
For detailed information about the tape splicing tool, refer to the documentation supplied with this tool.
2.1.9 Maintenance
►Each time you change the tape, clean the area around the transport wheel and the pickup window.
Loose components could be deposited and jammed here during operation.
►From time to time, operate the transport wheel without a tape. Use these service runs to remove any
components which have been caught between the transportation pins.
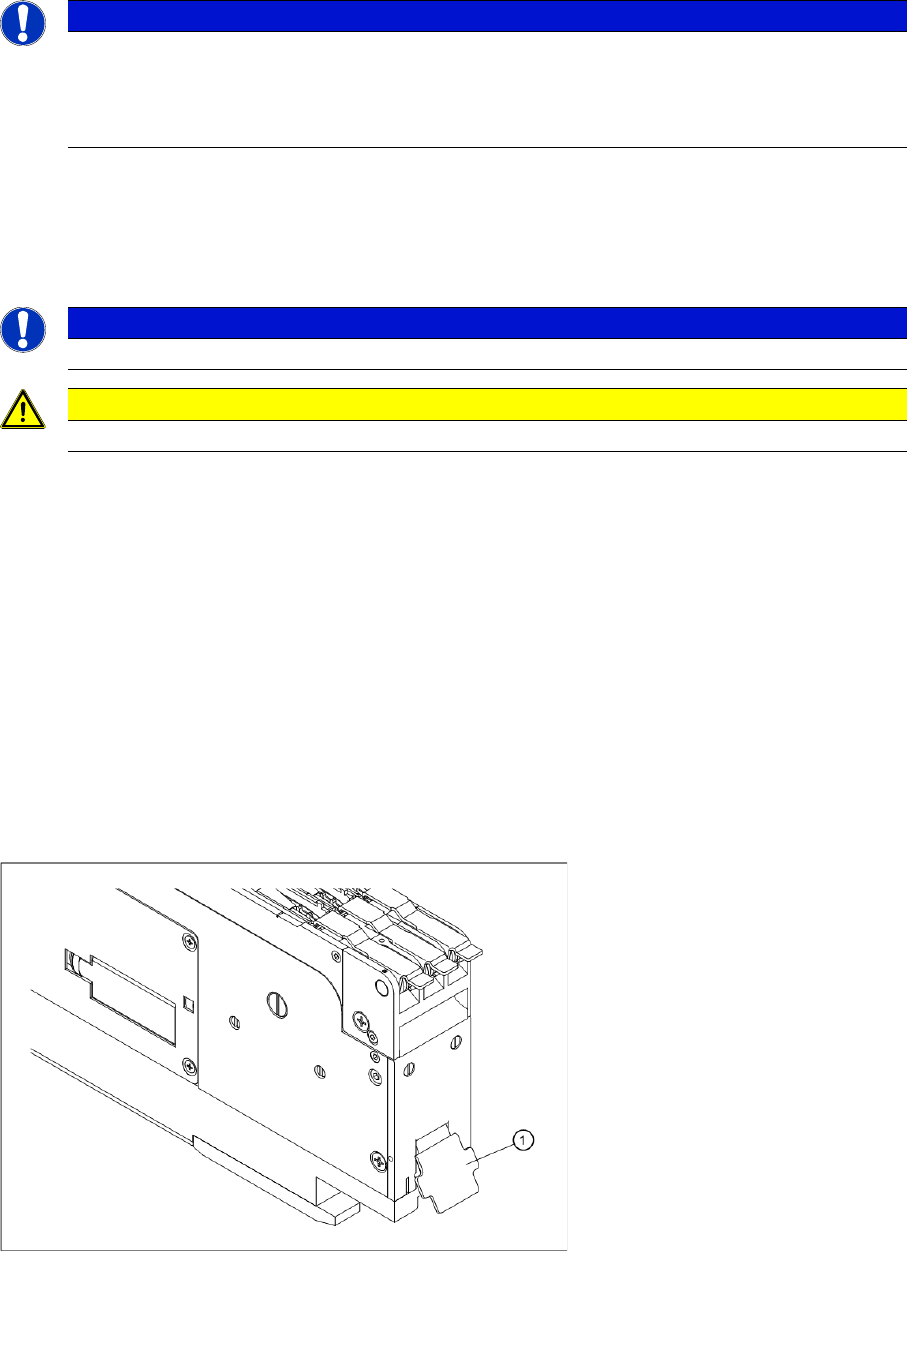
For 3x8 mm S feeders only
The transport wheel moves components into the feeder.
►Open the component reject flap (1) and shake out the components which have collected there.
Component reject flap
NOTICE
To splice the foil, use the adhesive strips from the tape splicing tool package Item
No.: 02102988-xx.
When processing the foil splice points, make sure that they are overlapped and follow the
procedure below.
NOTICE
Make sure that there is no adhesive foil protruding over the side of the splice point.
CAUTION
Make sure that adhesive strips from defective splice points are not fed into the foil container.
Legend:
1 Component reject flap