00196376-0102_UM S-Feeder_EN.pdf - 第58页
Bulkcase Feeders Operating the Bulkcase Feeder Replacing the Empty Murata Cassette 58 User Manual SIPLACE S-Feeder 3.3.4 Replacing the Empty Murata Cassette ► (1) Check the prism (A) , to make sure that there are no comp…
Bulkcase Feeders
Inserting the Murata Cassette Operating the Bulkcase Feeder
User Manual SIPLACE S-Feeder 57
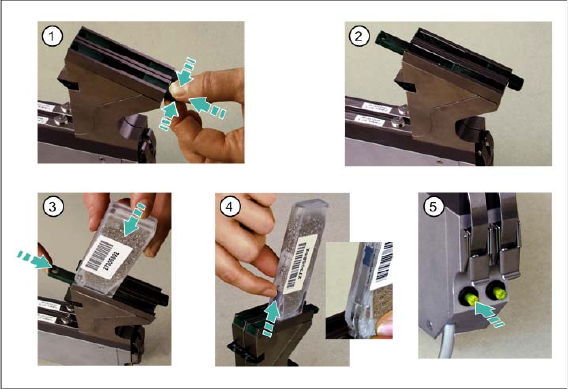
3.3.3 Inserting the Murata Cassette
►(1) Press the lock together and push upwards. The following diagram (2) shows the lock when open.
►(3) Place the closed Murata cassette onto the funnel, with the opening facing downwards, and push
the lock down again.
►(4) Open the Murata cassette, by pushing the slide upwards.
►(5) Press the button at the back of the feeder 1x. The components will be moved forwards to the pick-
up position.
Bulkcase Feeders
Operating the Bulkcase Feeder Replacing the Empty Murata Cassette
58 User Manual SIPLACE S-Feeder
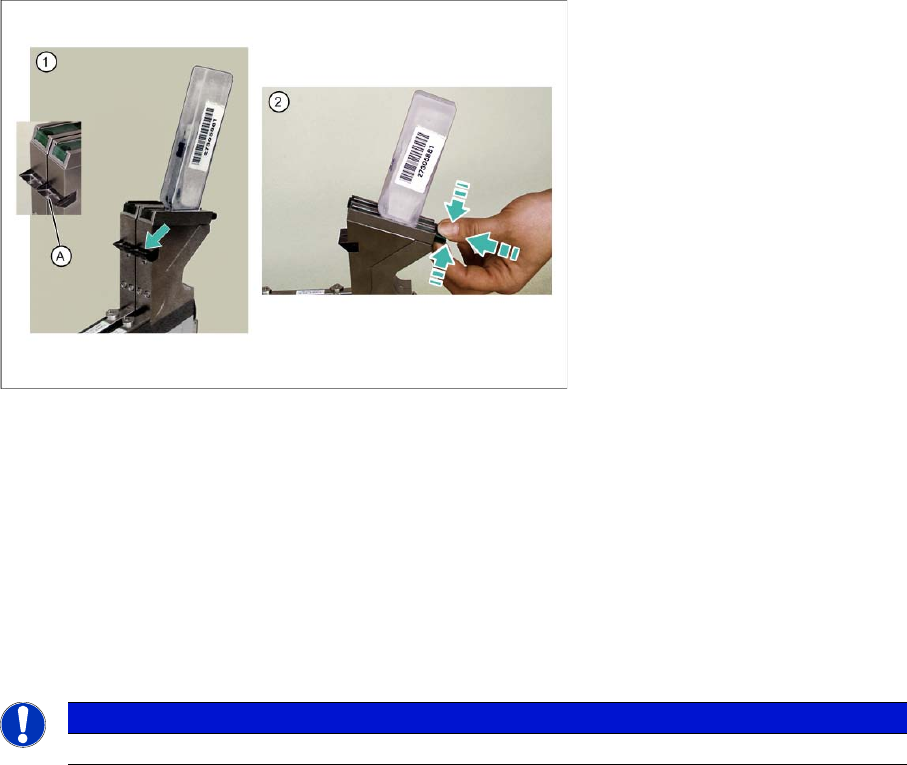
3.3.4 Replacing the Empty Murata Cassette
►(1) Check the prism (A), to make sure that there are no components in the transition area between
the funnel and the Murata cassette.
►(2) Press the lock together, push upwards and remove the empty Murata cassette.
Perform the further steps as described in "3.3.3 Inserting the Murata Cassette" [ ➙ 57]:
►Place the new, closed Murata cassette onto the funnel, with the opening facing downwards, and push
the lock down again.
►Open the Murata cassette, by pushing the slide upwards.
►Press the button at the back of the feeder 1x. The components will be moved forwards to the pickup
position.
See also
3.3.3 Inserting the Murata Cassette [ ➙ 57]
NOTICE
Empty Murata cassettes can be replaced without the need for a machine standstill.
Bulkcase Feeders
Replacing the Feeding Rail at Component Changeover Operating the Bulkcase Feeder
User Manual SIPLACE S-Feeder 59
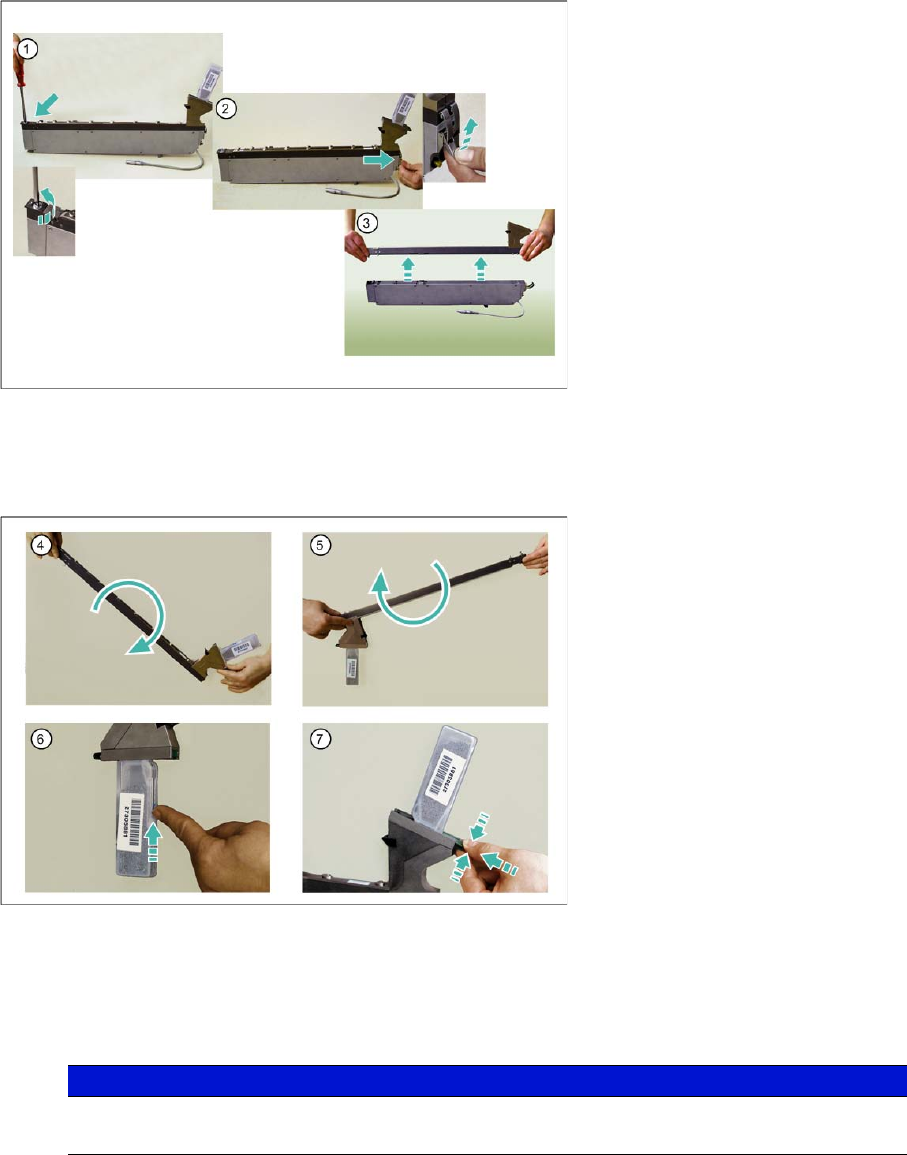
3.3.5 Replacing the Feeding Rail at Component Changeover
If you want to use the bulkcase feeder for components of a different size, you need to replace the feeding
rail fitted with one which is suitable for the new components.
►(1) Loosen the front end of the feeding rail by turning the fixture screw 90° in a clockwise direction.
►(2) Open the quick-fit closure at the back of the feeding rail.
►(3) Lift the feeding rail off the body.
►(4) Tilt the feeding rail towards the back, so that the remaining components slide towards the Murata
cassette.
►(5) Turn and shake the feeding rail until all the remaining components are in the Murata cassette.
►(6) Close the Murata cassette, by pushing the slide up.
►(7) Open the lock and remove the Murata cassette.
To fit another feeding rail and fasten the Murata cassette, proceed as described in "3.3.2 Placing the
Feeding Rails on the Body" [ ➙ 56] and "3.3.3 Inserting the Murata Cassette" [ ➙ 57].
NOTICE
The slide may not be closed while the components are still in the transition area between the
cassette and the funnel.