Autosite_Users_Manual.pdf - 第55页
Setup an d Installa tion AutoSite User Manual 2-33 Backing Up the AutoSite Disks When you have success fully powered up AutoS ite, and you have established com munication betw een AutoSite and TaskLin k, we suggest you m…
Setup and Installation
2-32 AutoSite User Manual
Ways to Control
AutoSite
Once communication with AutoSite is established, you could control
AutoSite in any of the following ways:
•
Terminal Mode
—This interface is the standard menu system that is
built into AutoSite.
•
CRC Mode
—This mode uses Computer Remote Control codes to
instruct AutoSite. In order to use this mode, AutoSite must be
running in Remote Mode. CRC mode is described in Appendix A of
this manual.
•
Custom Software Interface or TaskLink
—This interface is a custom
interface or a PC-based menu interface (such as TaskLink, which
offers a full menu-driven user interface). For more information about
TaskLink, refer to the documentation included with TaskLink or
contact Customer Support.
More About Terminal
Mode
In most cases, the emulation software must be set to
full screen
terminal
mode before you can view
terminal mode
. If you are using TaskLink,
start TaskLink and select
Programmer Interface
from the
Utilities
menu
to access terminal mode. See your TaskLink documentation for more
information.
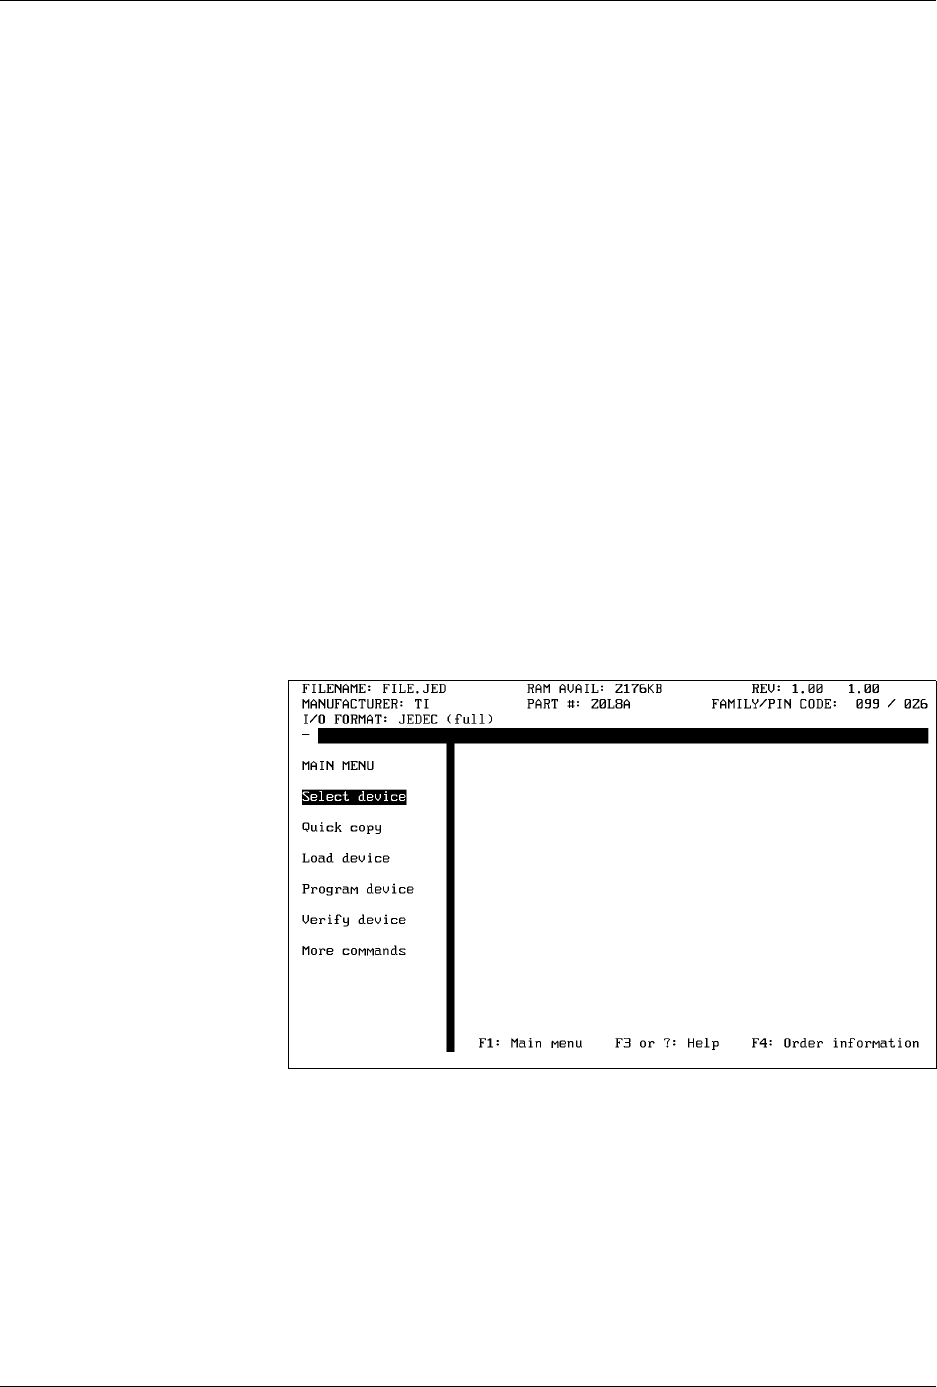
While in terminal mode, you can access the Main Menu, shown in Figure
2-23, which is the starting point from which you can select commands.
Selecting a Command in
Terminal Mode
You can select a command while in terminal mode by using one of two
methods:
• Type the first letter of the command, or
• Move the cursor to the menu item and press
E
NTER
.
If you get lost in the menu structure, press
F1
to return to the Main Menu.
Figure 2-23
The AutoSite Main Menu

Setup and Installation
AutoSite User Manual 2-33
Backing Up the
AutoSite Disks
When you have successfully powered up AutoSite, and you have
established communication between AutoSite and TaskLink, we suggest
you make a backup copy of your AutoSite disks.
If you have access to a DOS-based PC with a 1.44MB disk drive, use the
DOS DISKCOPY command to make a copy of your disks.
CAUTION: Make sure you use DISKCOPY and not COPY. The backup
must be an exact, bit-for-bit, sector-for-sector copy of the
original. Store the backup copy in a safe place.
To use the DISKCOPY command:
1. Insert an AutoSite disk (the “source” disk) into you PC’s disk drive.
2. At the DOS prompt, type
diskcopy
a
:
a
:
, where
a
represents the letter
of the disk drive into which the AutoSite disk has been inserted, and
press
E
NTER
.
DOS will copy a portion of the “source” disk into RAM. It will then
ask for the “target” disk, the disk to which you want to copy the
“source” information.
3. Remove the “source” disk and insert a formatted floppy disk into
your disk drive. DOS will then copy the information it has stored in
RAM onto the “target” diskette.
Note: You may be prompted to switch diskettes more than once.
What to Do Next Time
Next time you power up AutoSite, you probably do not need to follow all
the steps outlined in this chapter. Listed below are the normal steps for
preparing for another session on AutoSite.
Note: If you have not used AutoSite for a while, or if you suspect AutoSite might
have been moved from one area to another, follow the procedure below
before you use AutoSite.
To prepare AutoSite for another session, follow the procedure below:
1. Check the power cords and cables between AutoSite and the
connected equipment.
2. If you are controlling AutoSite from a PC, make sure it is on and that
the controlling software, such as TaskLink, is running.
3. If a Mass Storage Module (hard drive) is not installed, insert the
AutoSite Boot Files disk into the disk drive.
4. Select and insert a programming module (or Base) into the pin driver
head. Make sure the programming module (or Base) is locked in
place.
5. Connect the pin driver head to the handler.

Setup and Installation
2-34 AutoSite User Manual
6. Power up AutoSite.
7. Verify that AutoSite and the controlling software are communicating.
If you are using TaskLink, press
C
TRL
+
F1
to check communication
between TaskLink and AutoSite. If TaskLink displays
Contact With
Programmer Established
, then TaskLink and AutoSite are
communicating.
You are now ready to begin a new session on AutoSite.
More About Cables
This section describes the pin assignments AutoSite uses on its serial
ports. Use the information on this page and the following two pages to
build serial cables to connect to AutoSite.
SmartPort
AutoSite is compatible with both Data Terminal Equipment (DTE) and
Data Communications Equipment (DCE). AutoSite’s SmartPort feature
automatically toggles between DTE and DCE until a connection is
established.
Making Your Own
Cable
AutoSite receives commands and sends responses through an RS-232C
port using a 25-pin D connector in two possible configurations: either
DTE or DCE. The connections are shown in Figure 2-24.
Pin Functions When In
DTE Mode
The following table explains the function of the connector pins on the
Auxiliary and Handler ports when they are configured as DTE ports.
Pin Function Description
1 Ground Provides a safety ground connection
2 Transmit Data Carried the transmitted data
3 Receive Data Carries the received data
4 Request to Send This line is held high by AutoSite
5* Clear to Send A high on this line enables AutoSite to
transmit data. (Used for hardware
handshaking.) A low inhibits data
transmission from AutoSite.
6* Data Set Ready This line is held high when the remote source
is ready to send or receive data. A low
inhibits data transmission from AutoSite.
7 Signal Ground Provides a reference ground for all signals on
the cable.
8* Data Carrier
Detect
This line is held high when the modem
detects a carrier. A low on this line inhibits
AutoSite from transmitting data.