SYS-CP842-1.1E.pdf - 第75页
3.Machine System SYS-CP842-1.1E 66 CP-842E / CP-842ME System Reference Changing the Axis Group and th e Rapid Inching Speed The axes move at a very low speed when they are moved usin g the inching contro ls. When moving …
SYS-CP842-1.1E 3.Machine System
CP-842E / CP-842ME System Reference 65
3.1.12 Inching
Moving an Axis With the Inching Keys
Inching is performed using the inching keys on the operation console. Inching can be
performed at any time except under the following conditions:
• When the machine is in START ready status
• During operation
• Before the cause of an emergency stop has been cleared
• When displaying the I/O command page
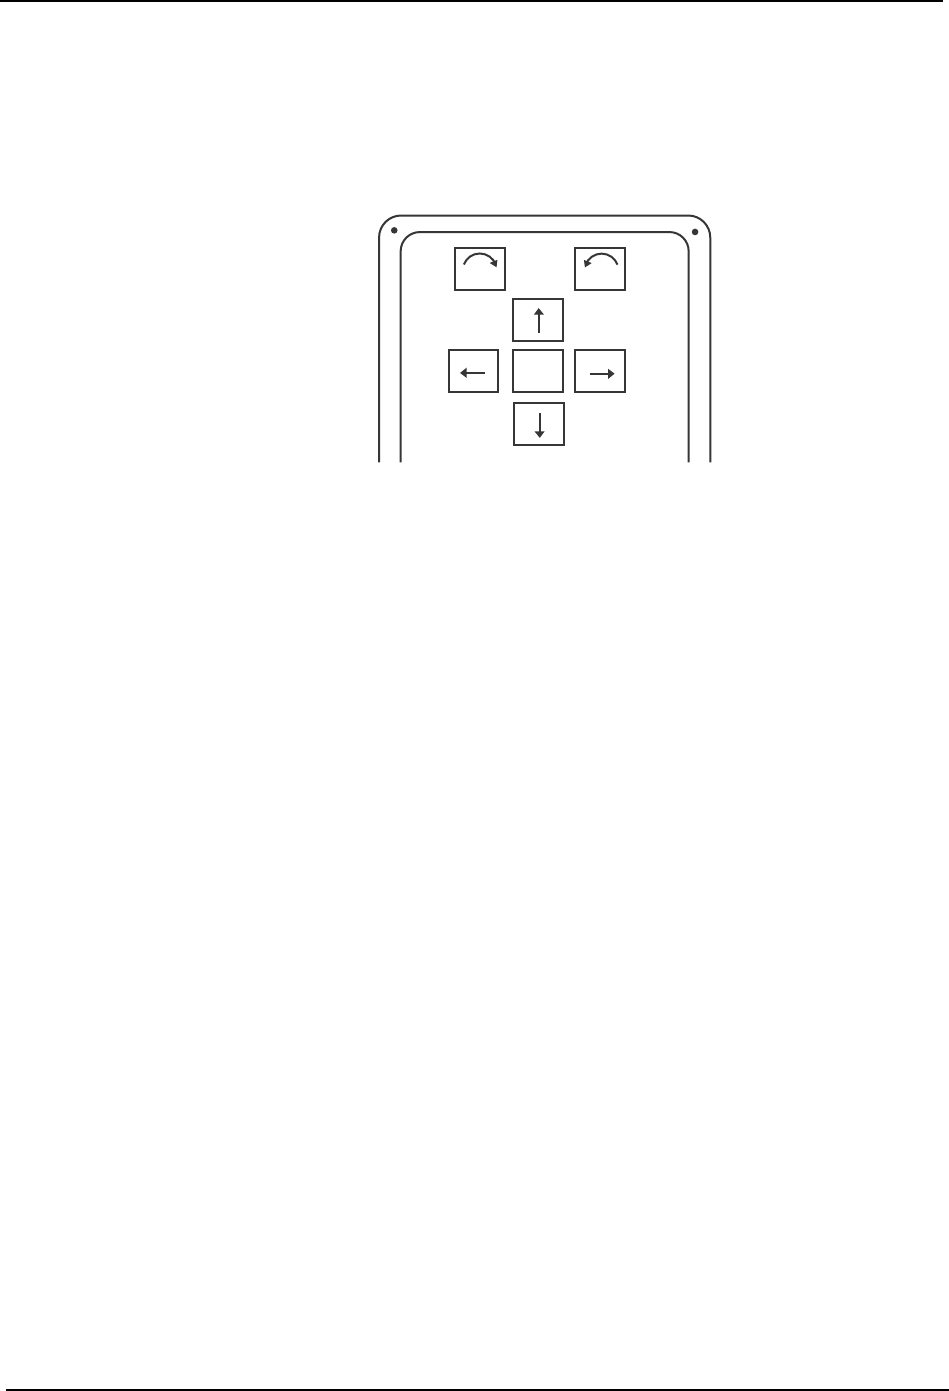
To inch an axis, press the inching key corresponding to the target axis and direction.
To move the target axis faster, hold down F (fast) as well as the chosen inching key for rapid
inching.
The axis combination displays at the [JOG] button in the command bar of the touch screen.
F
θ
θ
C7SS2001
3.Machine System SYS-CP842-1.1E
66 CP-842E / CP-842ME System Reference
Changing the Axis Group and the Rapid Inching Speed
The axes move at a very low speed when they are moved using the inching controls. When
moving axes longer distances, use the F (fast) in combination with the inching keys for
Rapid Inching. The Rapid Inching speed can be specified at the machine using the
following procedure.
Procedure
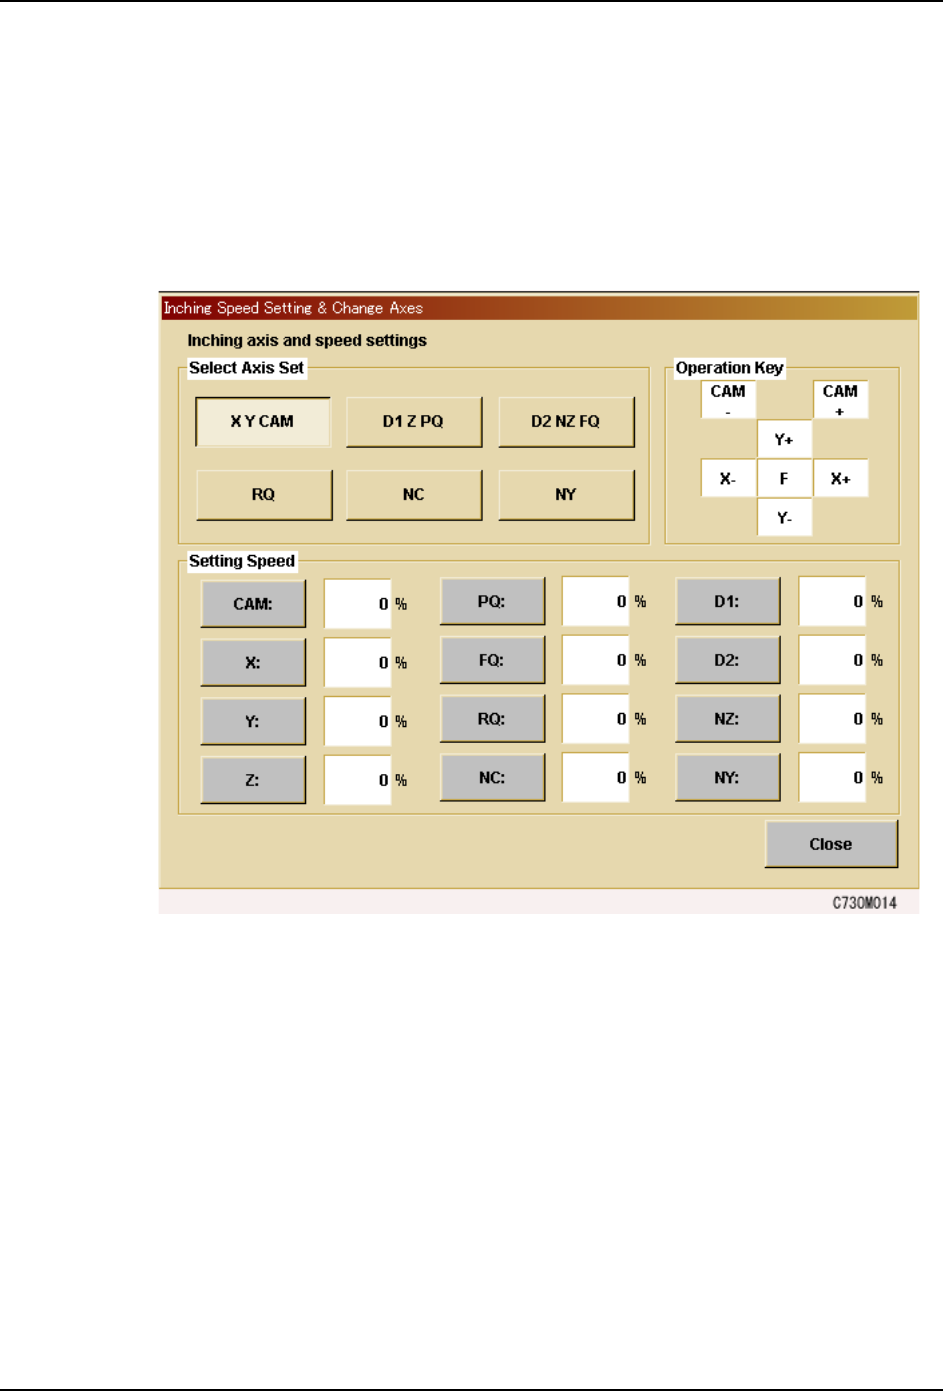
1. Press [JOG] to display the [Inching Speed Setting & Change Axes] screen.
2. Under [Select Axis Set], press the combination of axes to be controlled using the inching
keys.
3. To change the rapid axis speed by selecting the target axis under “Speed”, and entering
the percentage of full speed at which the axis is to be moved during Rapid Inching.
SYS-CP842-1.1E 3.Machine System
CP-842E / CP-842ME System Reference 67
3.1.13 Changing the Starting Sequence
Use this procedure to start assembly from a sequence other than sequence one.
Procedure
1. Press [Production] at the [Main] screen, and then press [Start Sequence].
2. Enter the number of the sequence from which production is to be commenced at the
numeric keypad.
3. Press [OK] when the sequence has been specified.
The specified sequence displays at the Current seq. no item at the [Production] screen.
Note: The production start sequence number can only be specified after a panel is loaded to the main
conveyor.
3.1.14 Skipping a Panel
On a multiboard panel, if the operator decides there is a board (or boards) that should not
be assembled (i.e., skipped), there are three methods of preventing parts being placed on
that board.
Setting board skips
Board skips can be set up in the program.
Skip mark
An appropriate mark is attached to the target board. When the mark is detected by the
machine it knows not to produce that board.
Refer to your host system documentation about setting skip mark reading positions in the
program.
Manual board skips
Commands at the machine can be used to skip one board on certain panels, or the same
board on each panel.
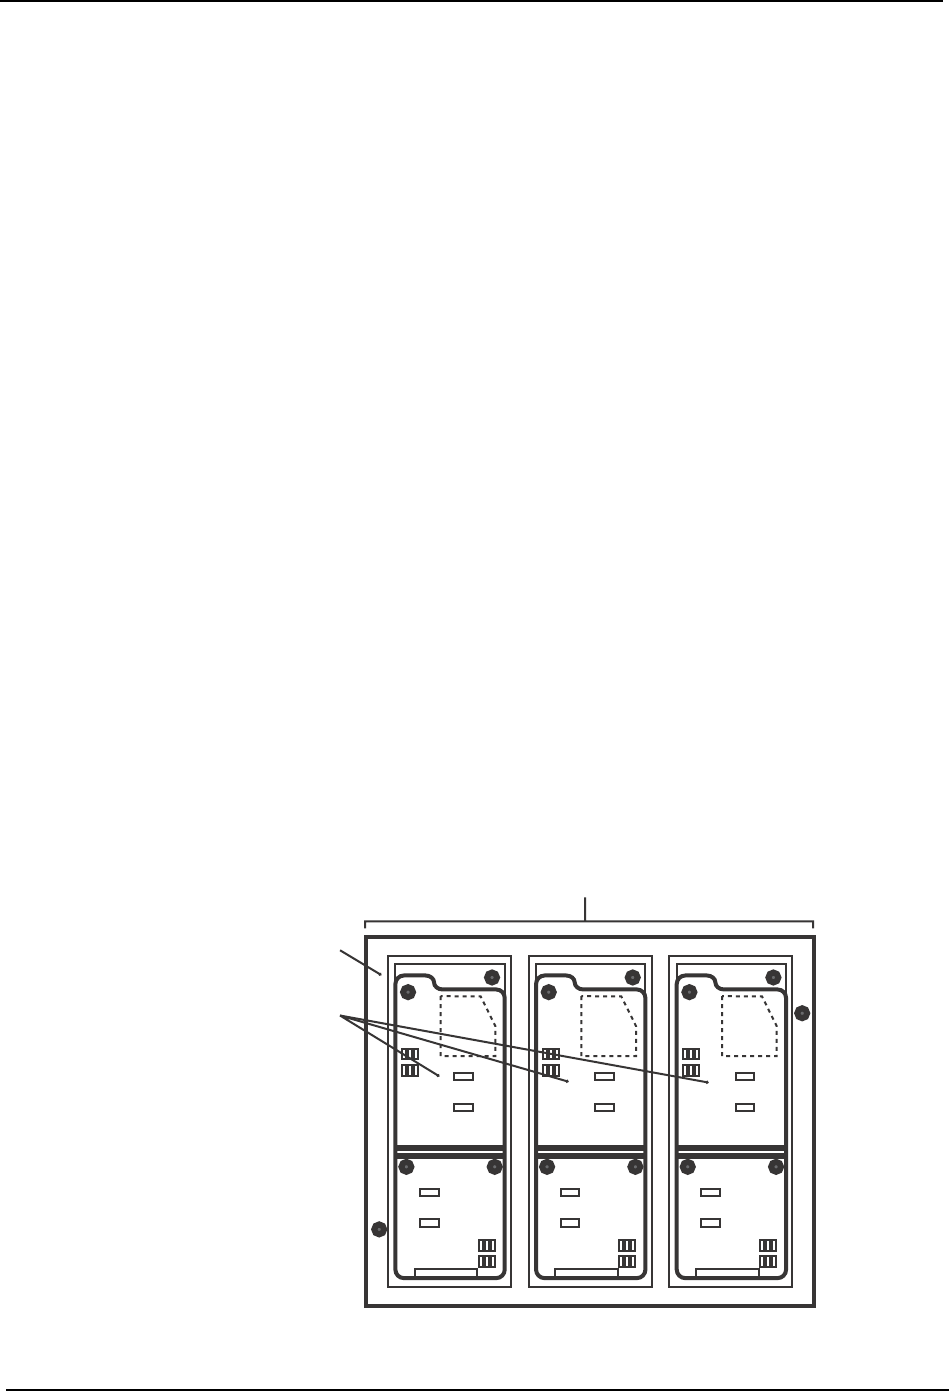
Panel
Multiboard panel
Boards
C73OM002