TR7600 SIII_Hardware_en_v_2_0_4.pdf - 第16页
Test Research, Inc . 6 TR7600 SIII Series User Gui de – Hardwa re Figure 6: VPL C/Contro l Toolb ar
Test Research, Inc.
TR7600 SIII Series User Guide – Hardware 5
In the VPLC window, the following options will be displayed:
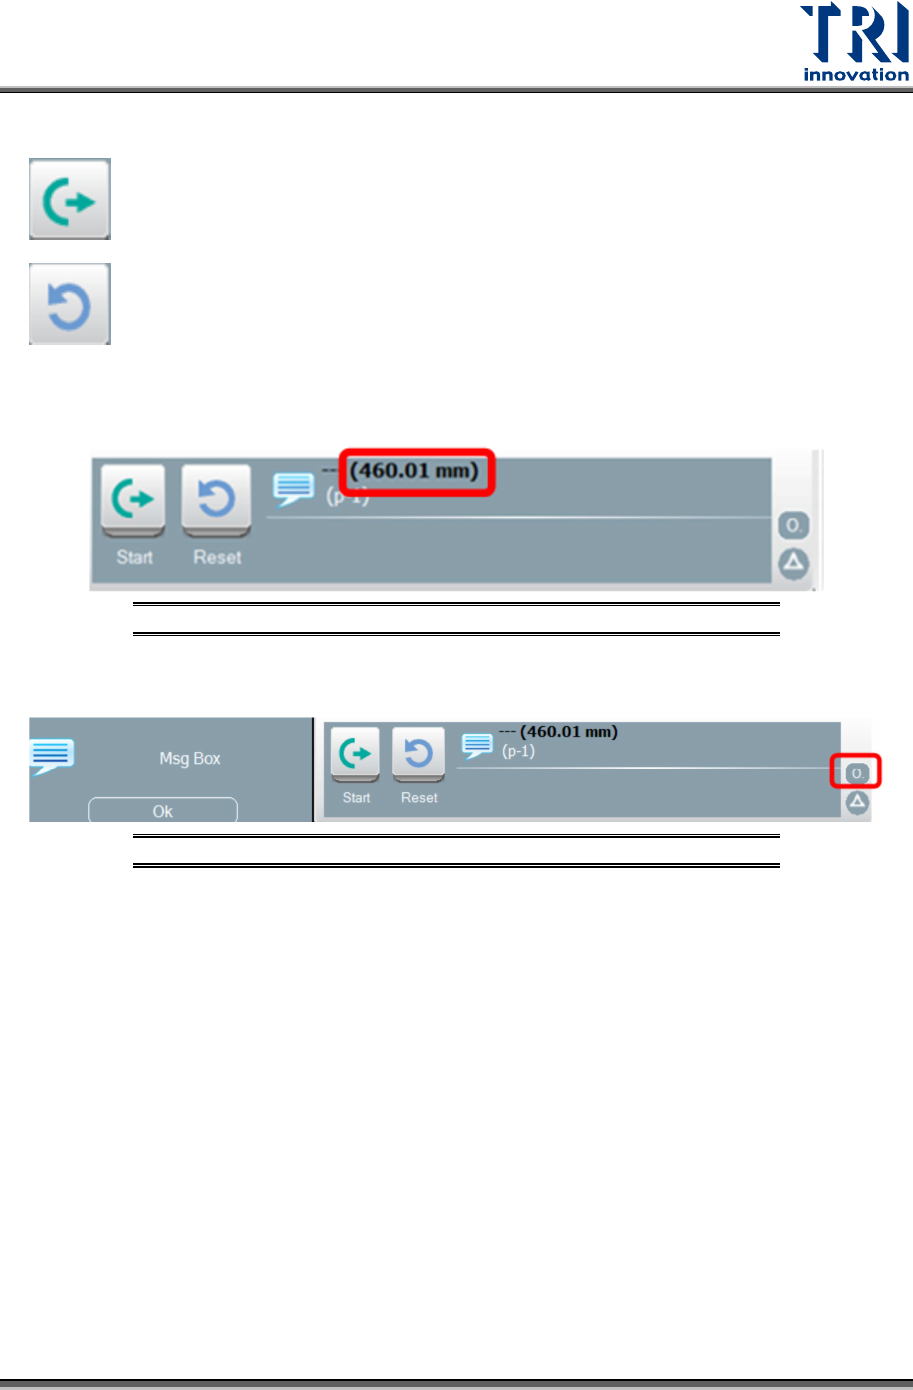
: Start to test a board
: Reset to deliver the board to a gate.
The number on the upper side means the width of the tested board.
Figure 4: VPLC/ Board Width
Click the circle shape button at the right corner of the VPLC window to show the message
window.
Figure 5: VPLC/Message Box
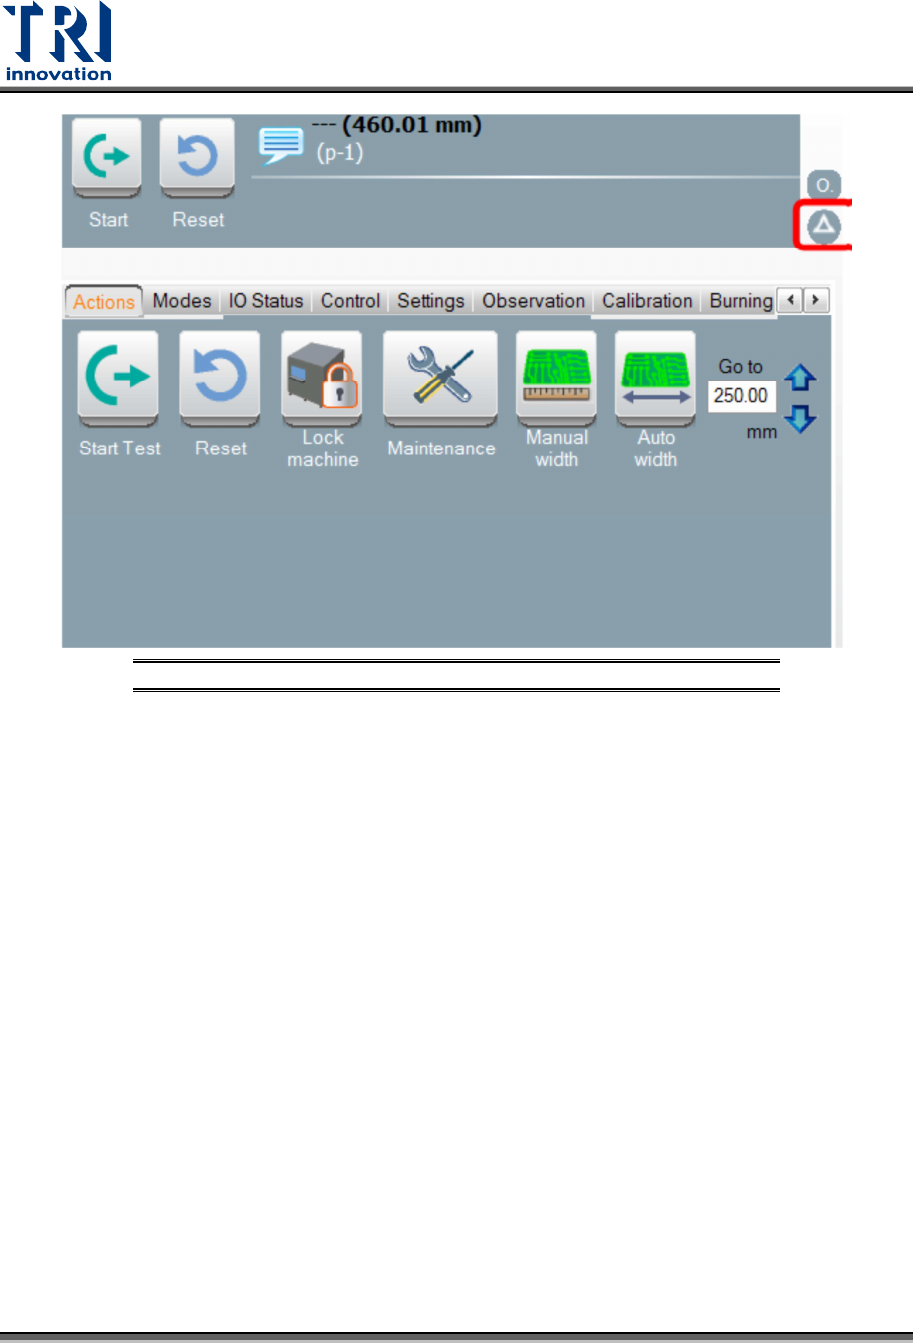
Click the triangle shape button at the lower-right corner of the window to show the control
toolbar. In the control bar, it includes the [Actions], [Modes], [IO Status], [Control], [Settings],
[Observation], [Calibration], and [Burning].
Test Research, Inc.
6 TR7600 SIII Series User Guide – Hardware
Figure 6: VPLC/Control Toolbar
Test Research, Inc.
TR7600 SIII Series User Guide – Hardware 7
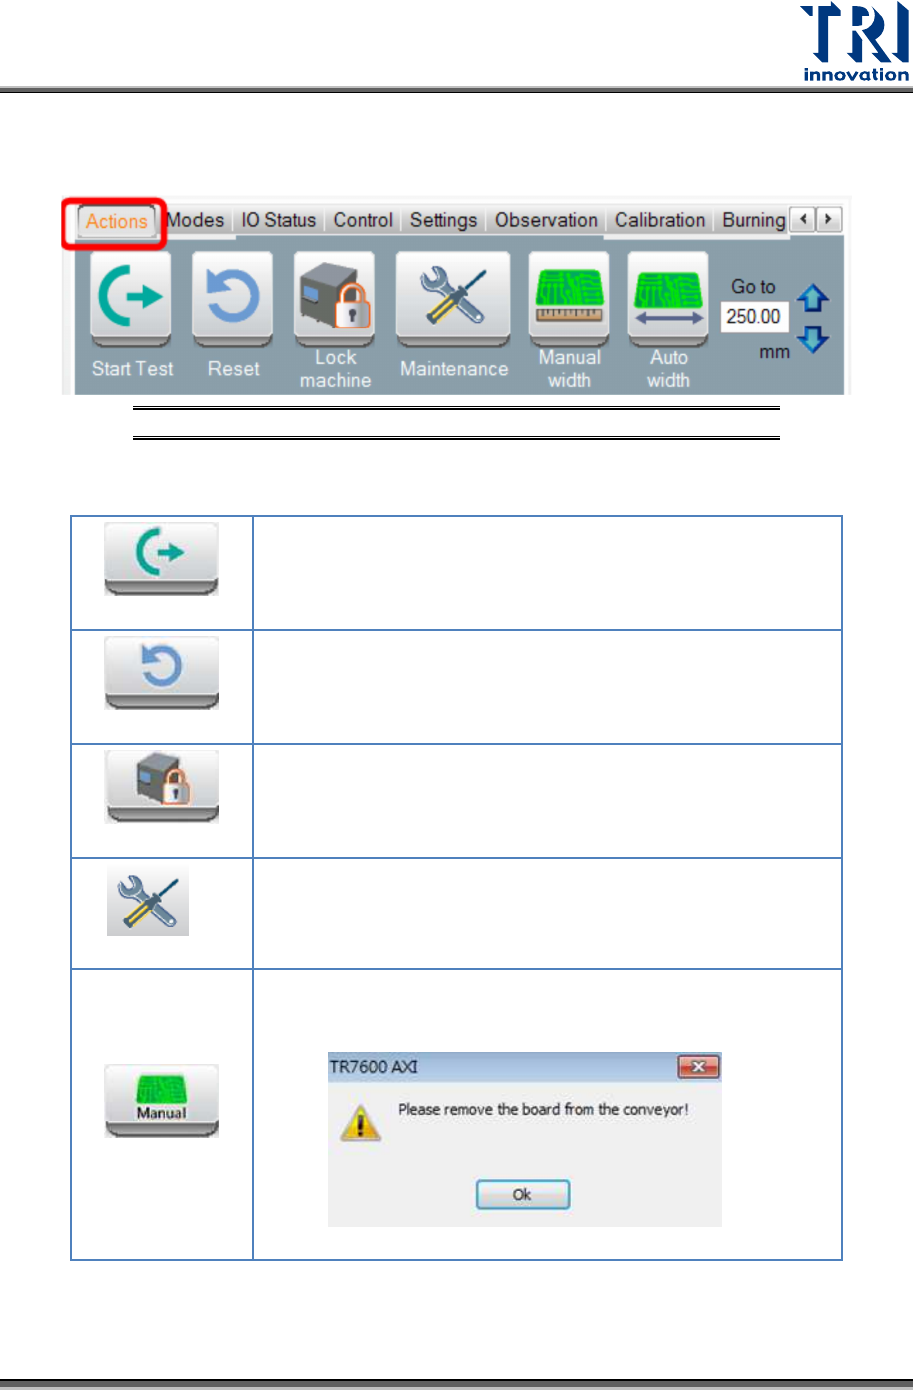
3.1 Actions
Click [Action] to change the conveyor width and scan the board.
Figure 7: VPLC/Control Toolbar/Actions
In the [Actions] menu, the following options will be displayed:
Start
The conveyor sends the board to the default position and
clips it. Left and right gates will be closed.
Reset
The conveyor releases the board. The machine opens the
gate and sends the board to the gate.
Lock
The machine locks the front and rear doors and both gates.
The conveyor clips the board.
Maintenance
Open the front door and let the conveyor release the board.
Manual Width
Click to change the conveyor width manually. Another window
will pop up to remind you to remove the board from the
conveyor first.