00198327-01_MM_Vacuumpump_Becker_VX25_DE_EN.pdf - 第43页
2 Maintenance Tasks for Vacuum Pump 2.1 Tools, Consumables, Spare and Wear Parts Maintenance Manual / Instandhaltungsanleitung Vacuum Pump / Vakuumpumpe Becker VX25 06/2017 43 2 Maintenance Tasks for Vacuum Pump NOTICE S…

1 Introduction
1.5 Abbreviations
42 Maintenance Manual / Instandhaltungsanleitung Vacuum Pump / Vakuumpumpe Becker VX25 06/2017

2 Maintenance Tasks for Vacuum Pump
2.1 Tools, Consumables, Spare and Wear Parts
Maintenance Manual / Instandhaltungsanleitung Vacuum Pump / Vakuumpumpe Becker VX25 06/2017 43
2 Maintenance Tasks for Vacuum Pump
NOTICE
SX1/SX2/DX1/DX2: The vacuum pump is an option.
The vacuum pump is located at location 2 behind the COT-insert.
NOTICE
SX4/DX4: The vacuum pumps are options.
The vacuum pumps are located at locations 1 and 4, each behind the COT insert.
► Carry out the maintenance tasks on all vacuum pumps in your machine.
NOTICE
X series S: locations 1 and 4
The vacuum pumps are located at locations 1 and 4, each behind the COT insert.
► Carry out the maintenance tasks on all vacuum pumps in your machine.
NOTICE
TX series: location 1
The vacuum pump is located at location 1 behind the cover in the machine frame.
2.1 Tools, Consumables, Spare and Wear Parts
●
If needed, filter insert [03077677-xx]
●
Service manual for your machine
●
Assembly instructions for the vacuum pump of your machine:
– Assembly instructions "Option Vacuum Pump SIPLACE TX Series" [DE+EN: 00198147‑xx]
– Assembly instructions "Option Vacuum Pump SIPLACE SX1/SX2" [DE+EN:00196614‑xx]
– Assembly instructions "Option Vacuum Pump SIPLACE X-Series S, SX4/DX4" [DE
+EN:00196845‑xx]
2 Maintenance Tasks for Vacuum Pump
2.2 Preparatory Steps
44 Maintenance Manual / Instandhaltungsanleitung Vacuum Pump / Vakuumpumpe Becker VX25 06/2017
2.2 Preparatory Steps
WARNING
Risk of injury when working near the tape cutter.
When working in the area of the tape cutter, move the component trolley out of the machine
and disconnect the machine from the mains supply and the compressed air supply.
► Wait until the operating pressure has dropped to 0 MPa.
► Always secure the machine against unauthorized reactivation.
► Do not reach into the tape cutter.
► Switch off the machine and secure it to prevent unauthorized reactivation. Observe the in-
structions in section 1.2 "Preparatory Work..." [}35].
► Interrupt the compressed air supply to the machine.
► The installation location of the vacuum pump depends on the machine type. If necessary,
refer to the appropriate vacuum pump assembly instructions for your machine.
► If necessary, dismantle the used tape chute and the cover to get access to the vacuum pump.
CAUTION
Loosened vacuum pump
It is possible to remove the vacuum pump from the machine but it is not necessary.
For a better access, however, it may be useful to loosen the vacuum pump and pull it a bit
to the front within the machine. If necessary, refer to the appropriate vacuum pump assem-
bly instructions for your machine.
► Make sure that the vacuum pump cannot fall out of the machine.
2.3 Recommended maintenance intervals
Maintenance interval Spare part Task
Every 30,000 operating
hours
Slide set [03077679‑xx] Check the slide set and replace if ne-
cessary.
Every 6 months or every
4,000operating hours
Filter insert [03077677‑xx] Check the filter insert and replace if
necessary.
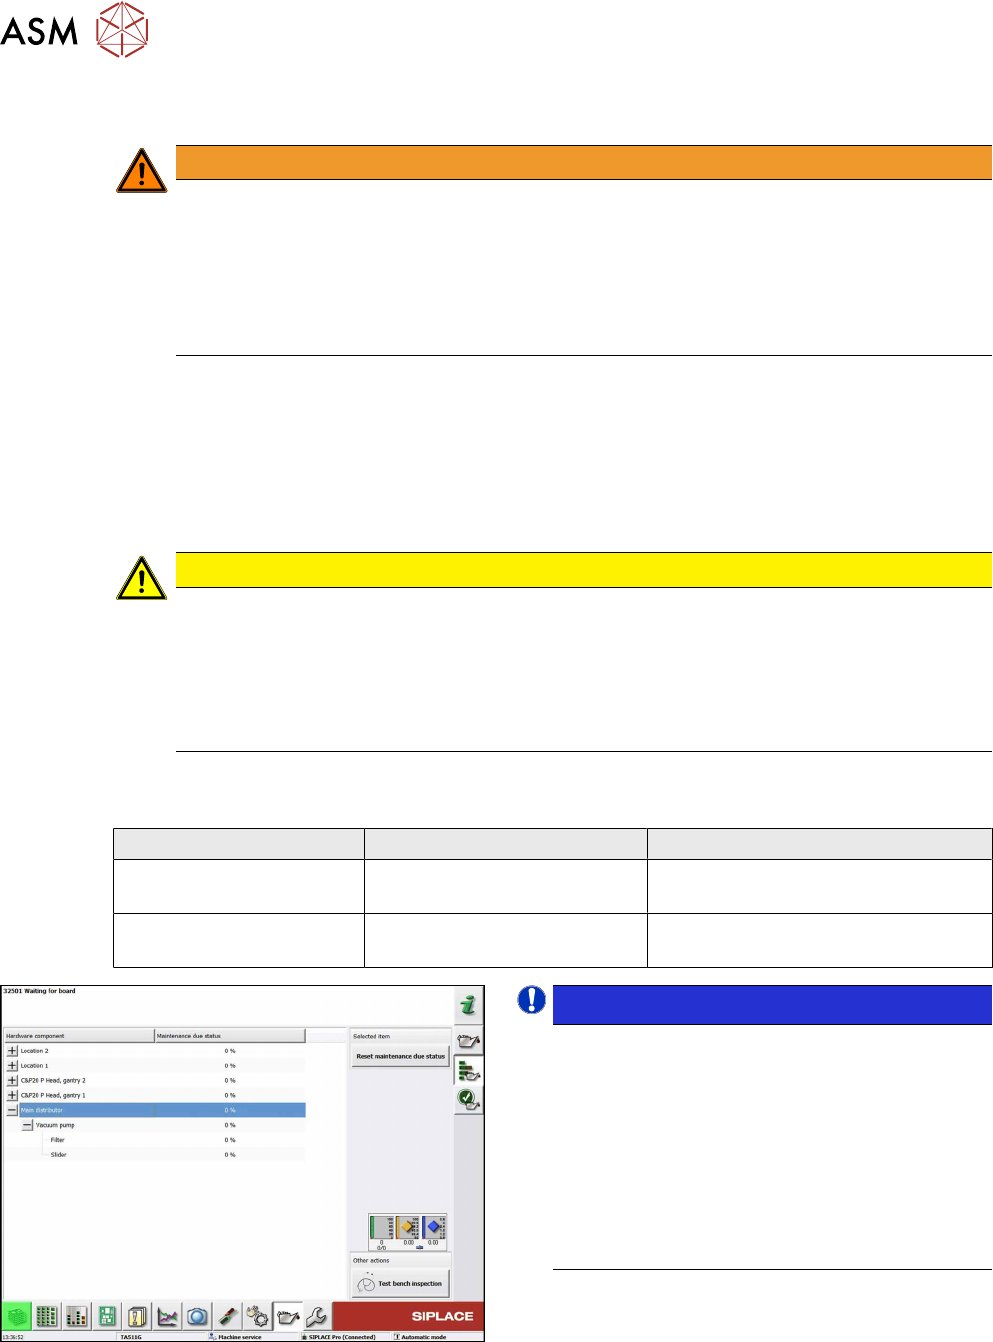
Fig.9: Maintenance GUI
NOTICE!
Maintenance status
From SW709.1, the maintenance status for filter
and sliders of the vacuum pump is displayed in
the maintenance GUI. The displayed value
refers to the operating hours.
For more information about the product life, refer
to the manufacturer's documentation.
(See http://www.becker-international.com – Va-
cuum pump rotary vane pumps, dry running,
type VX4.25)
.