Infinity EX Rail System Module.pdf - 第18页
INFINITY EX RAIL S YSTEM M ODULE ADJUS TMENTS AN D SETTIN GS 15.1 8 Technical Reference Manual Chapter Issue 2 Jan 04 Quick Fit Board Cl amp Set ting W ARNING BO ARD CLAMPS. EXTREME CARE MUST BE EXERCISED WHEN WORK ING I…
INFINITY
EX
RAIL SYSTEM MODULE
ADJUSTMENTS AND SETTINGS
Chapter Issue 2 Jan 04 Technical Reference Manual 15.17
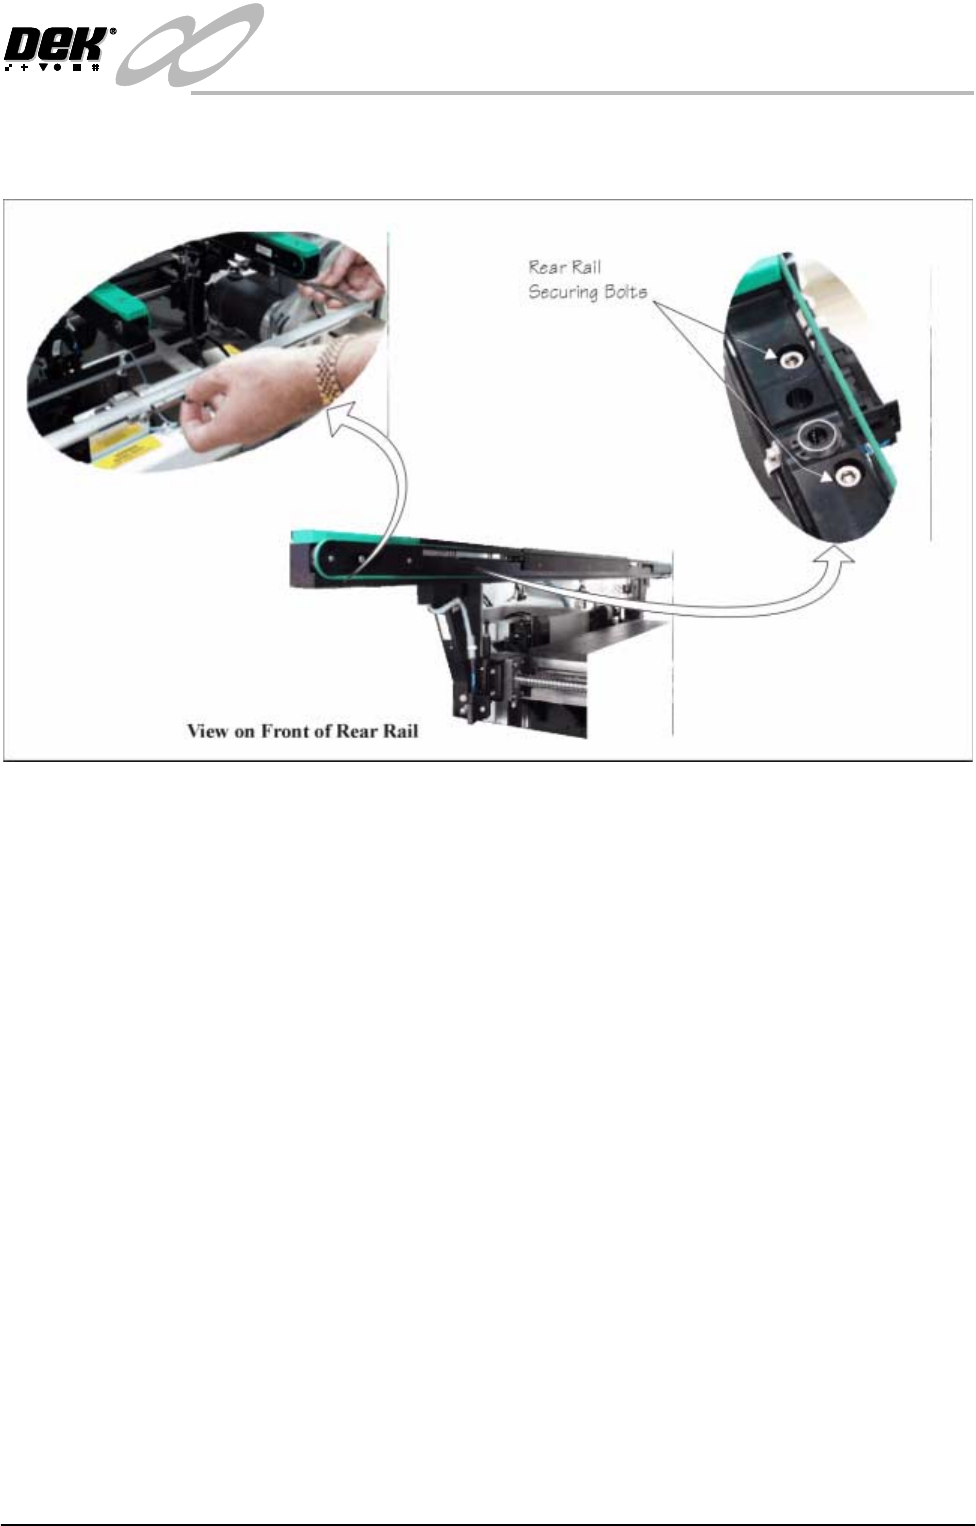
3. Using a suitable vernier caliper, check the rear rail to front rail parallelism at
each end of the rail below the transport belt pulley to within ±0.2mm.
4. If adjustment is necessary, carry out the following:
a. Loosen the rail securing bolts (in four positions), adjust the rear rail as
required. Tighten the bolts, re-check the rail parallelism.
b. When the adjustment is complete, remove each bolt disturbed one at a
time, apply suitable locking compound and fully tighten and recheck the
rail parallelism.
5. On completion, carry out Home Position Rail Width Check (see Rail System
Module Chapter).
INFINITY
EX
RAIL SYSTEM MODULE
ADJUSTMENTS AND SETTINGS
15.18 Technical Reference Manual Chapter Issue 2 Jan 04
Quick Fit Board Clamp Setting
WARNING
BOARD CLAMPS. EXTREME CARE MUST BE EXERCISED WHEN
WORKING IN THE TOOLING AREA OF THE MACHINE TO AVOID
INJURY. THE FOILS ON THE FRONT AND REAR BOARD CLAMPS
ARE VERY SHARP.
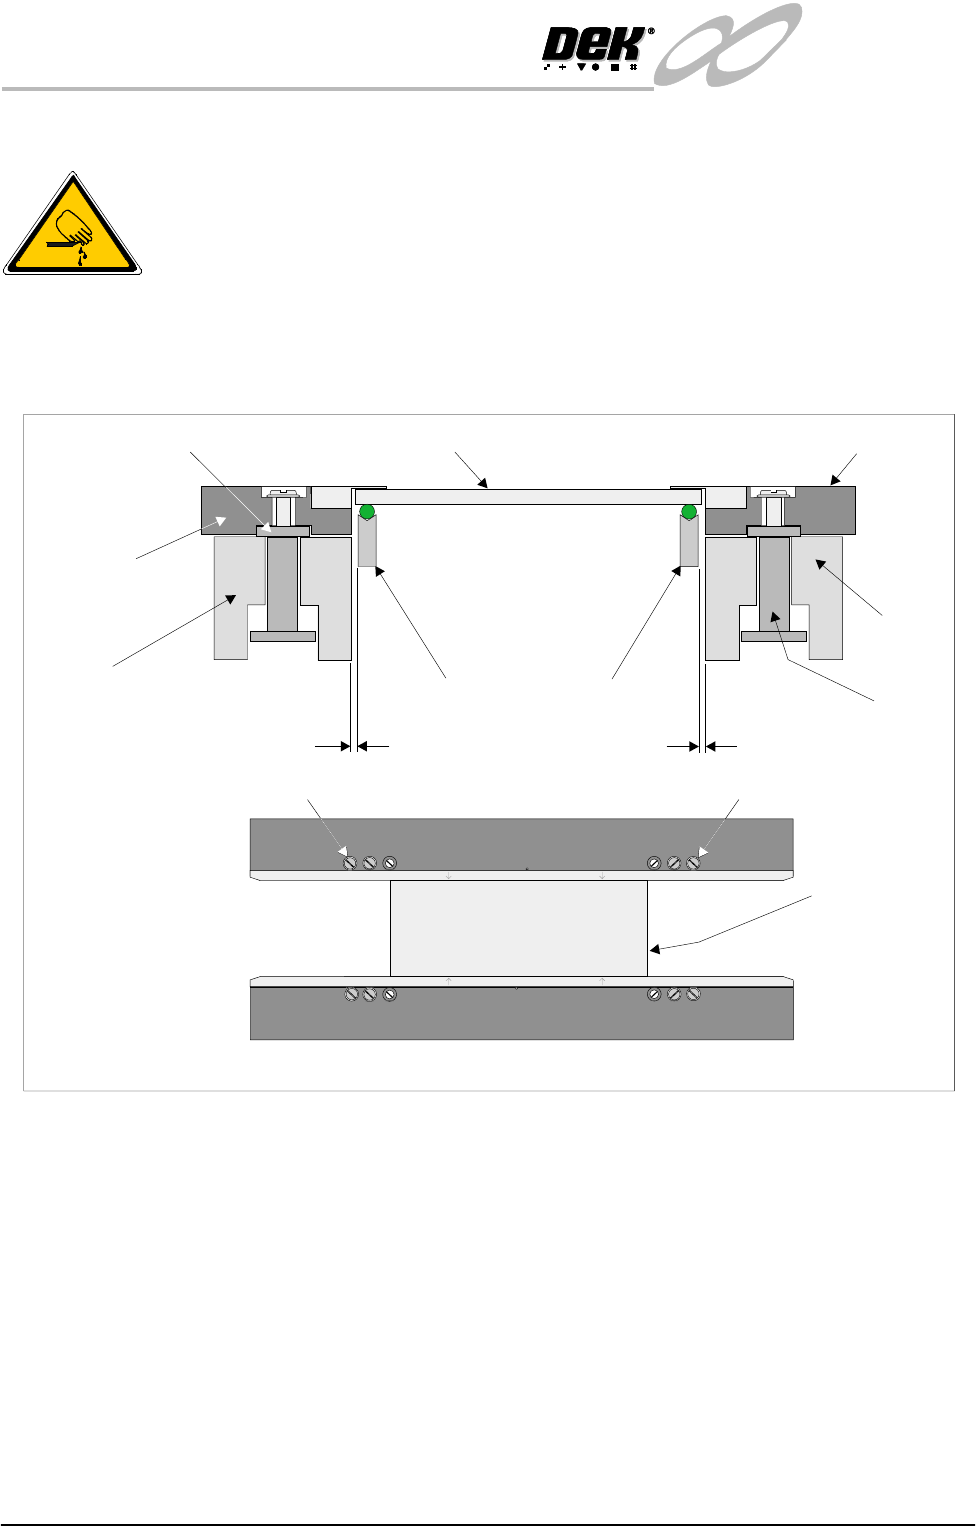
1. Check that a gap between the front board clamp and the transport belt is set
between 0.1mm - 0.15mm. Ensure that the front board clamp is parallel to
the front transport belt.
2. If adjustment is necessary, slacken screw A (2 positions) and adjust. Tighten
screw A (2 positions) on completion.
3. Repeat Steps 1 and 2 for the rear board clamp.
4. Gently move the rear rail in by hand enabling the setting plate (140403) to
be moved along the transport rails until it sits along the entire length of the
board clamp. Gently move the rear rail in by hand until the front and rear
clamps grip the setting plate.
5. Using a 0.05mm feeler gauge check along the whole length of both clamps
for gaps. If the feeler enters any gaps, slacken screws A on the rear board
clamp and adjust. Tighten screws A on completion.
6. If any adjustment is carried out, ensure that gaps set in Steps 1 and 2 are
maintained.
WARNING-SHARP EDGE
WARNING-SHARP EDGE
PATENT No.5157438
PATENT No.5157438
Board Clamp
Setting Plate
A
A
Board Clamp Mechanism
Front Fixed Rail
Transport Belt Guides
0.1mm - 0.15mm0.1mm - 0.15mm
Board Clamp Mounting Plate
Board Clamp Setting Plate
Front Board Clamp
Rear Board Clamp
Moving Rail
Board Clamp Guide
INFINITY
EX
RAIL SYSTEM MODULE
ADJUSTMENTS AND SETTINGS
Chapter Issue 2 Jan 04 Technical Reference Manual 15.19
7. Check for correct operation of the board clamps after any adjustment is
made.
Quick Fit Board Clamp Foil Replacement
WARNING
BOARD CLAMPS. EXTREME CARE MUST BE EXERCISED WHEN
WORKING IN THE TOOLING AREA OF THE MACHINE TO AVOID
INJURY. THE FOILS ON THE FRONT AND REAR BOARD CLAMPS
ARE VERY SHARP.
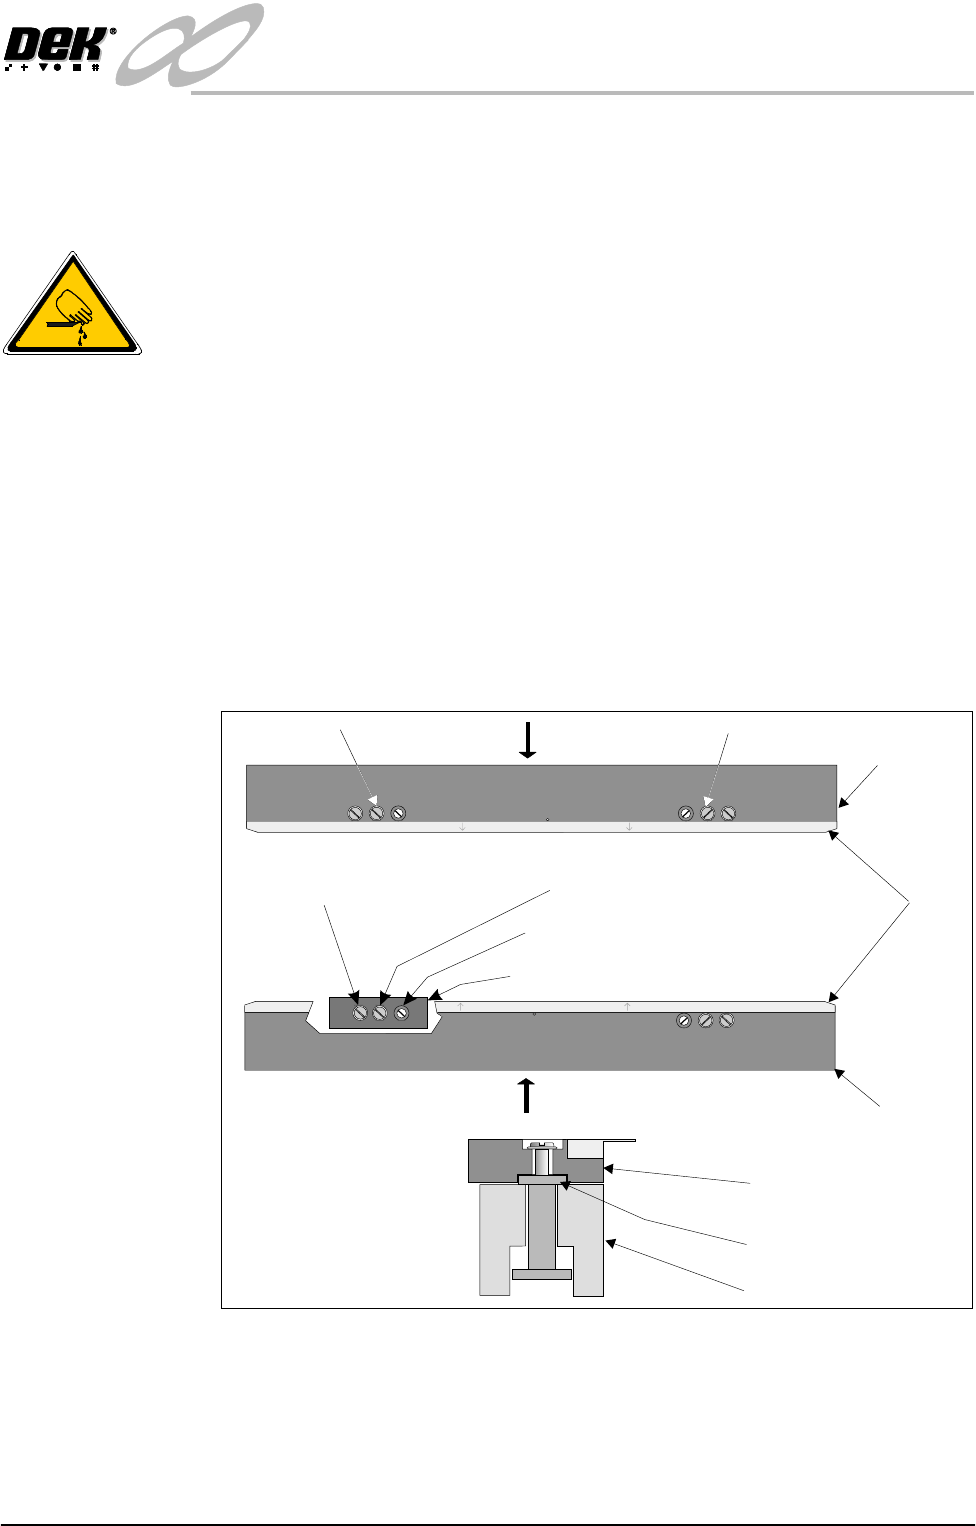
1. Remove screws C and lift off the board clamp (see Note 1). Retain the two
screws.
2. Remove the eight M2.5 x 6mm pan headed slotted screws securing the foil
to the board clamp. Discard the foil and retain the eight screws.
3. Fit the new foil with the screws removed in Step 2.
4. Place the board clamp with new foil into position.
5. Slide the board clamp in the direction of arrow A for the rear board clamp
and arrow B for the front board clamp. This ensures the board clamp butts
up against the outside face of the board clamp mounting plate.
6. Secure the board clamp with the screws removed in Step 1.
NOTE
1. Due to build tolerances the board clamps must be refitted to the same
position.
2. The board clamp setting up procedure is not required after board clamp
foil replacement.
WARNING-SHARP EDGE
WARNING-SHARP EDGE
PATENT No.5157438
PATENT No.5157438
C C
B
A
Rear Board
Clamp
Front Board
Clamp
Foil
Piston Screw
Carrier
Carrier Securing Screw
Cutaway showing a Carrier
Guide Locking Screw
Rail
Carrier
Board Clamp
Cutaway Side View