TM4230.SmartRecognition.pdf - 第9页
S M T S o f t w a r e E n g i n e e r i n g G r o u p I M O p e r a t i o n s Y A M A H A M O T O R C O . , L T D . MDOC-SOFT50185 6) Adjust detected edges Adjust the number o f edges that are detected aut…
SMTSoftwareEngineeringGroup
IMOperationsYAMAHAMOTORCO.,LTD.
MDOC-SOFT50185
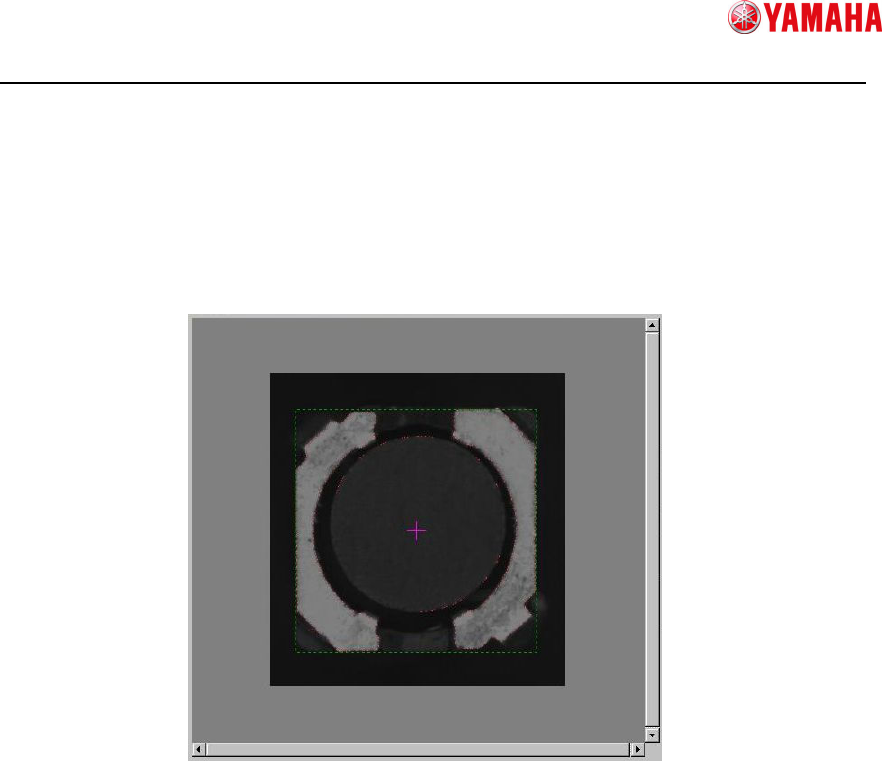
5) Move to the Create Model screen
Press the [Next] button to go to the [Create Model] screen.
When the screen is switched, the edges are detected automatically from the captured
image, and the vision window switches to an image superimposing of the detected
edge image on the captured parts image.
An error may occur if the detected edges are too many or too few.
If it is difficult to see detected edges, check only the [Detected Edge] check box.
SMTSoftwareEngineeringGroup
IMOperationsYAMAHAMOTORCO.,LTD.
MDOC-SOFT50185
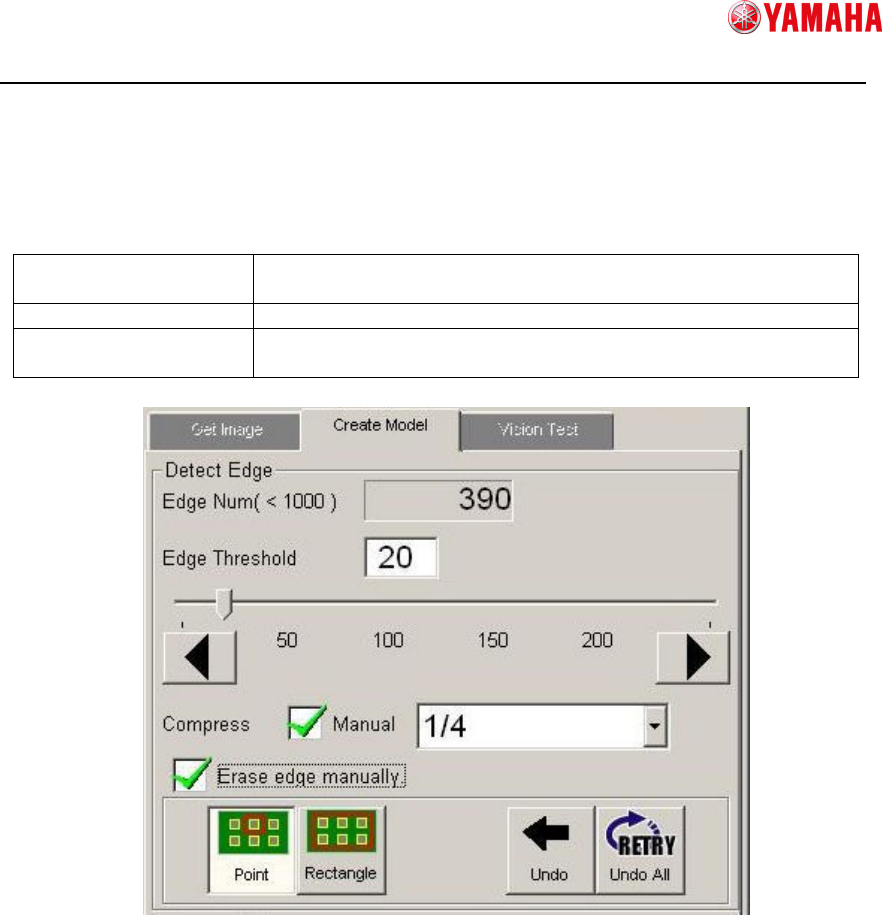
6) Adjust detected edges
Adjust the number of edges that are detected automatically.
100 to 999 edges can be set, but the more edges it has, the more time the recognition
process will take. Therefore 100 to 499 edges are recommended.
Change edge threshold
If the edges are too many or few, modify the edge threshold to
decrease or increase the number.
Compress edge If the edges are too many, thin out some edges.
Erase edge manually Erase false detection as parts edges if any.
Or erase edges that are not necessary for model creation.
① Edge Num
The number of current edges.
If the number is not appropriate, the background color will turn to the warning
condition as below.
100 to 499 : Grey (appropriate)
500 to 999 : Yellow (acceptable but takes time)
0 to 49 or over 1000 : Red (error at switching the screen)
② Edge Threshold(Edit box)
Allows you to change the edge threshold value inputting value here.
③ Edge Threshold(Slide bar)
Allows you to change the edge threshold value dragging the slide bar.
①
①①
①
②
②②
②
③
③③
③
④
④④
④
④
④④
④
⑤
⑤⑤
⑤
⑥
⑥⑥
⑥
⑦
⑦⑦
⑦
⑧
⑧⑧
⑧
⑨
⑨⑨
⑨
⑩
⑩⑩
⑩
⑪
⑪⑪
⑪

SMTSoftwareEngineeringGroup
IMOperationsYAMAHAMOTORCO.,LTD.
MDOC-SOFT50185
④ Edge Threshold(Slide bar button)
Allows you to change the edge threshold value ±1 by one-click.
⑤ Manual Compress
When [Manual] is checked, [⑥Manual Compress Level] is enabled.
⑥ Manual Compress Level
Allows you to select a manual compressing level.
You can select a level from 1/1 to 1/10.
Compressing level decided automatically is displayed here in gray.
⑦ Erase edge manually
When [Erase edge manually] is checked, ⑧ to ⑪ are enabled.
⑧ Erase Edge(Point)
Allows you to change how to erase edges to the Point mode.
The mouse cursor on the vision window turns to an eraser, and you can erase
any edge as you like by dragging the mouse.
⑨ Erase Edge(Rectangle)
Allows you to change how to erase edges to the Rectangle mode.
You can select an area by dragging the mouse, and erase edges in the area at
once.
⑩ Erase Edge(Undo)
Restores erased edges to the previous status.
If the edges have been erased in the point mode, they are not restored
point-by-point, but restored by each dragging mouse action.
⑪ Erase Edge(Undo All)
Restores all erased edges to the original status.
※ [Attention] Please note that the edge condition will be initialized, if you go back to the
[Get Image] screen from the [Create Model] screen
※ [Attention] Please note that the edge condition will be initialized, if you execute Manual
Compress after erasing edges.