Galaxy EX Safety Features.pdf - 第15页
SA FETY FEA TU RES LOCKOUT Ch apte r Is sue 6, Jun 18 Tech ni cal R efer enc e Manual 2. 15 LOCKOUT Ele ctrical Loc kout WARNING LETHAL VOLTAGE. DANGEROUS VOLTAGES EXIST IN THIS EQUIPMENT. ENSURE ALL ELECTRO NIC COVERS A…
SAFETY FEATURES
HIGH VOLTAGE PROTECTION
2.14 Technical Reference Manual Chapter Issue 6, Jun 18
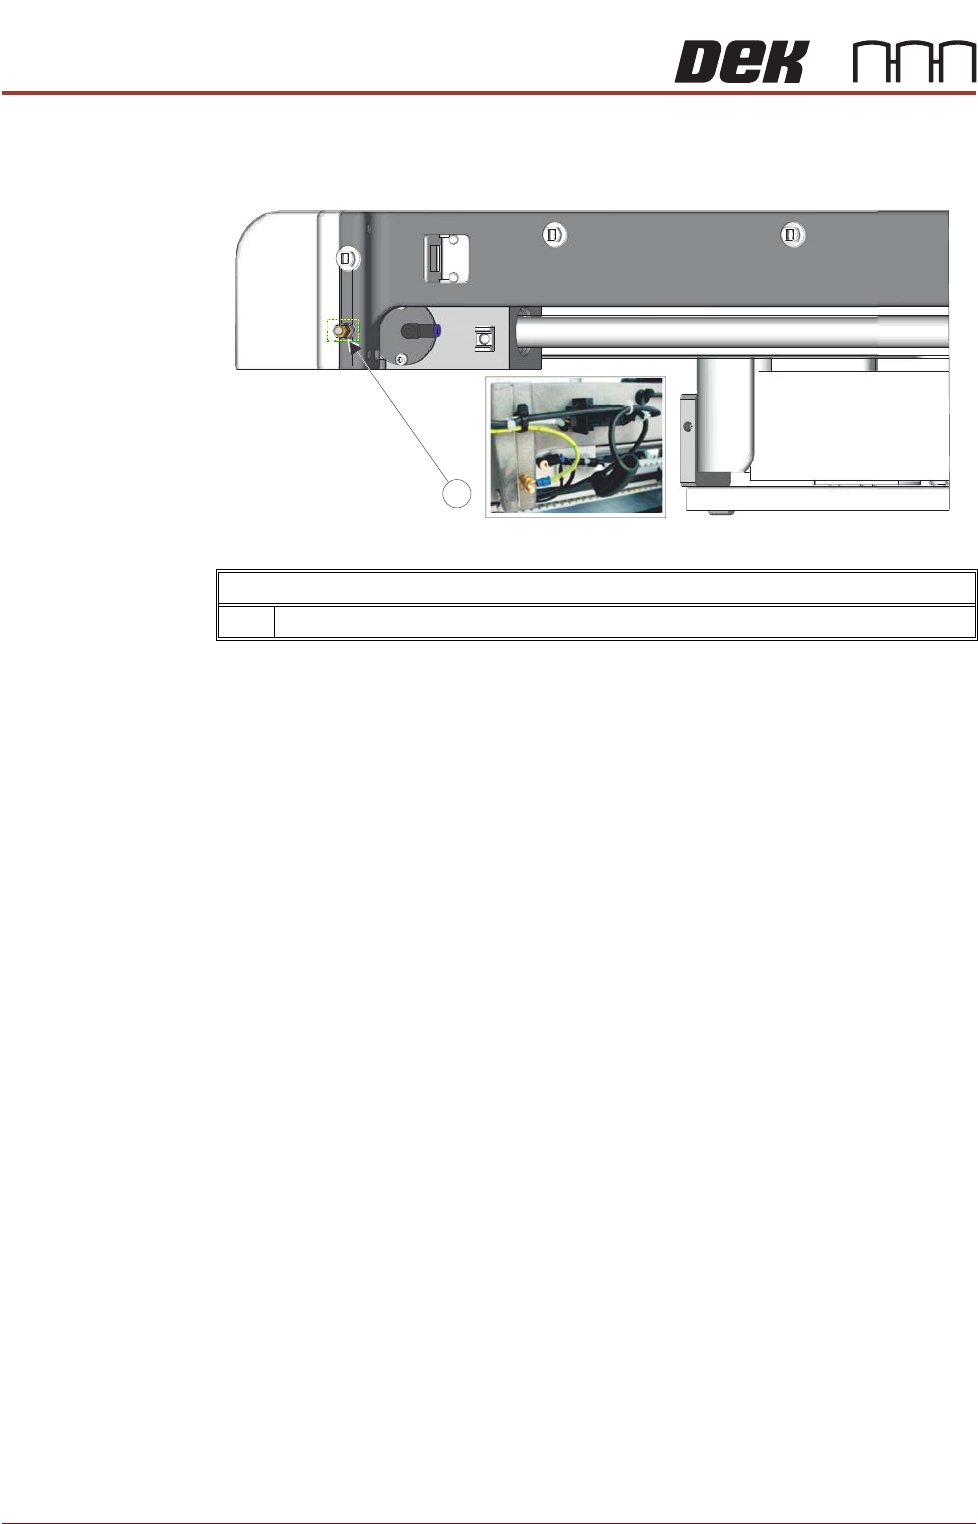
ASM Chase Showing Earth Loom Bonding Point
1 ASM Chase Earth Bonding Point
SAFETY FEATURES
LOCKOUT
Chapter Issue 6, Jun 18 Technical Reference Manual 2.15
LOCKOUT
Electrical Lockout
WARNING
LETHAL VOLTAGE. DANGEROUS VOLTAGES EXIST IN THIS EQUIPMENT.
ENSURE ALL ELECTRONIC COVERS AND MAIN MACHINE COVERS ARE FITTED
BEFORE OPERATING THIS EQUIPMENT.
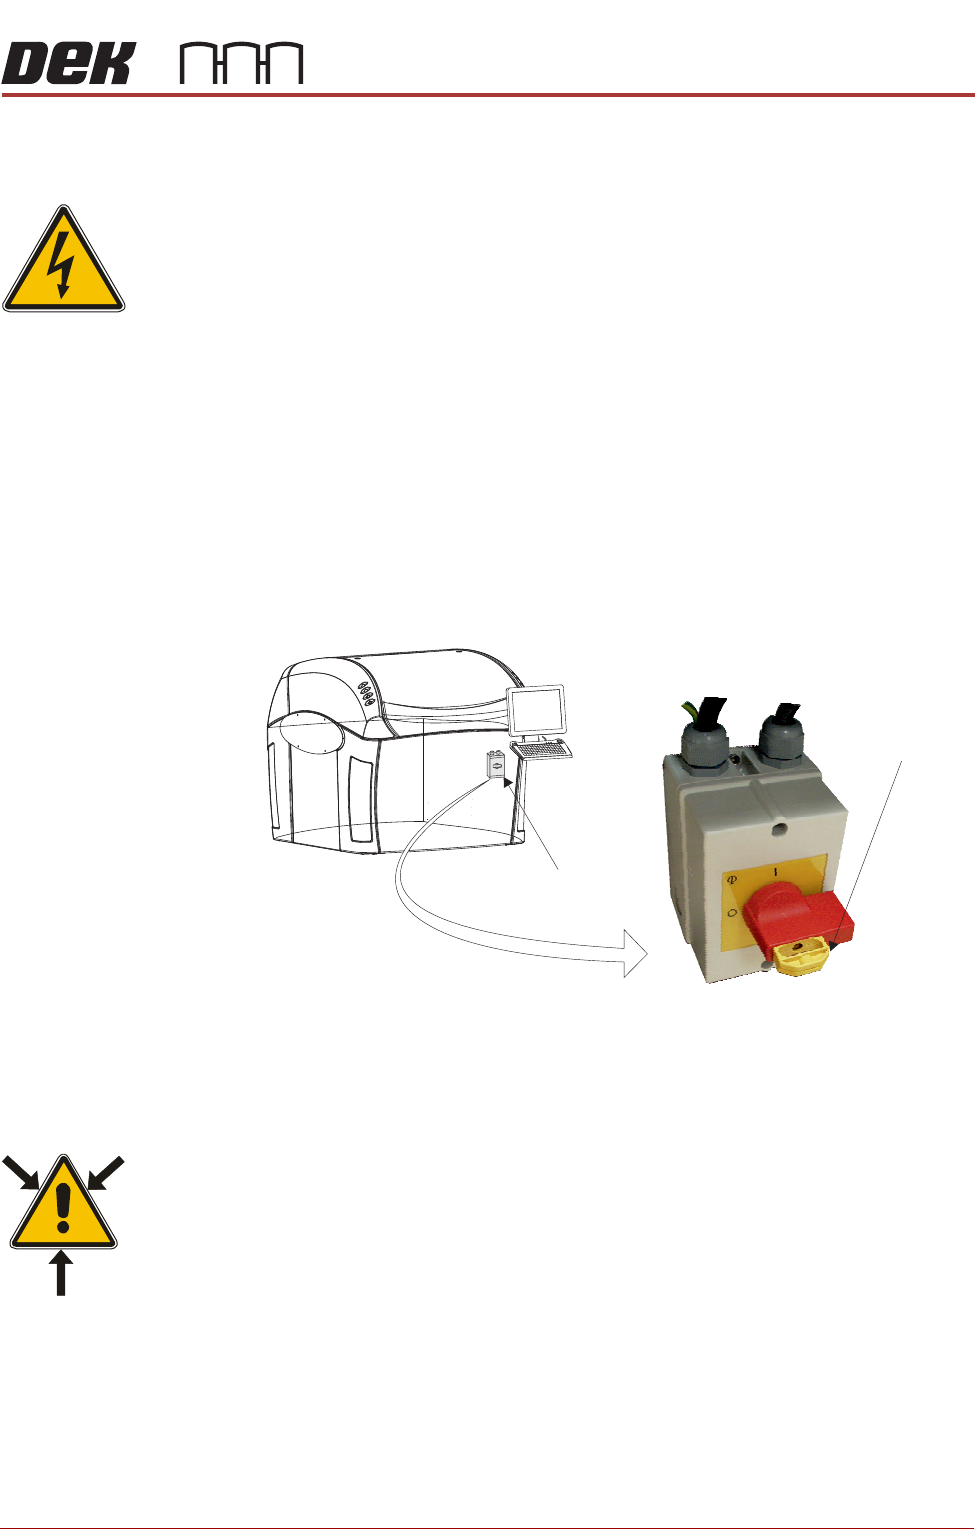
Electrical lockout of the machine is achieved by applying a padlock, or any other
suitable locking device, through the centre pull out section of the mains isolator
switch. This can only be achieved when the switch is in the OFF position.
To electrically lockout the machine, carry out the following procedure:
1. Close down the machine software.
2. Switch the mains isolator to the OFF position.
3. Pull the yellow centre section of the mains isolator switch out.
4. Fit a padlock or suitable locking device through the lockout point in the
centre section of the switch.
5. This completes the electrical lockout.
Pneumatic Lockout
WARNING
COMPRESSED AIR. COMPRESSED AIR SHOULD NEVER IMPINGE UPON THE
BODY. PORTS, PIPES, ETC MUST NEVER BE BLOCKED BY HAND. BEFORE
CONNECTING OR DISCONNECTING ANY PNEUMATIC COMPONENTS, ENSURE
THE COMPRESSED AIR SUPPLY HAS BEEN DISSIPATED AND DISCONNECTED
FROM THE MACHINE.
Pneumatic lockout of the machine is achieved by:
1. If the electrical lockout procedure has just been implemented, go to Step
4.
2. Close down the machine software.
3. Switch the electrical mains isolator to the OFF position.
4. Turn OFF the factory’s main pneumatic supply to the machine.
Mains Isolator Switch
NOTE
Switch shown in the positionOFF
Lockout Point

SAFETY FEATURES
LOCKOUT
2.16 Technical Reference Manual Chapter Issue 6, Jun 18
5. Dissipate remaining air in the pneumatic supply line.
6. Disconnect the pneumatic supply line from the machine.
7. This completes the pneumatic lockout.