Nordson-EFD-8040-Operating-Manual.pdf - 第21页
ValveMate 8040 Controller 21 www.nordsonefd.com info@nordsonefd.com +1-401-431-7000 Sales and service of Nordson EFD dispensing systems are available worldwide. Final Setup Checklist Air pressure to solenoid pack is se…
ValveMate 8040 Controller
20 www.nordsonefd.com info@nordsonefd.com +1-401-431-7000 Sales and service of Nordson EFD dispensing systems are available worldwide.
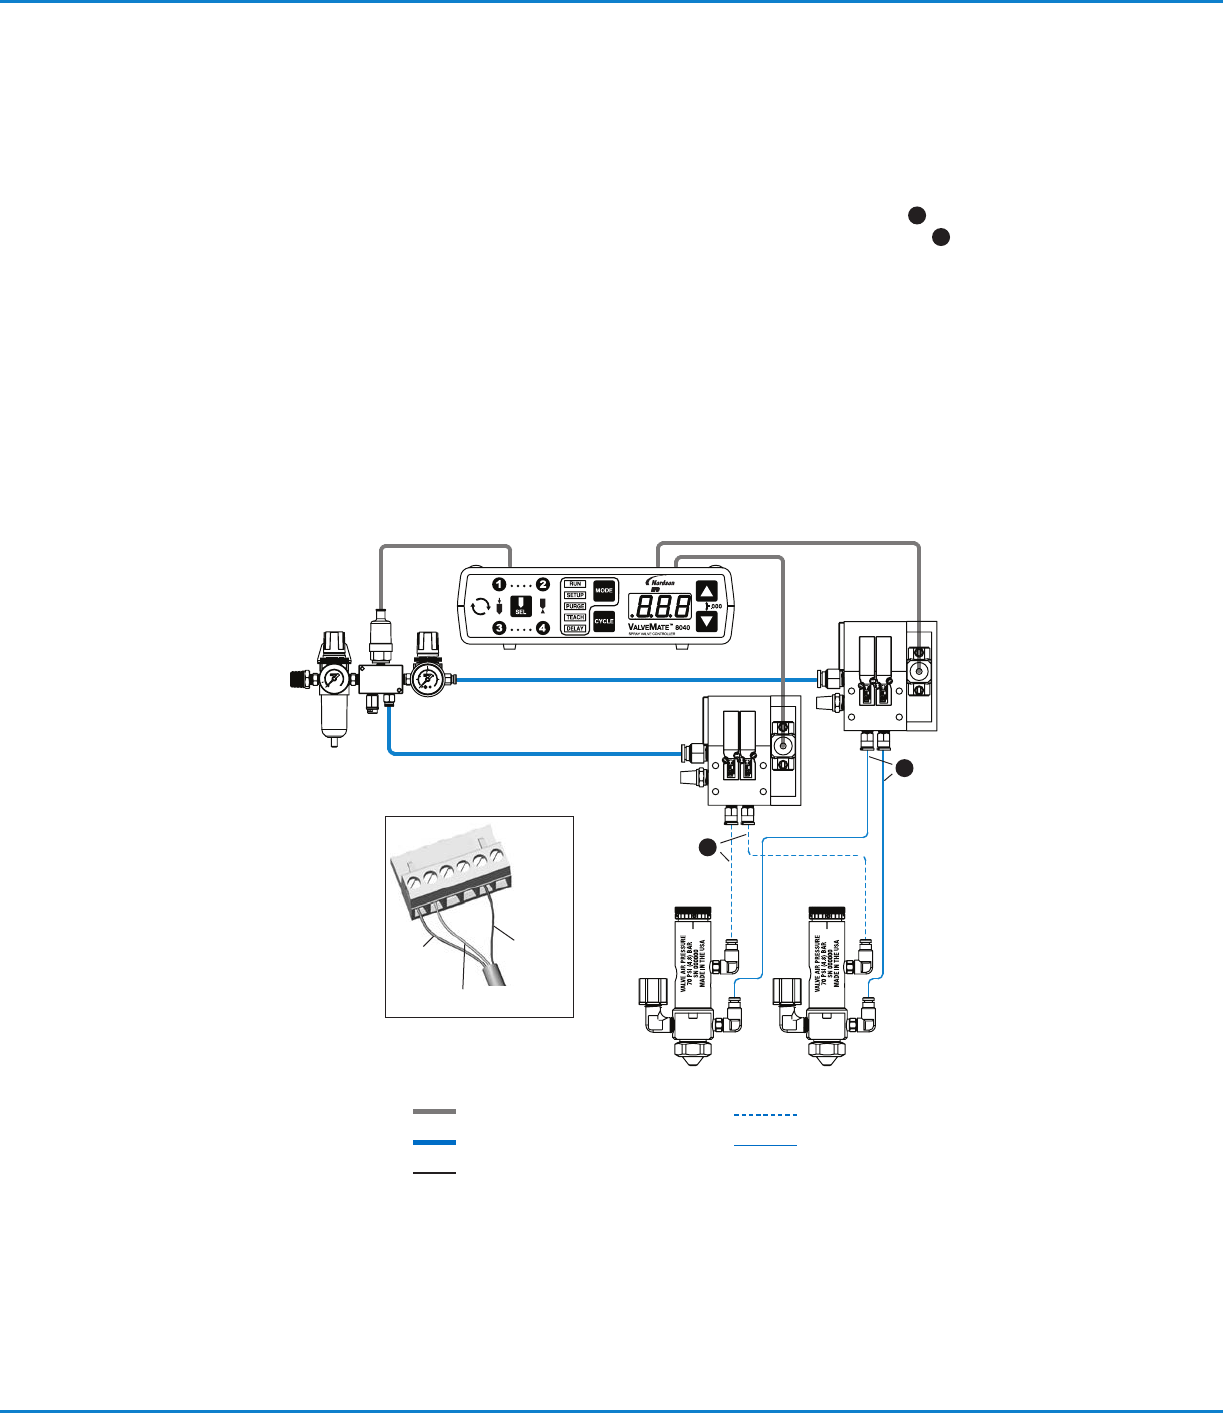
Mount the solenoid packs in a convenient location
near the spray valve station.
Interconnect the solenoid pack to the ValveMate
8040 controller using the cable supplied.
Refer to the inset for color coded wire designation
Connect a regulated and filtered air supply to the
solenoid pack.
Supply pressure to the solenoids should be set to
5.5bar (80psi).
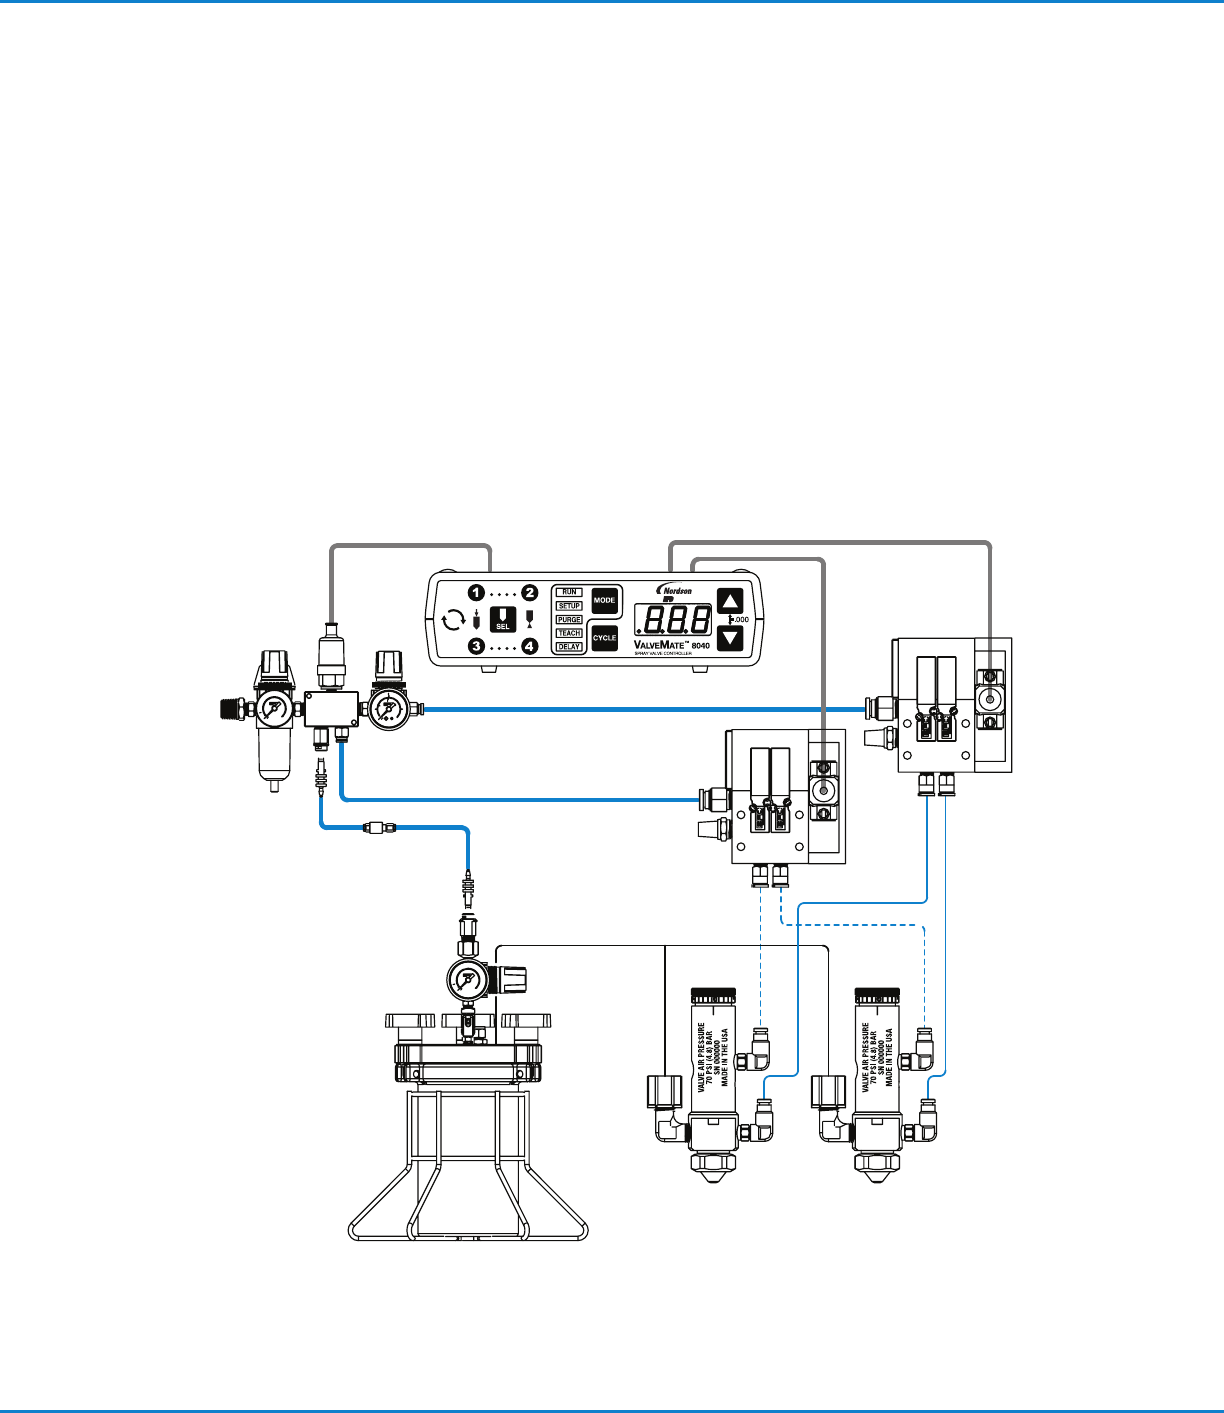
Install the Dispense Valves
All EFD spray valves are supplied with an installation
manual. The manual will explain the operation of the
spray valve and also how to set up the valve with the
fluid reservoir.
Connect the valve actuating air hoses
to the appropriate solenoid output.
6a
White hoses to
white push-in fittings for actuating air.
6b
Black hoses to
black push-in fittings for nozzle air.
Installing the Air Solenoids
Electrical
Constant Air
Fluid
Actuating Air
Nozzle Air
Common
— Blue
Channel 2 — Brown
Channel1
— Black
6a
6b
ValveMate 8040 Controller
21www.nordsonefd.com info@nordsonefd.com +1-401-431-7000 Sales and service of Nordson EFD dispensing systems are available worldwide.
Final Setup Checklist
Air pressure to solenoid pack is set to 5.5bar (80psi).
Nozzle air pressure regulator is set to 1.02bar
(10psi).
Solenoids and I/O are wired correctly.
Spray valves and fluid reservoir are properly
connected.
Spray valves are set up and installed in accordance
with the spray valve installation guide.
Turn power on. Confirm indicator lamps and display
is lit.
NOTE: The ValveMate 8040 is not equipped with an
ON / Off switch and remains in ON condition as long as
input power supply voltage is maintained.
ValveMate 8040 Controller
22 www.nordsonefd.com info@nordsonefd.com +1-401-431-7000 Sales and service of Nordson EFD dispensing systems are available worldwide.
Set tank pressure. For low viscosity, low pressures and
high viscosity, higher pressure.
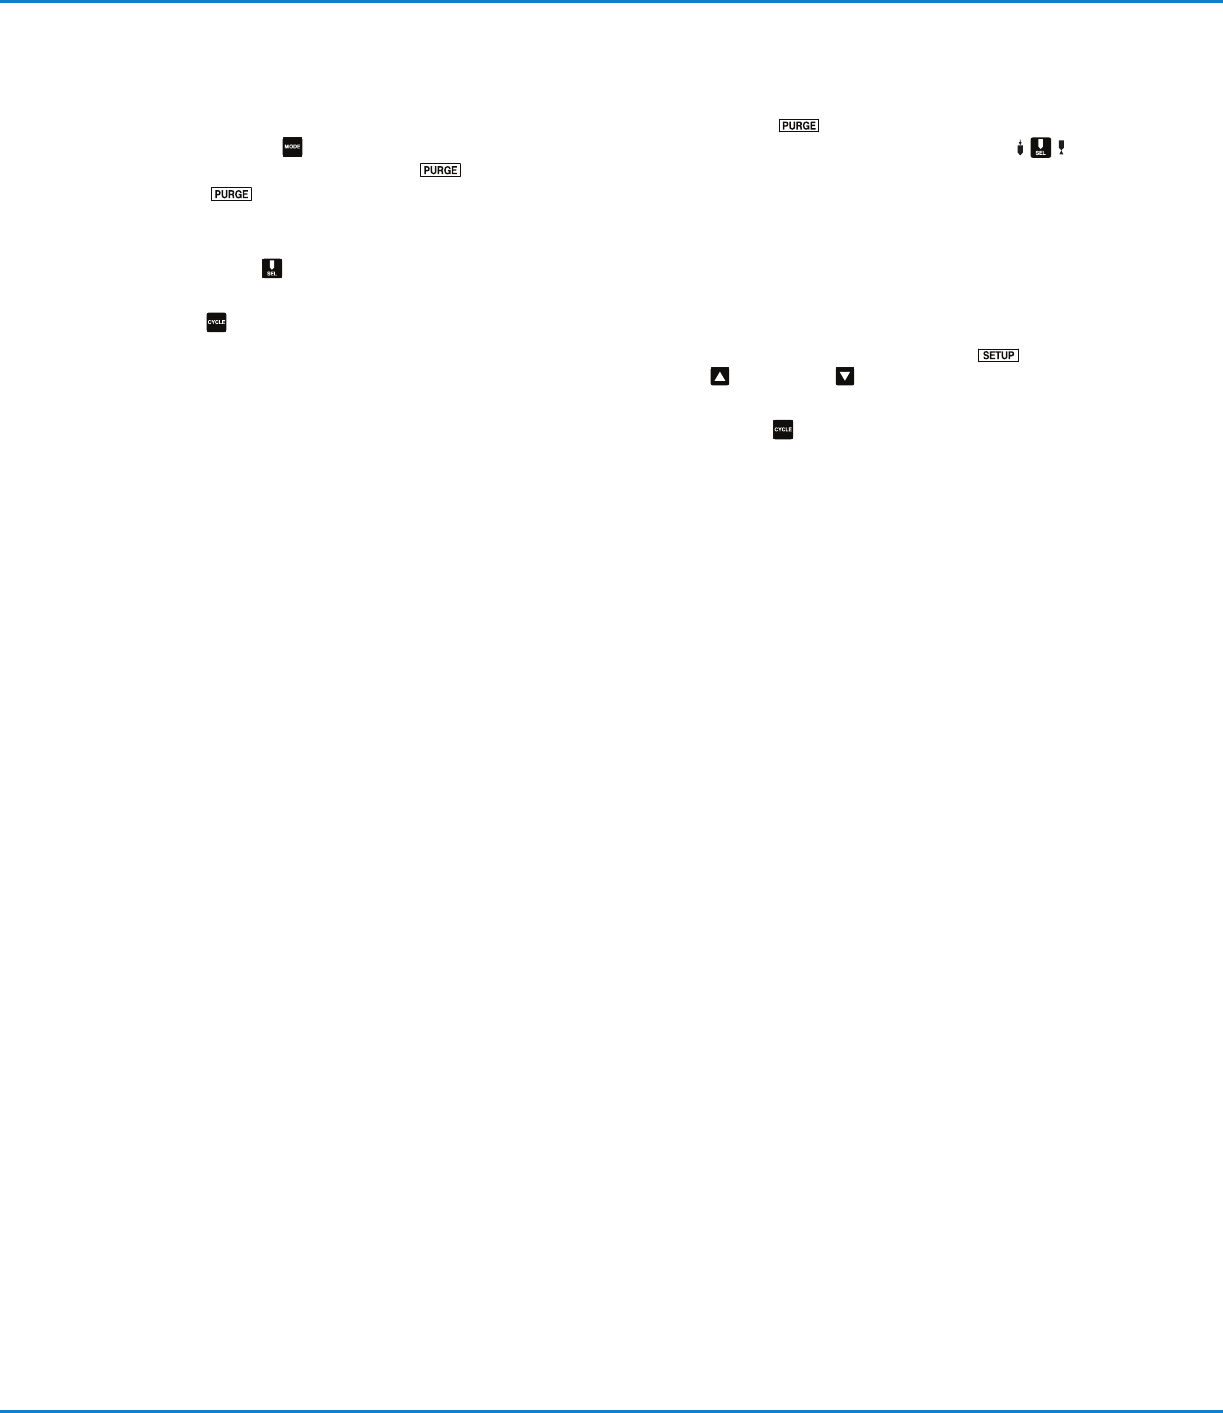
Using the MODE button on the ValveMate controller,
place the controller in the PURGE mode. In
PURGE mode only, channels ···· and ····
can be selected independently without nozzle air
pressure.
Using the SEL button, press to sequence as follows:
Place a container under the spray valve and press the
CYCLE button to open the spray valve and flow
material until all air is purged from the system. Adjust
the tank pressure, or valve stroke knob to set a flow
rate that is not too low or too high. A goal starting point
for a fine spray is one drop of fluid per second. For
heavier spray, increase the drop rate just below where
the flow becomes a steady stream. Adjust flow using a
combination of tank pressure and valve needle stroke.
Testing the Spray Valves
Set nozzle air pressure regulator to 0.7bar (10psi).
Using the PURGE mode again, actuate the spray
valves and observe the spray sequence: ····
····
Press SEL: Channel only is active is off.
Press SEL: Channels
···· only are active.
Press SEL: Channel
only is active is off.
Press SEL: Channels
···· only are active.
Press SEL: Channels
and only.
Press SEL: All channels are now active.
Press mode and place controller in SETUP mode.
Using the UP / DOWN buttons, set a spray time
of 0.05 seconds for all valves.
Press the CYCLE button to initiate a spray cycle.
Increase or decrease the time or tank pressure to arrive
at the desired deposit size. The primary control of
deposit size is the valve open time. Final time setting
may be different for each valve as this is the way we
compensate for minor variations in tubing length or
tolerance stack up.
The system is now ready to be initiated by the machine
controls when the machine is started.