DECAN_S2_Maintenance(Eng_Ver4.3).pdf - 第58页
W ee kly Inspe ction chapt er 4 Advanced Chip Shooter DE CAN S2 M ain ten an ce H and bo ok 4-5 Checking the Solenod V alve Step 4 . Click th e <Valve Ch eck > bu t ton an d sele ct th e V ac uu m ON /OFF c oun t i…
Weekly Inspection
chapter 4
Advanced Chip Shooter
DECAN S2 Maintenance Handbook
4-4
Checking the Solenod Valve
Weekly Inspection
Measures
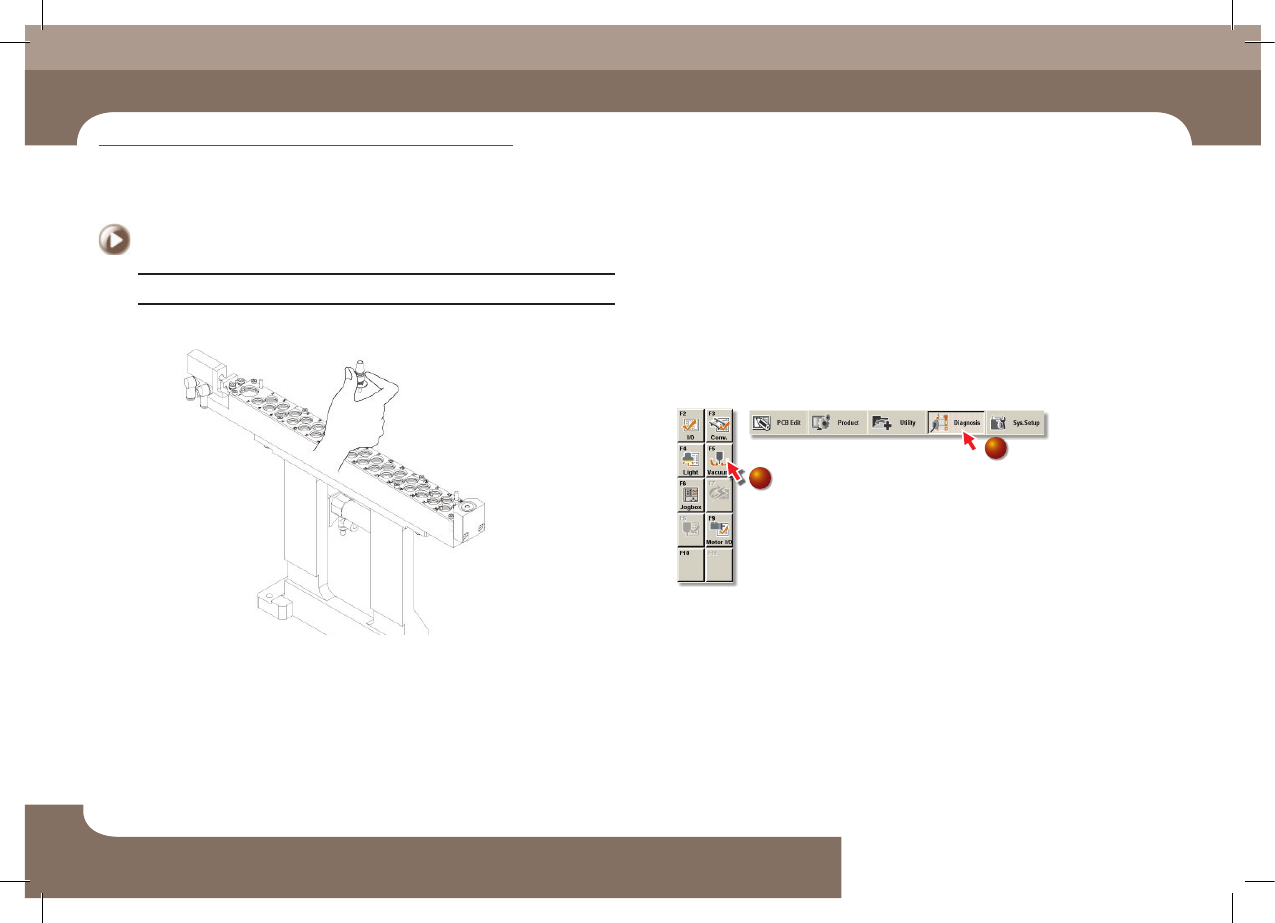
Step 1.
Insert the CN040 nozzle into the ANC.
Step 2.
Operate the machine to install the CN040 nozzle of the
ANC on the head.
Step 3.
Select the 'Diagnosis' menu of the MMI and select the
'Vacuum' submenu.
2
1
Checking the Solenod Valve
(Time required: 20min / No. W-3)
Weekly Inspection
chapter 4
Advanced Chip Shooter
DECAN S2 Maintenance Handbook
4-5
Checking the Solenod Valve
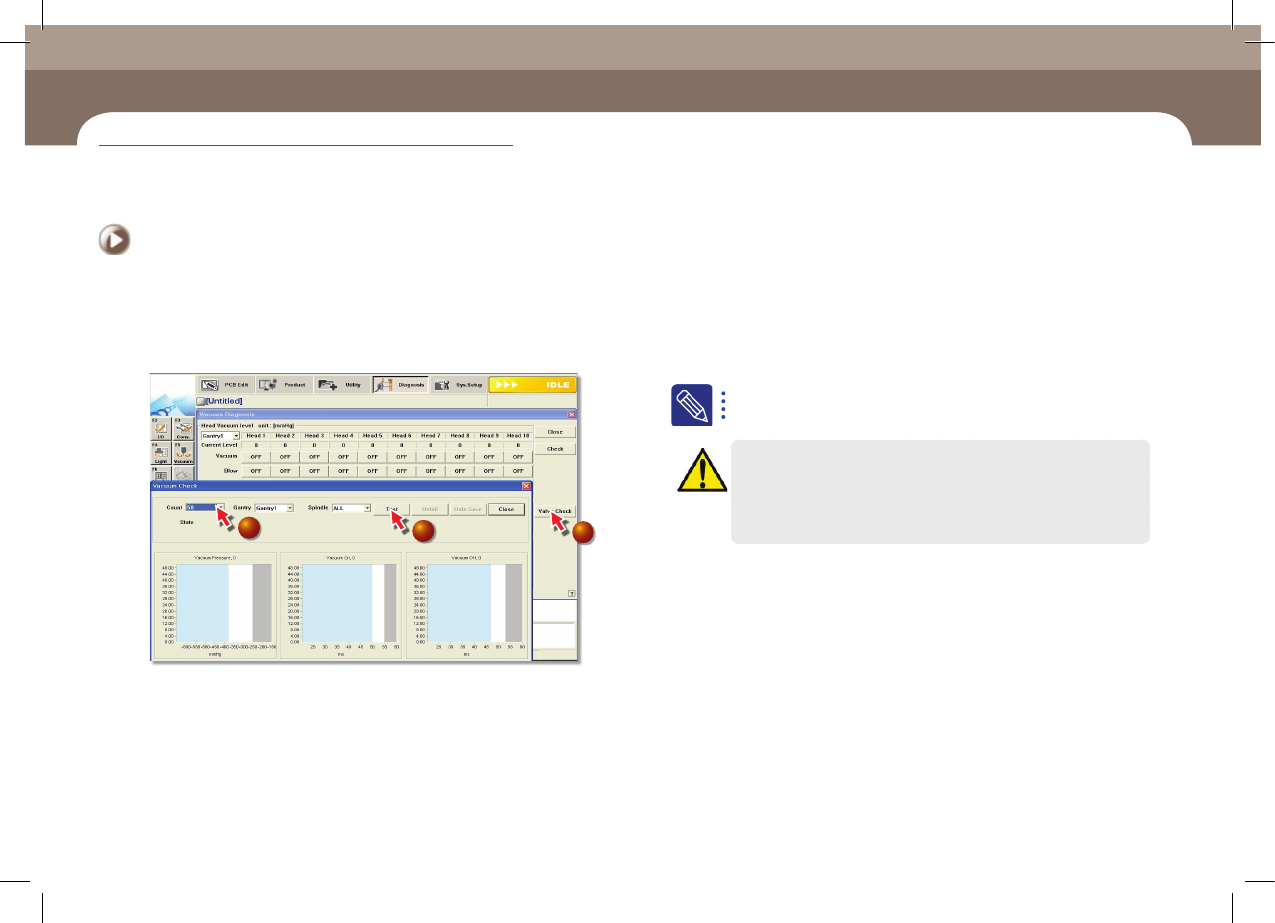
Step 4.
Click the <Valve Check> button and select the Vacuum
ON/OFF count in the <Try> combo box of the 'Valve
Check' dialog box and then click the <Test> button.
3
5
4
Step 5.
If the check result shows that the solenoid valve has a
problem, contact our STS or local agent to replace the
corresponding solenoid valve.
For further details related to the solenoid valve check or for any
problems, refer to '14.4 Vacuum' of the Administrator's Guide.
Caution
Check the vacuum filter every week and replace it within at least 6
months to ensure the vacuum for part pickup is generated properly.
It is recommended that the solenoid valve, which is a consumable
product, is replaced every two years to ensure stable operation.
Weekly Inspection
chapter 4
Advanced Chip Shooter
DECAN S2 Maintenance Handbook
4-6
Checking and Replacing Head Vacuum Filter
Weekly Inspection
Checking and Replacing Head Vacuum Filter
Measures
Step 1.
Move the Front X Frame and Rear X Frame to both
ends by referring to "Forward movement of the front
X-frame" on page 1-3 and "Backward movement of the
rear X-frame" on page 1-7.
Step 2.
Press the 'STOP' and 'RESET' buttons in order after
pressing the 'EMG' button on the OP panel to stop
operation.
For more details, refer to "How to perform emergency stop" on page
1-2.
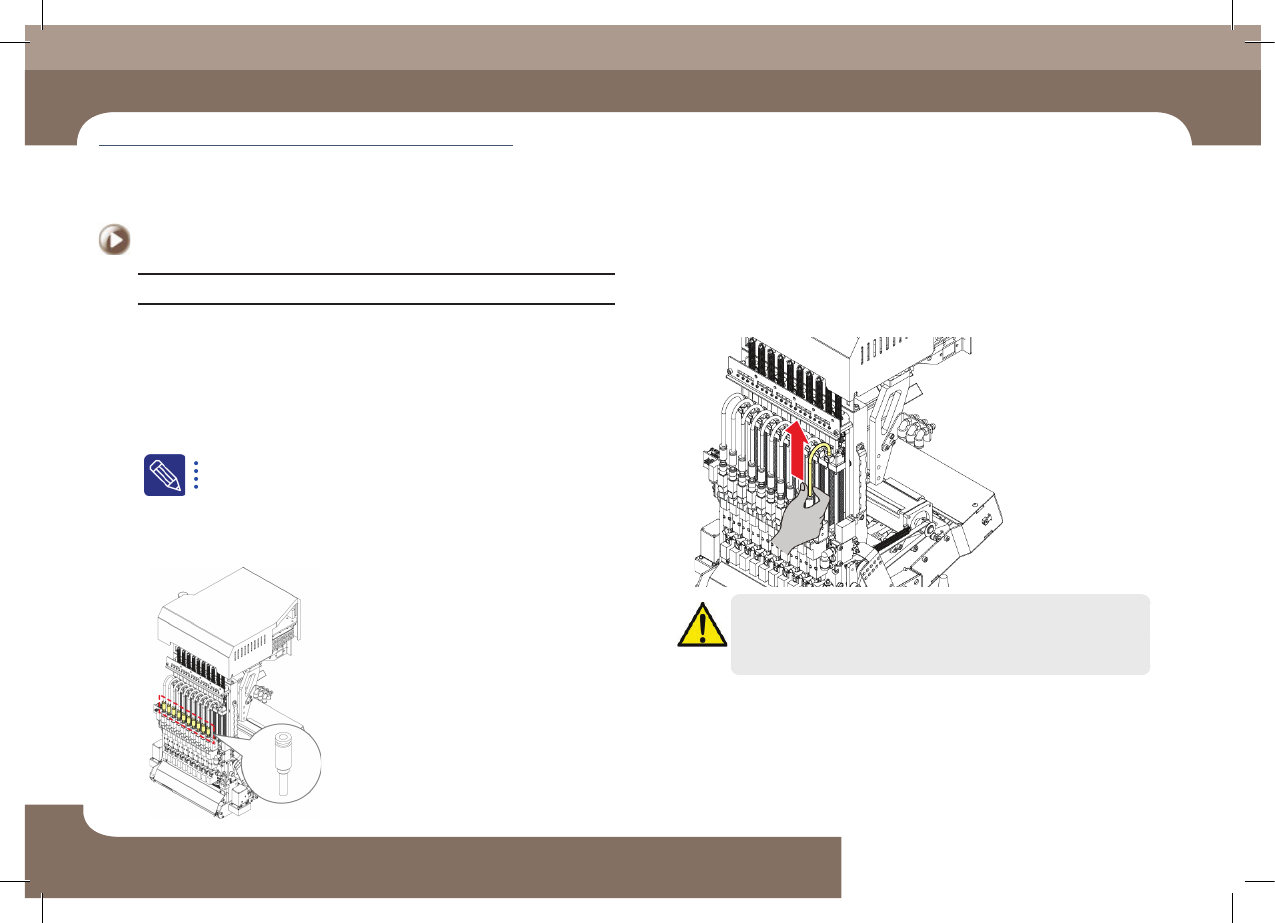
Step 3.
Check for discoloration of the vacuum filter. (It is
recommended that you inspect for filter discoloration
monthly).
Step 4.
Saparate the coil tube from vacuum filter
Caution
If the aluminum cover of the vacuum filter is assembled by applying
excessive force, the acrylic cover of the vacuum filter may be
damaged. Please assemble with adequate force.
(Time required: 30min / No. W-4)