DECAN_S2_Maintenance(Eng_Ver4.3).pdf - 第82页
Mon thly Inspe ction chapt er 5 Advanced Chip Shooter DE CAN S2 M ain ten an ce H and bo ok 5 -2 1 Cleaning and Lubricating Y Frame LM Guide Step 4 . Inje ct th e gre ase u sing a lu bric ator . Step 5. Move t he fr ont …
Monthly Inspection
chapter 5
Advanced Chip Shooter
DECAN S2 Maintenance Handbook
5-20
Cleaning and Lubricating Y Frame LM Guide
Monthly Inspection
Tool for Maintenance
Ultra-fine fiber cloth, Flat Brush, Lubricator, GREASE-GREASE_AFE-CA
Measures
Step 1.
Move the Front X Frame and Rear X Frame to both
ends by referring to "Forward movement of the front
X-frame" on page 1-3 and "Backward movement of the
rear X-frame" on page 1-7.
Step 2.
Press the 'STOP' and 'RESET' buttons in order after
pressing the 'EMG' button on the OP panel to stop
operation.
For more details, refer to "How to perform emergency stop" on page
1-2.
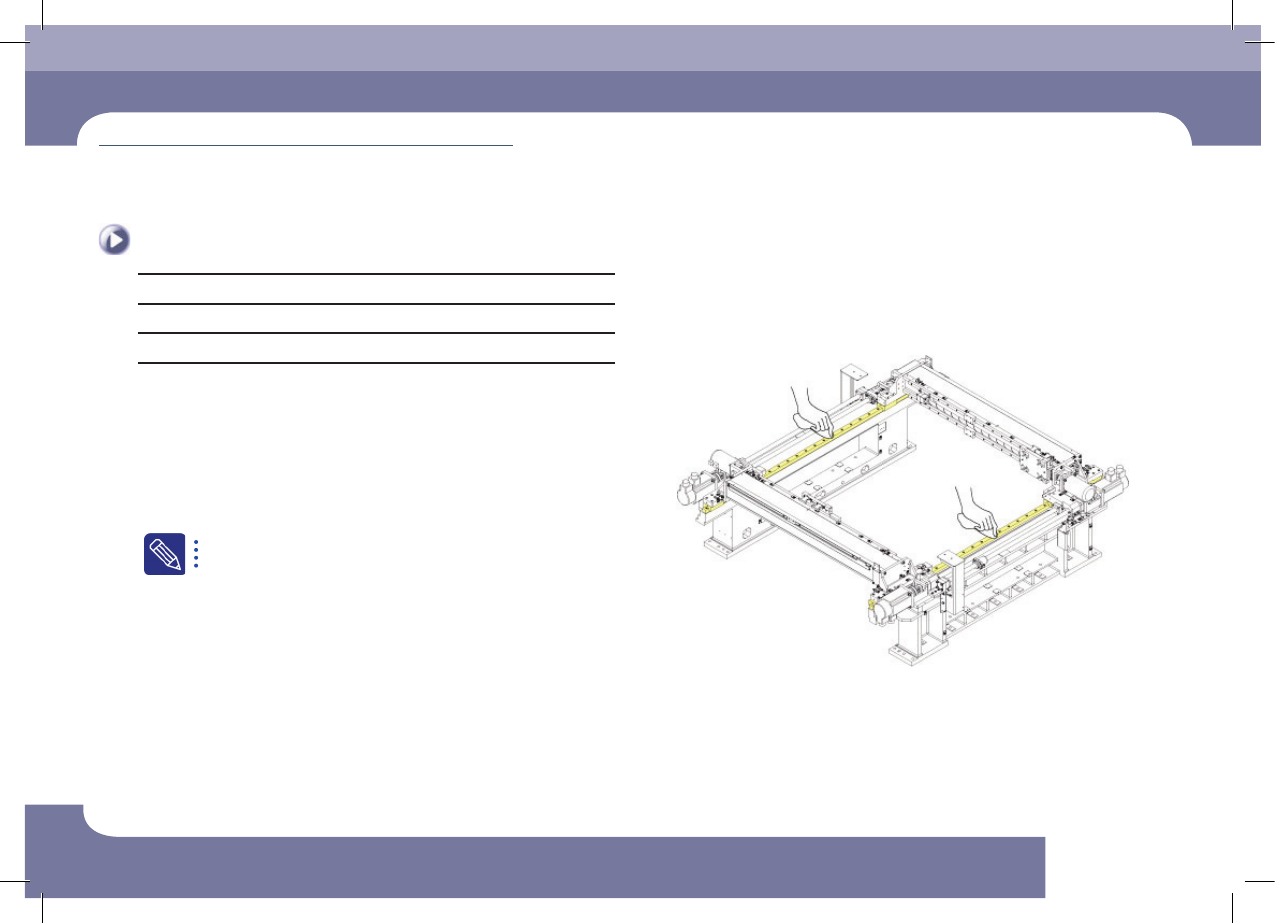
Step 3.
Clean the LM guide rail and ball screw using an ultra fine
fiber cloth.
Cleaning and Lubricating Y Frame LM Guide
(Time required: 60min / No. M-10)
Monthly Inspection
chapter 5
Advanced Chip Shooter
DECAN S2 Maintenance Handbook
5-21
Cleaning and Lubricating Y Frame LM Guide
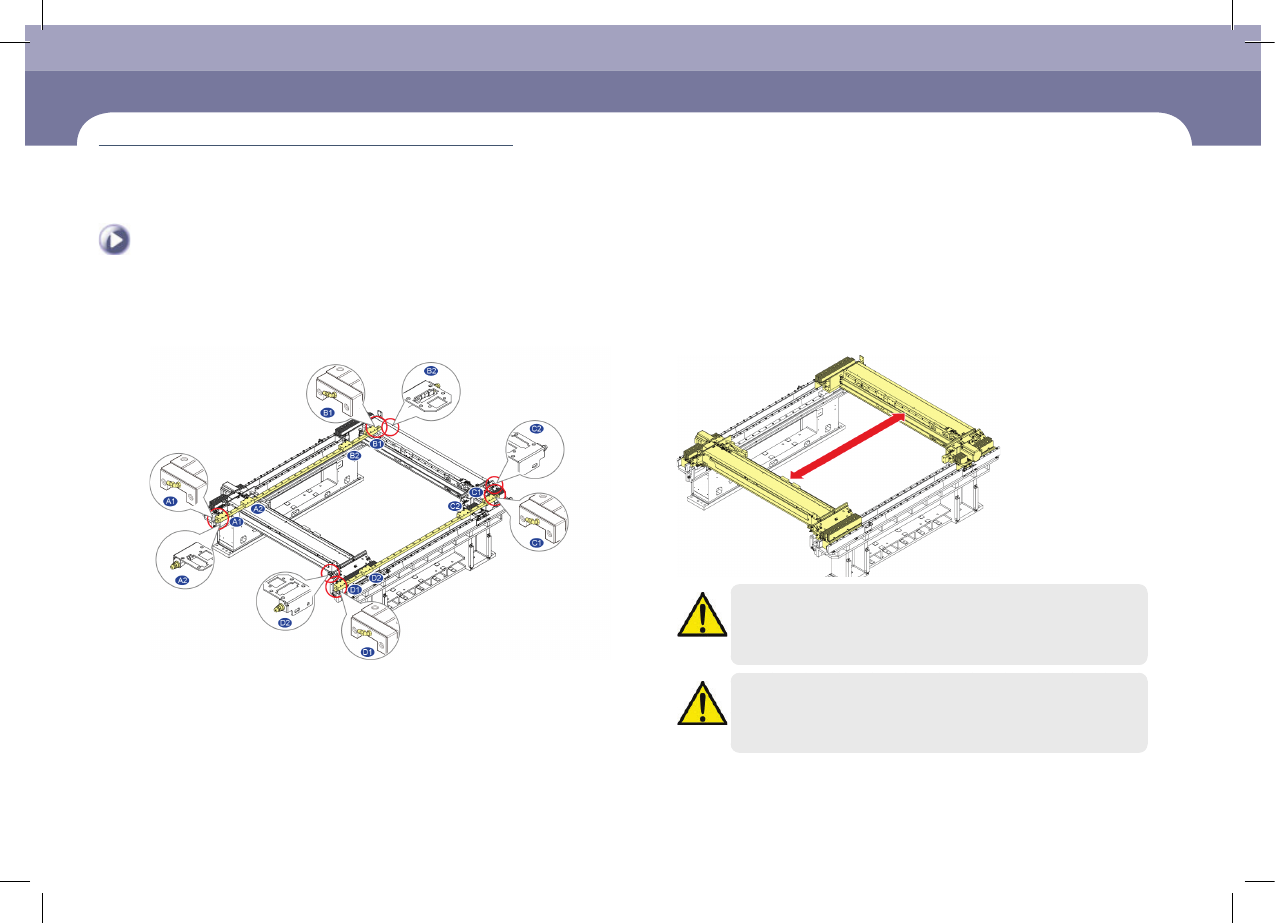
Step 4.
Inject the grease using a lubricator.
Step 5.
Move the front and rear X frames back and forth three
times.
Caution
The designated grease must be applied using the designated
lubricator in the designated manner. Other lubricating methods are
unacceptable.
Caution
If the machine's operating environment is harsh, check its lubrication
status frequently.
Step 6.
Release the emergency stop as described in "Releasing
'Emergency Stop' mode" on page 1-10 and perform the
operation again.
Monthly Inspection
chapter 5
Advanced Chip Shooter
DECAN S2 Maintenance Handbook
5-22
Cleaning and apply grease and lubricating the conveyor lead screw, LM guide
Monthly Inspection
It is possible to prevent deformation of the corresponding section by friction or an
error due to increased temperature.
Tool for Maintenance
Ultra-fine fiber cloth, Flat Brush, Lubricator, GREASE GADUS S2 V220-2
Measures
Step 1.
Move the Front X Frame assembly backward as
described in "Backward movement of the front X-frame"
on page 1-4.
Step 2.
Press the 'STOP' and 'RESET' buttons in order after
pressing the 'EMG' button on the OP panel to stop
operation.
For more details, refer to "How to perform emergency stop" on page
1-2.
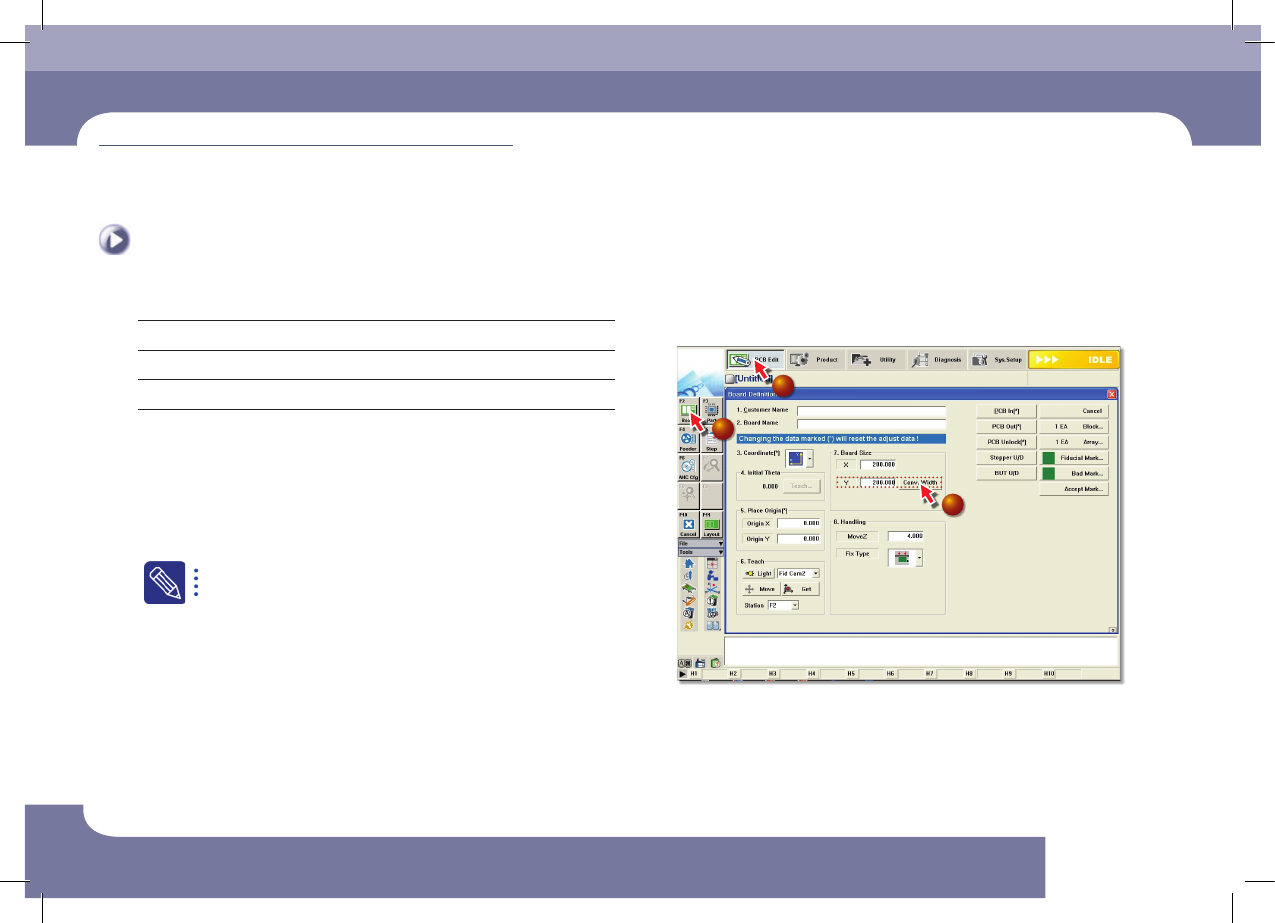
Step 3.
Adjust the conveyor width
1
2
3
①Select the 'PCB Edit' Menu
②Select the 'Borad' Submenu
③Enter 200 (maximum size in the Y direction) in the <7. Board Size> group and
click the <Conv.Width> Button
Cleaning and apply grease and lubricating the
conveyor lead screw, LM guide
(Time required: 30min /
No. M-11)