NPM Calibration Manual-En.pdf - 第17页
NPM Maint en anc e E di ti on 9.4 Head / Plane Compensati on Z Page 9-16 EJM9BE-M B-09M-21 18 Press + [OK]. • T he head mov es to the worki ng posi tion. 19 Turn OFF the se rvo switch. 20 Open the s afety cover. 21 Detac…
NPM
Maintenance Edition
9.4 Head / Plane Compensation Z
EJM9BE-MB-09M-21 Page 9-15
15
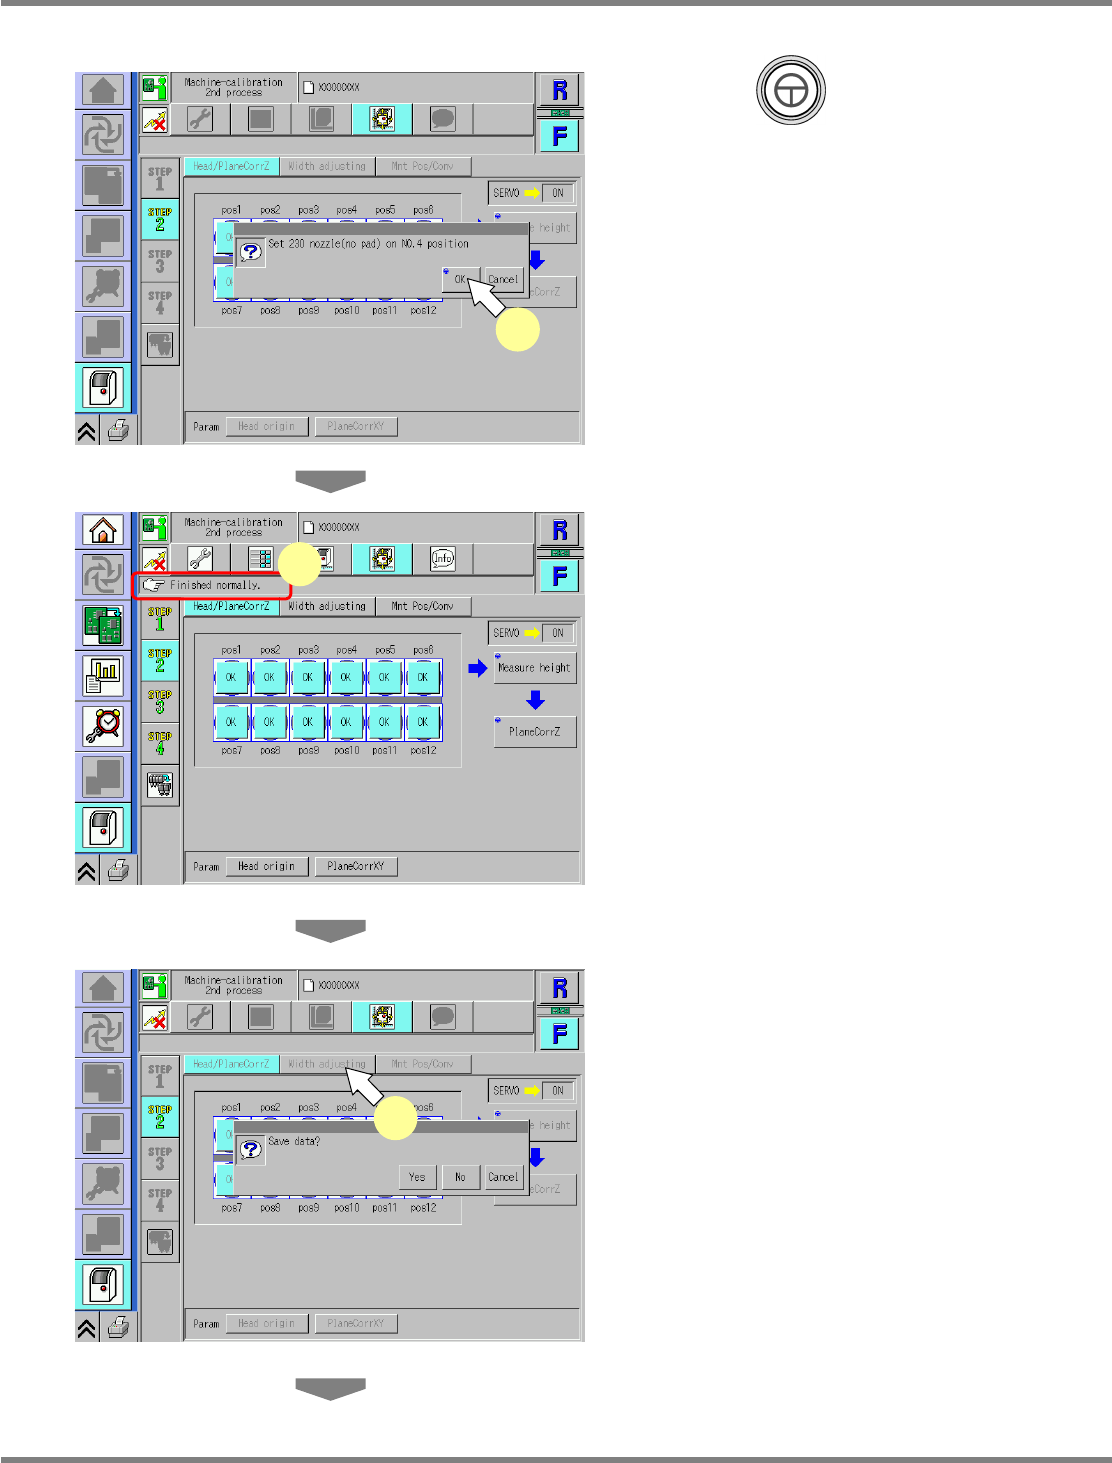
Press + [OK].
•
The calibration is carried out.
16
Check that it is successfully complete.
∗
Perform steps 3–15 for also the other table.
17
Press [Width adjusting].
•
When exiting this screen to the other one, you
are always prompted to save the data.
∗
To save the data obtained by the calibration,
press [Yes].
•
If you press [No], the return-to-origin process
is carried out and the data obtained by the
calibration are lost.
•
After the above operation, the next screen is
displayed.
UnitCalibAxisSurfaceZ-04E01
15
UnitCalibAxisSurfaceZ-06E01
17
UnitCalibAxisSurfaceZ-05E01
16
NPM
Maintenance Edition
9.4 Head / Plane Compensation Z
Page 9-16 EJM9BE-MB-09M-21
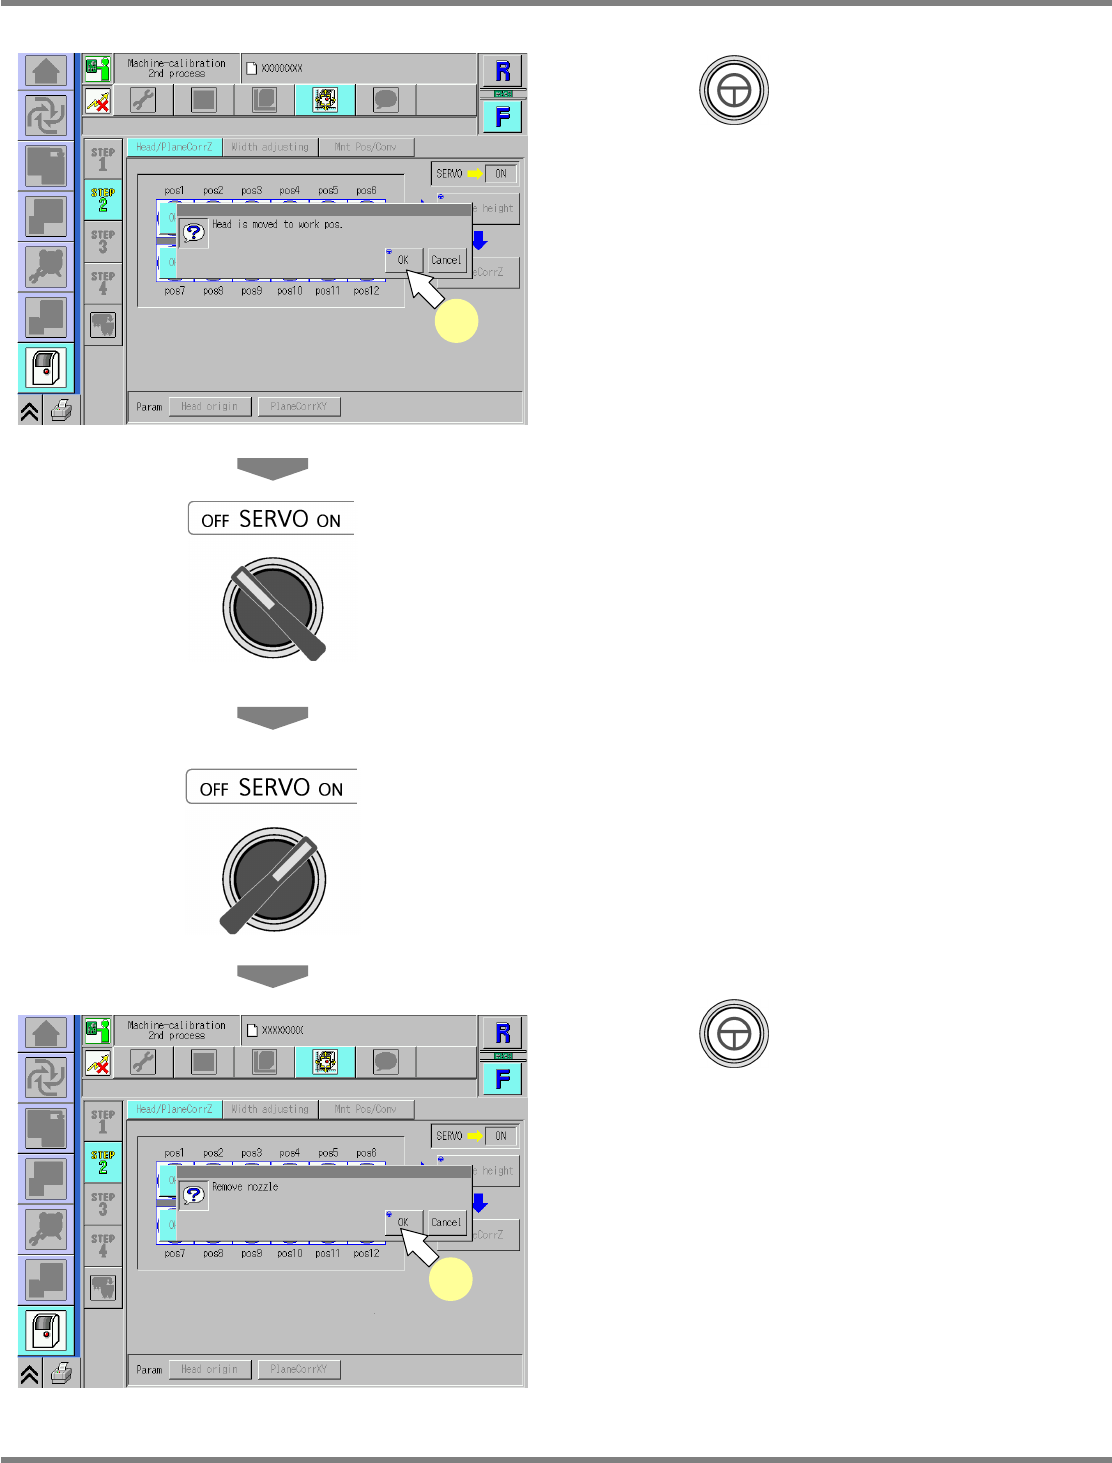
18
Press + [OK].
•
The head moves to the working position.
19
Turn OFF the servo switch.
20
Open the safety cover.
21
Detach the nozzles.
22
Close the safety cover.
23
Turn ON the servo switch.
24
Press + [OK].
•
After the head moves to the origin position,
the screen selected in step 17 is displayed.
UnitCalibAxisSurfaceZ-07E01
18
UnitCalibAxisSurfaceZ-08E01
24
NPM
Maintenance Edition
9.5 Width Adjustment
EJM9BE-MB-09M-21 Page 9-17
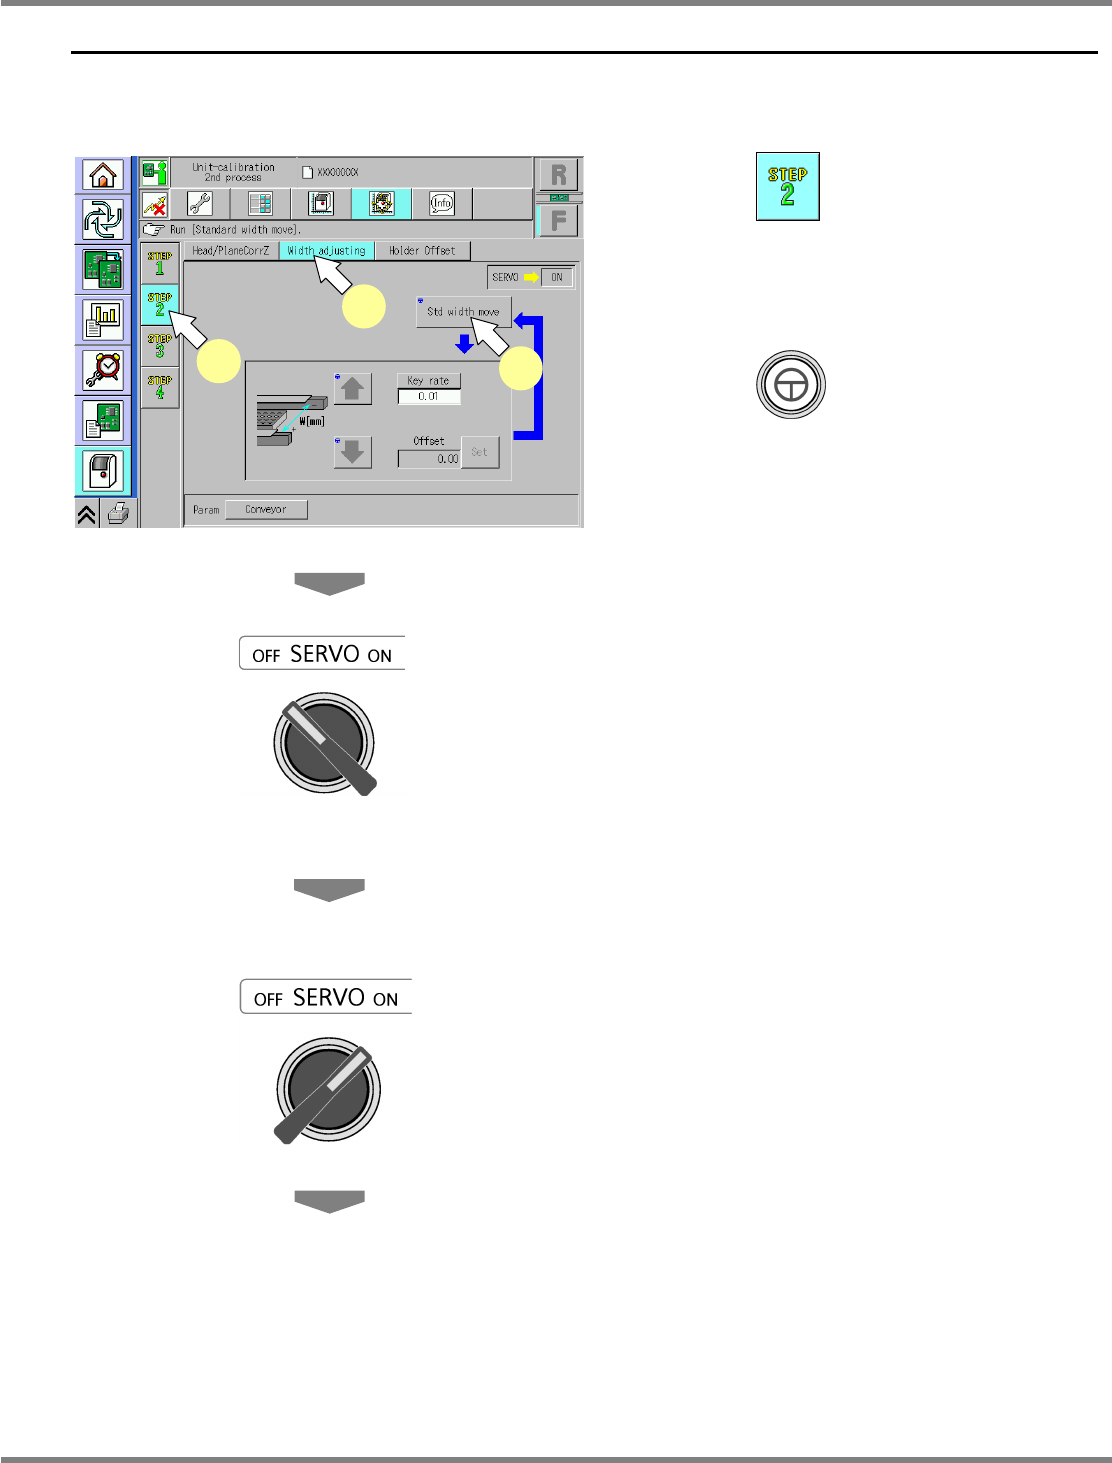
9.5 Width Adjustment
Single conveyor type
1
Press .
2
Press [Width adjusting].
3
Press + [Std width move].
•
The conveyor width is adjusted to the
reference width: 460 mm.
4
Turn OFF the servo switch.
5
Open the safety cover.
6
Measure the conveyor width with a
vernier caliper.
7
Close the safety cover.
8
Turn ON the servo switch.
UnitCalibConveyorWideOrigin-01E02
1
2
3