NPM Calibration Manual-En.pdf - 第78页
NPM Maint en anc e E di ti on 9.11 Hei ght Off set EJM9BE-M B-09M-21 Page 9-77 17 Press + [OK]. • T he cali br ation is carri ed out . 18 Check that it i s successfu ll y com pl ete. ∗ Perf orm steps 3–18 f or also the o…
NPM
Maintenance Edition
9.11 Height Offset
Page 9-76 EJM9BE-MB-09M-21
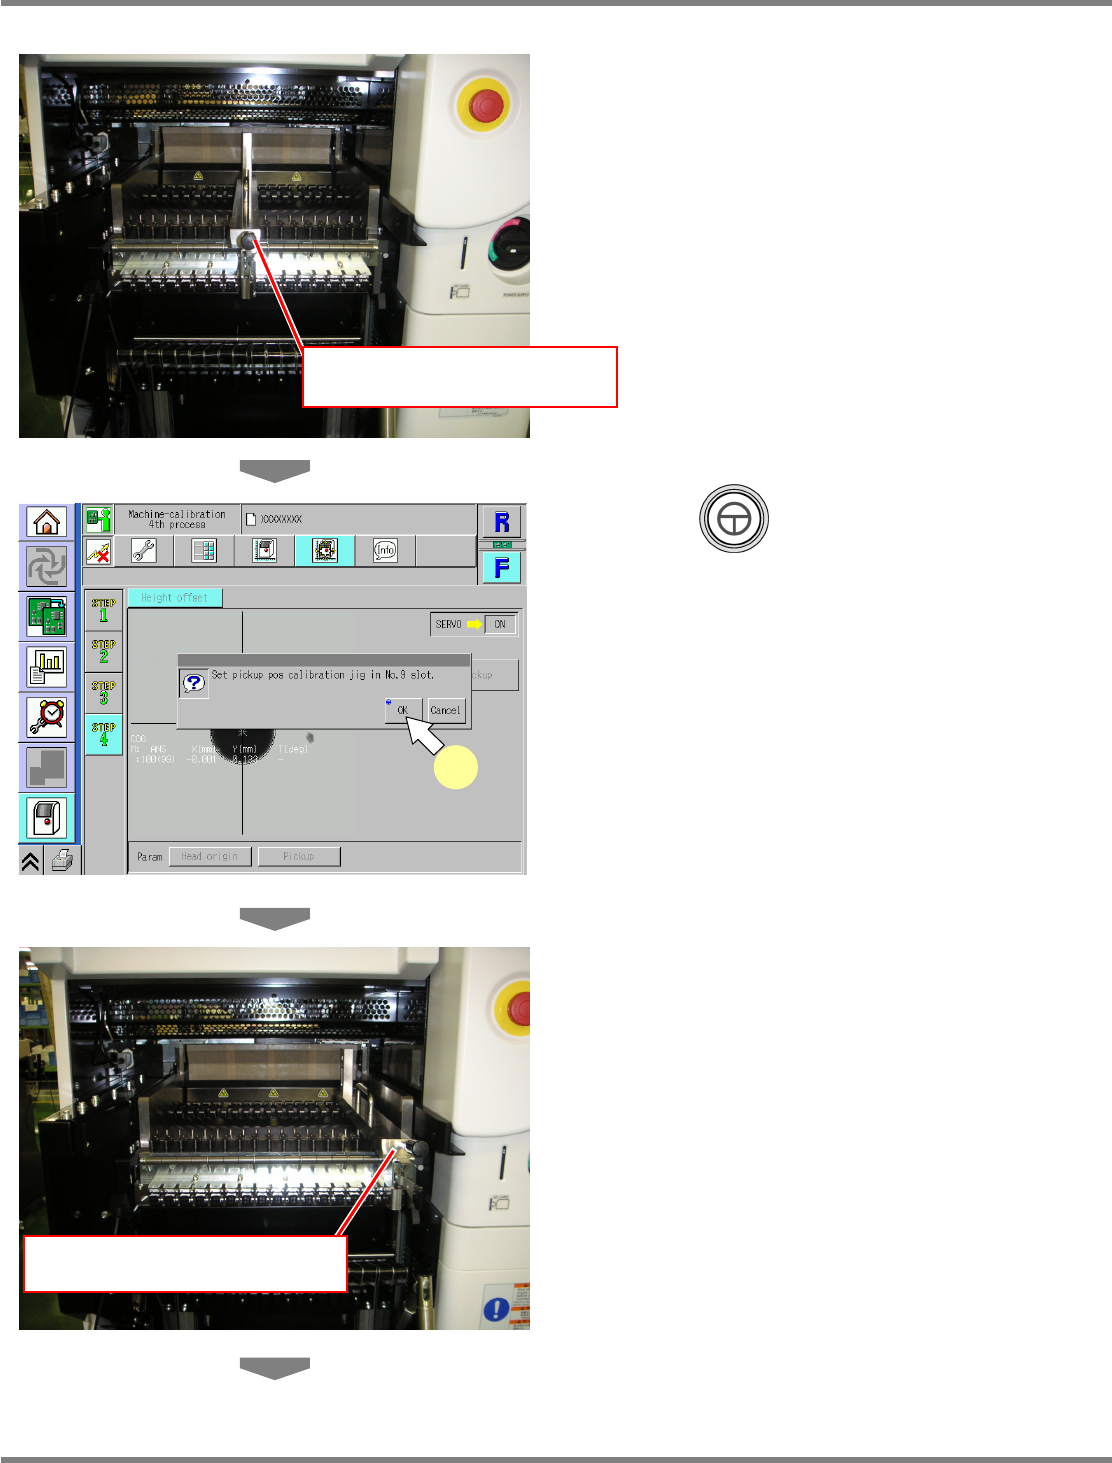
14
Set the pickup-position-height
teaching jig.
∗
Set the pickup-position-height teaching jig in
the No.9 slot on the center of the table
selected in step 3.
15
Press + [OK].
•
The calibration is carried out.
16
Set the pickup-position-height
teaching jig.
∗
Set the pickup-position-height teaching jig in
the No.16 slot on the right side of the table
selected in step 3.
Pickup-position-height teaching jig
(No.9 slot)
UnitCalibHeadHightMeasure-04E00
15
Pickup-position-height teaching jig
(No.16 slot)
NPM
Maintenance Edition
9.11 Height Offset
EJM9BE-MB-09M-21 Page 9-77
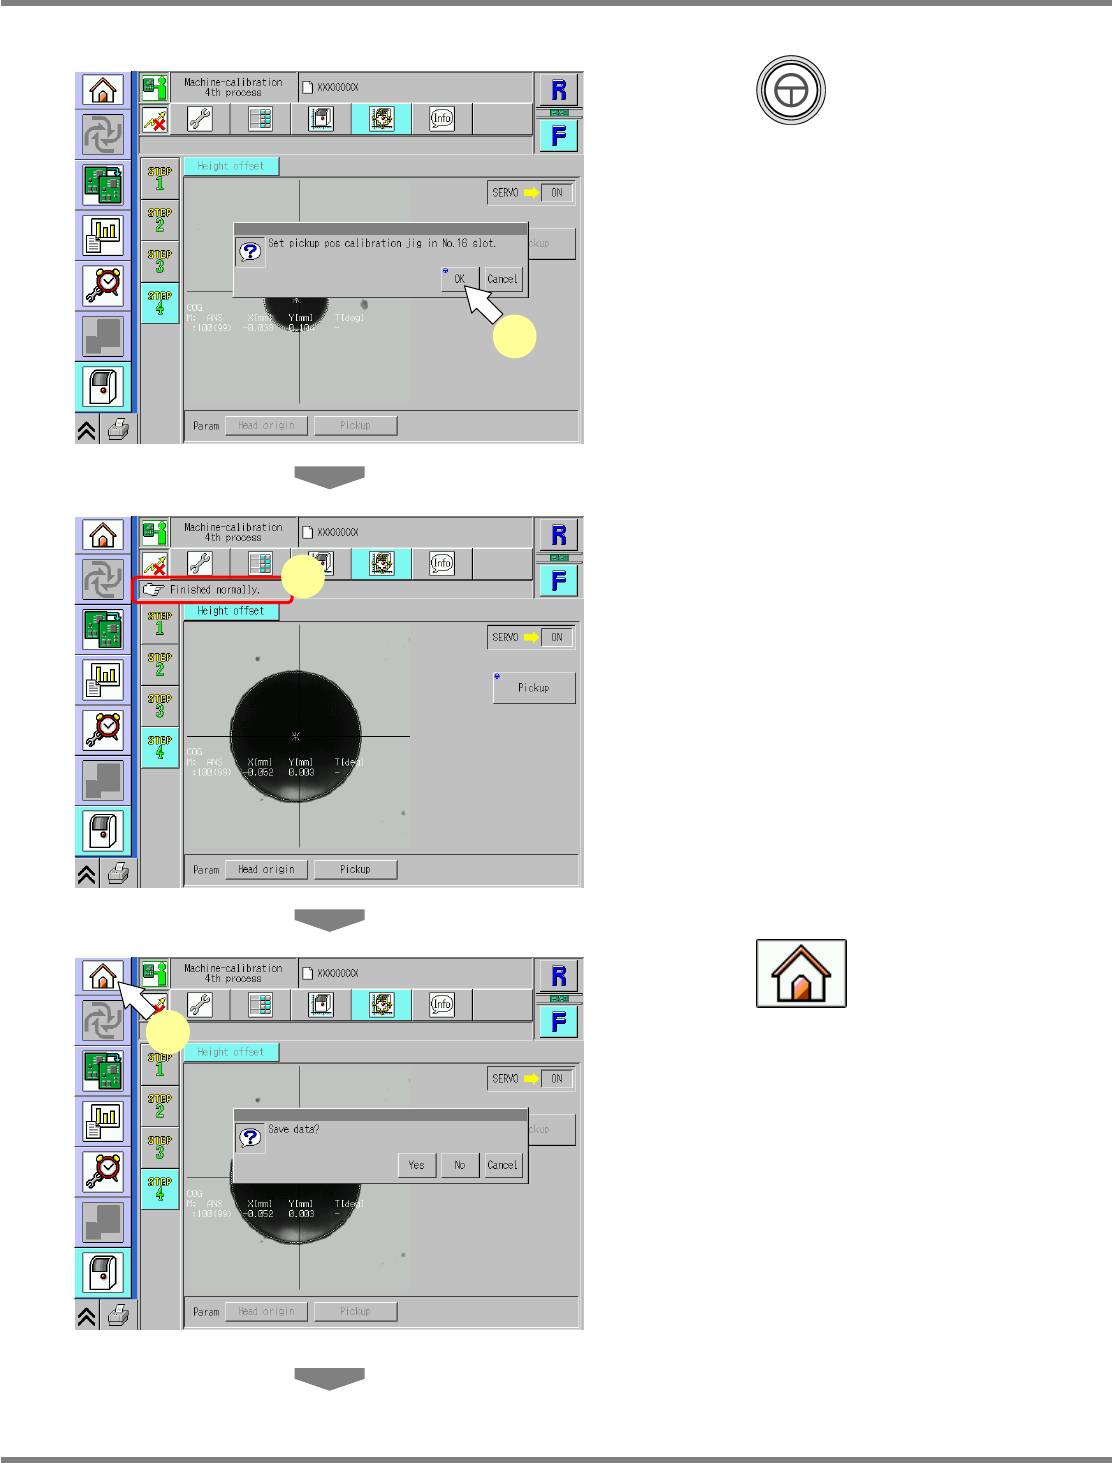
17
Press + [OK].
•
The calibration is carried out.
18
Check that it is successfully complete.
∗
Perform steps 3–18 for also the other table.
19
Press .
•
When exiting this screen to the other one, you
are always prompted to save the data.
∗
To save the data obtained by the calibration,
press [Yes].
•
If you press [No], the return-to-origin process
is carried out and the data obtained by the
calibration are lost.
•
After the above operation, the next screen is
displayed.
UnitCalibHeadHightMeasure-07E00
19
UnitCalibHeadHightMeasure-05E00
17
UnitCalibHeadHightMeasure-06E00
18
NPM
Maintenance Edition
9.11 Height Offset
Page 9-78 EJM9BE-MB-09M-21
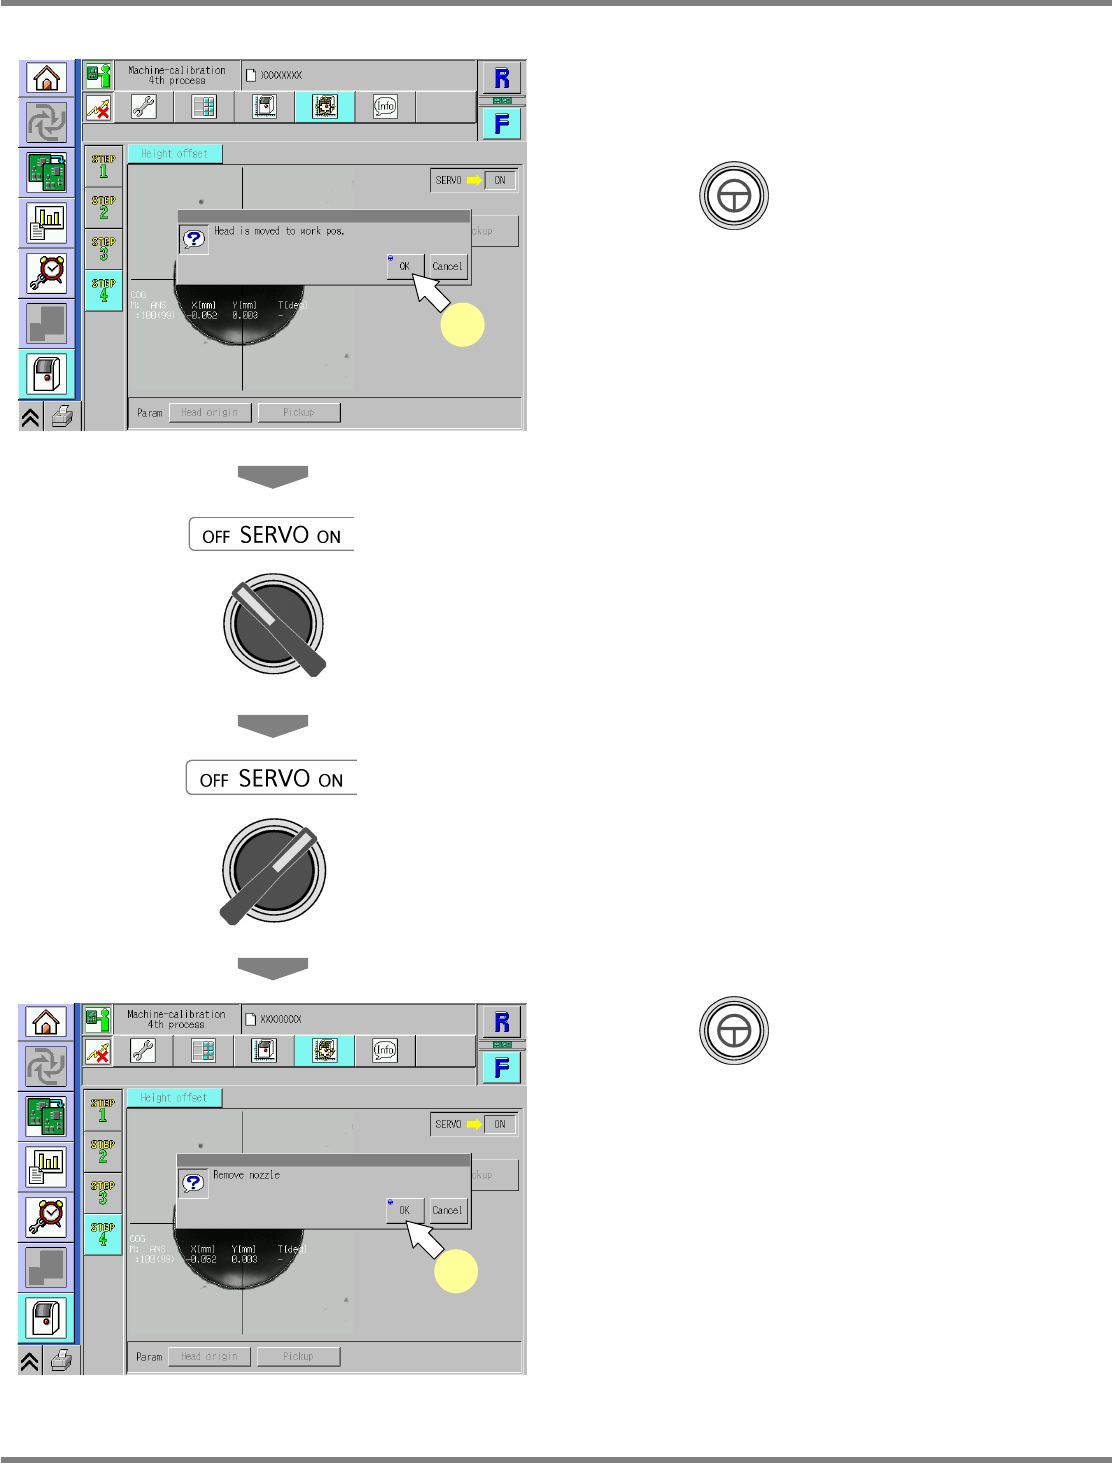
20
Remove the pickup-position-height
teaching jig.
21
Press + [OK].
•
The head moves to the working position.
22
Turn OFF the servo switch.
23
Open the safety cover.
24
Detach the nozzles.
25
Close the safety cover.
26
Turn ON the servo switch.
27
Press + [OK].
•
After the head moves to the origin position,
the screen selected in step 19 is displayed.
UnitCalibHeadHightMeasure-08E00
21
UnitCalibHeadHightMeasure-09E00
27