M6_ServiceManual_e.pdf - 第56页
3 Mechanical Section 3-26 Air filter for Head assembly Air filter location Lubricatiaon and Filter elemenet replacement Air filter ( LC1-M71A4-001/AIR FILTER ASSY. ) Vacuum g enerator ( LG0-M71A3-000/GENERATOR.VACUUM ) A…
3 Mechanical Section
3-25
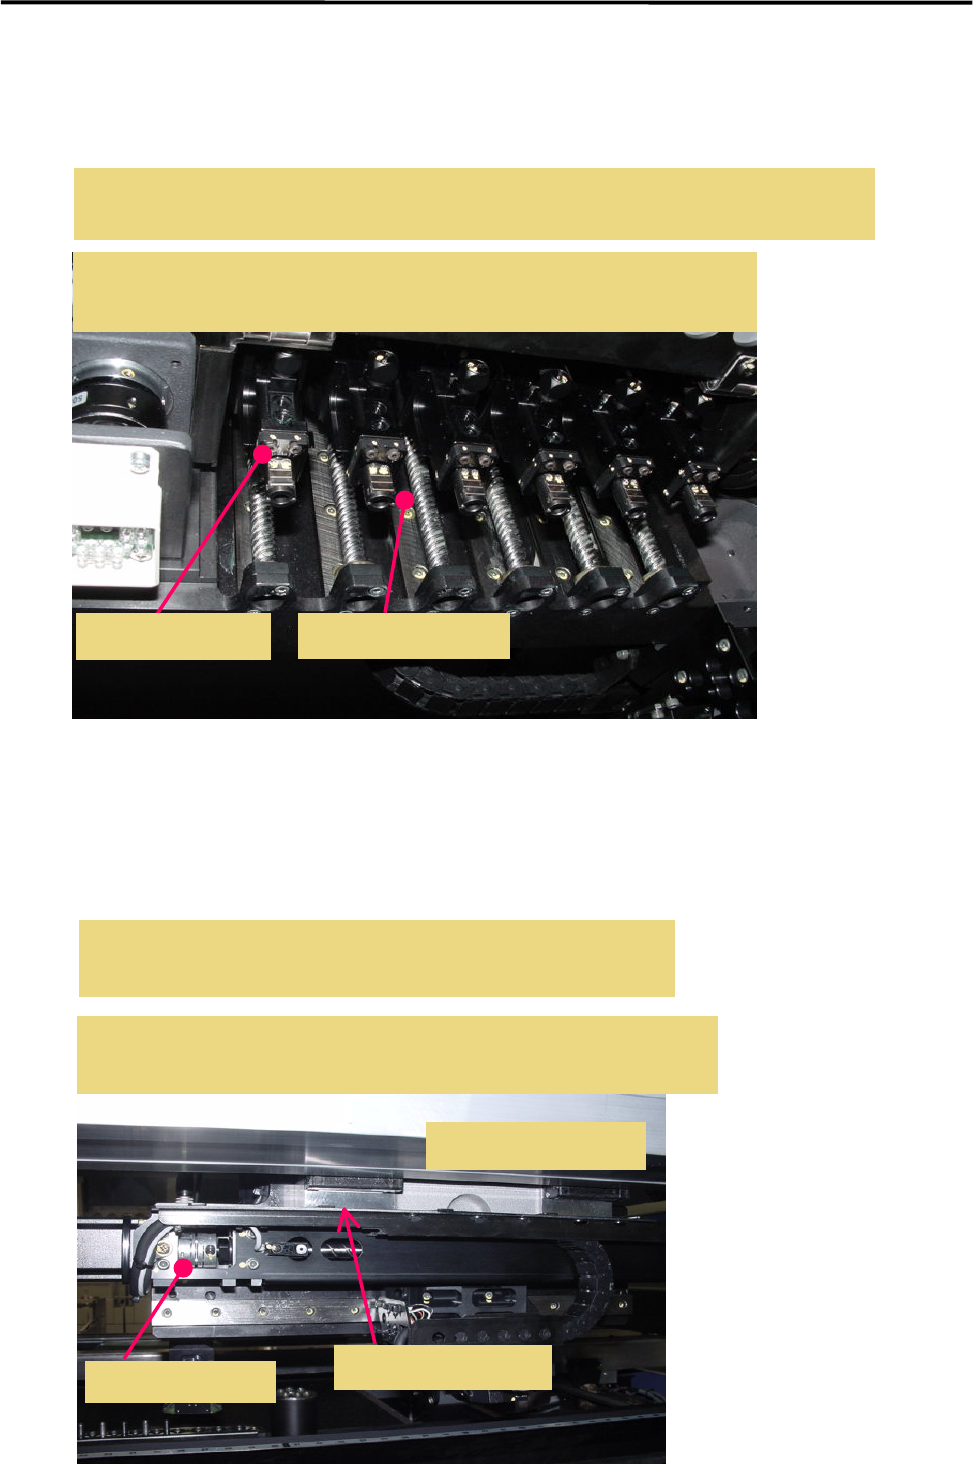
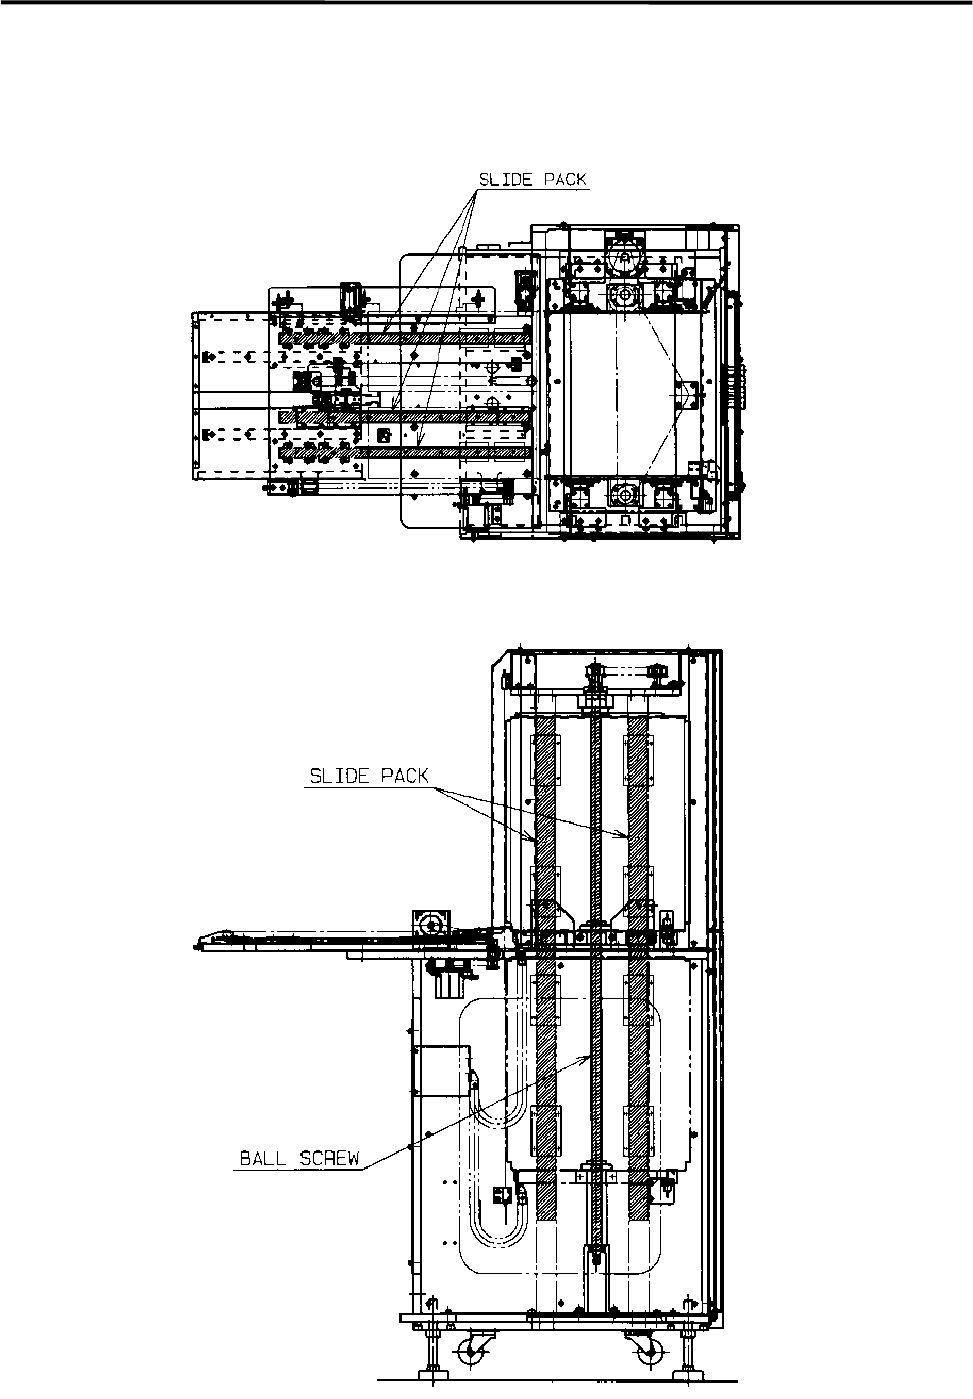
Head Assembly: Z-axis ball screw and Linear guide
・Be sure the mounter is
power off state.
・Move all the head to
the upper ends
manually.
・Lubricate the grease to
the ball screws and
the linear guides.
・Move the heads
between upper-end
and lower-end a few
times manually.
・Wipe off excessive oil
at the lower end.
Scan Camera: S-axis ball screw and Linear guide
Be sure the mounter is power off
state.
・Lubricate the ball screw through
the cover window.
・Lubricate the linear guide rail.
・Move the linear guide rail from the
left-end to the right end a few
times manually.
・Wipe off excessive grease.
Recommended grease: THK AFA 70g(LG0-M86A3-000)
THK AFB 70g(LG0-M86A4-000)
Dip a brush or a torsion brush in grease, and lubricate ball screws and
linear-guide grooves.
Z-axis linear guideZ-axis ball screw
Recommended grease: THK AFA 70g(LG0-M86A3-000)
THK AFB 70g(LG0-M86A4-000)
Dip a brush or a torsion brush in grease, and lubricate ball screws and
linear-guide grooves.
S-axis linear guide
S-axis ball screw
Viewed from the rear
3 Mechanical Section
3-26
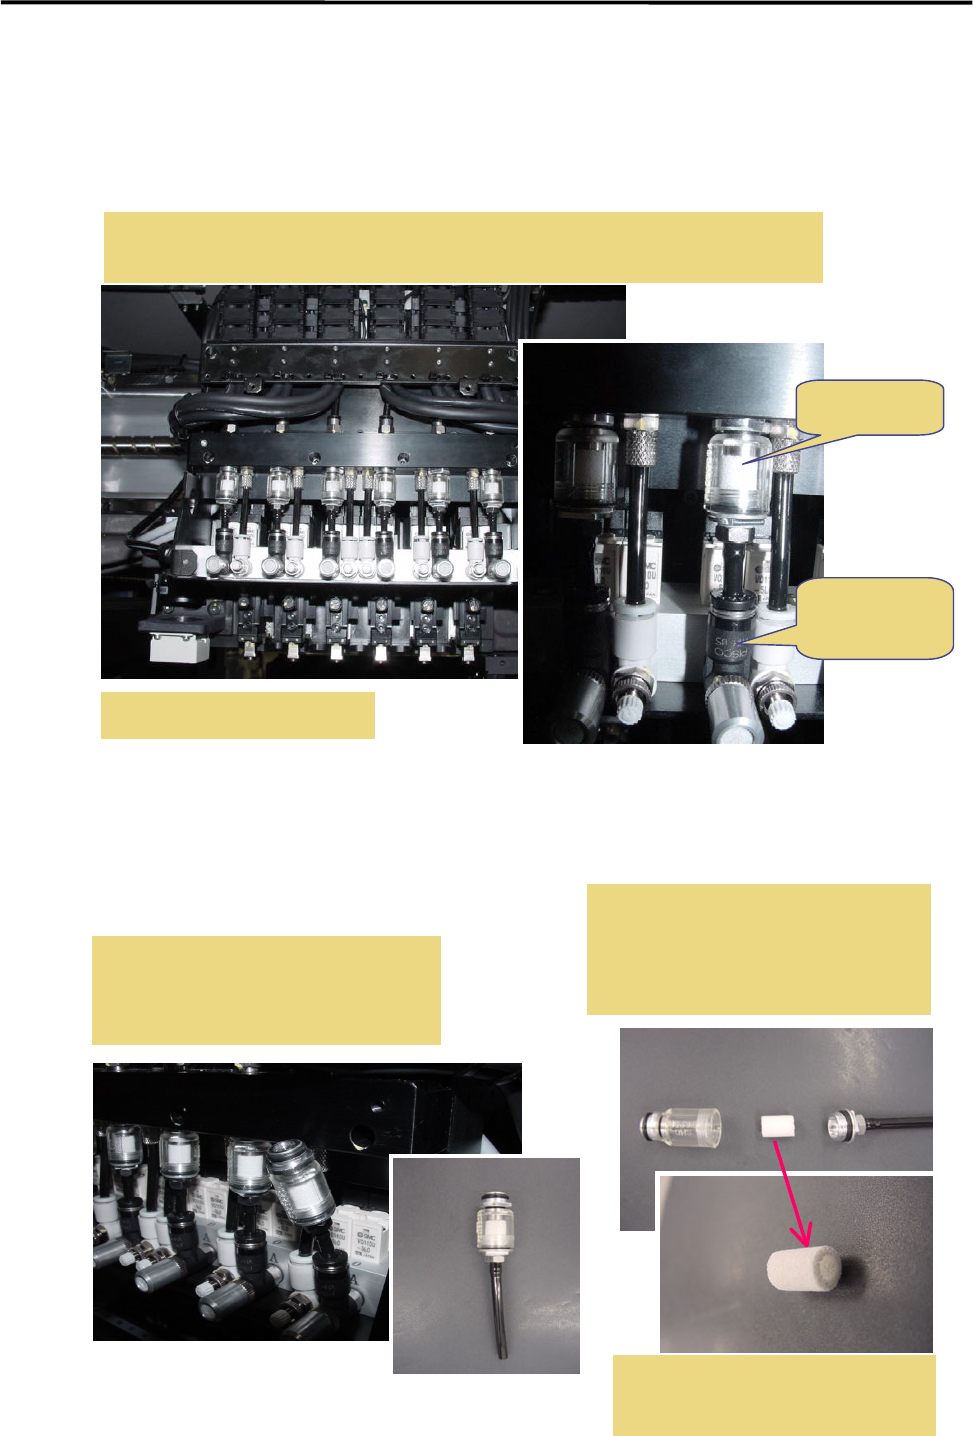
Air filter for Head assembly
Air filter location
Lubricatiaon and Filter elemenet replacement
Air filter (LC1-M71A4-001/AIR FILTER ASSY.)
Vacuum
g
enerator
(
LG0-M71A3-000/GENERATOR.VACUUM
)
Air piping around Head
Air filter
Vacuum
generator
Pull out a resin filter-case
downward.
If it is tight, apply grease to O-ring to
Unscrew the filter case by holding
the resin cover and the aluminum
j
oint with each finger. Replace the
filter with a new one.
Insert the element so the open
end is toward the air hose.
3 Mechanical Section
3-27
MX-20 (Option)