00900068-02_SM_ASM_ProcessLens_EN.pdf - 第58页
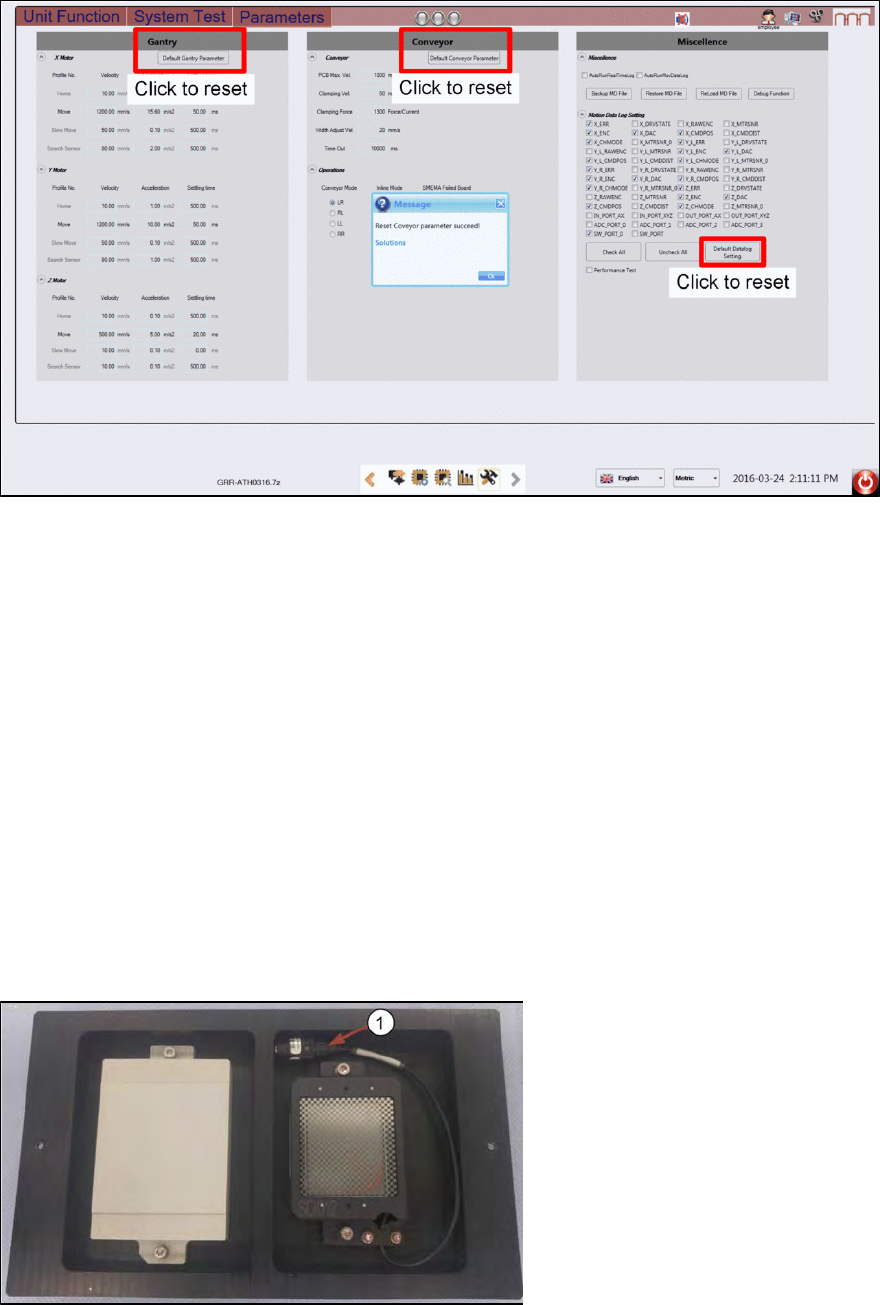
ASM Proces sLens Single - l ane 03/2020 Edit ion 58 2D and 3D cal fi xture inf o Mech anical feature Dimension Length: 260 mm W idth: 154 mm Hight : 4 mm Step 1 1. G o to Inspection Page . 2. Click Adjust Convey or . 3. …
ASM ProcessLens Single-lane 03/2020 Edition
57
Before starting the calibration procedures, reset machine kinematics to default values.
4.1 Calibrations - 2D and 3D Calibration
The objectives are:
•
Z axis Calibration: Auto Focus
•
Calibrate camera to gantry XY rotation
•
2D Calibration
•
3D Calibration
One side of the calibration tool is for 3 dimensional and the other 2 dimensional. The 2D target is
wired with a lighting module.
2D and 3D Calibration tool
1. Check the calibration tool. Clean with a lint free cloth if necessary.
2.
Coil the 2D light cable into the cavity as shown.
1) 2D back light cable and
connector.
3D Calibration Target 2D Calibration Target
ASM ProcessLens Single-lane 03/2020 Edition
58
2D and 3D cal fixture info
Mechanical feature
Dimension
Length:
260 mm
Width:
154 mm
Hight:
4 mm
Step 1
1.
Go to Inspection Page.
2.
Click Adjust Conveyor.
3.
Set the following:
– Thickness, 4mm.
– Width, 154mm
4.
Click Set..
The conveyor starts to adjust to
154mm width.
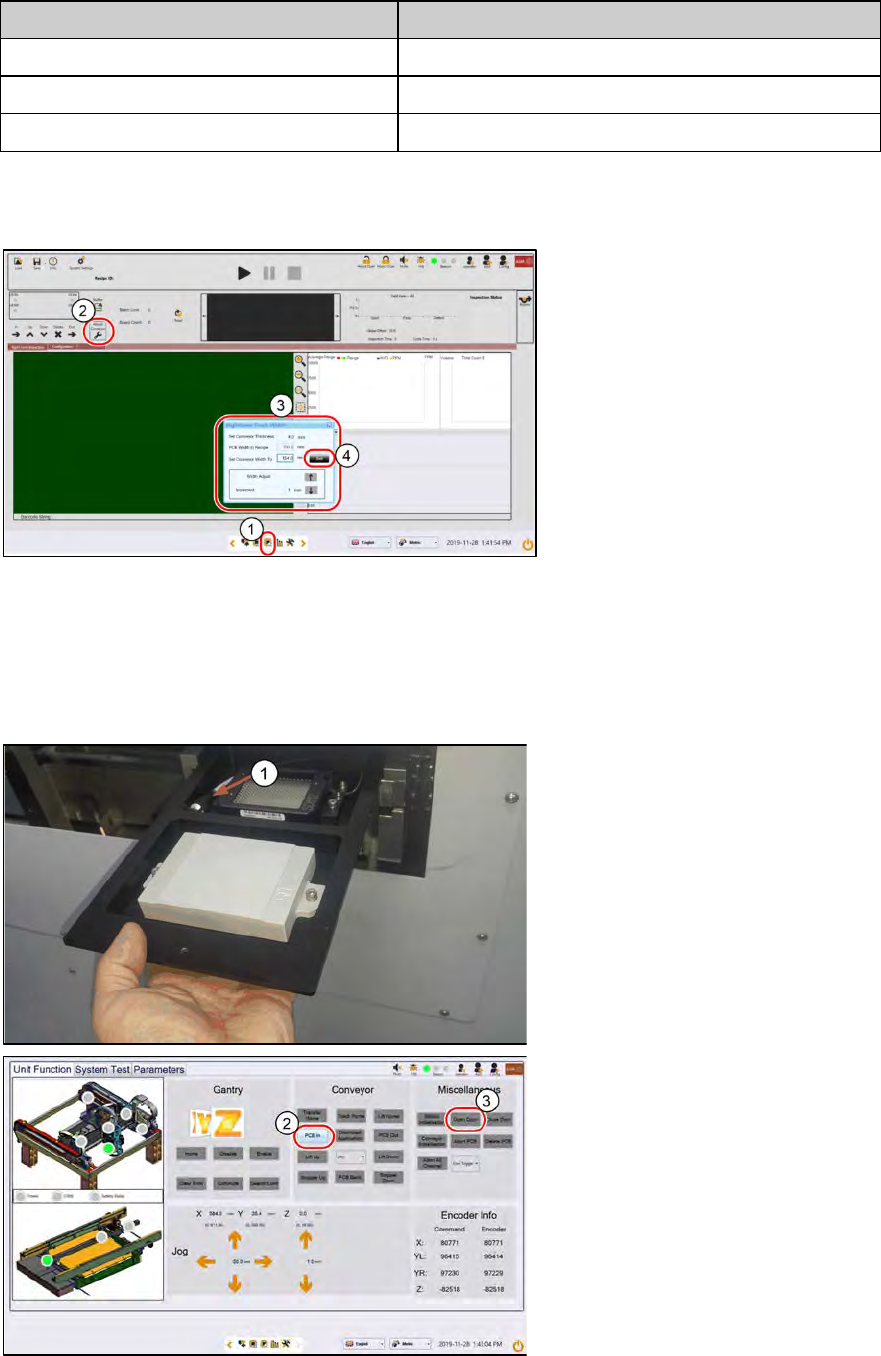
Step 2
1. Place the 2D and 3D target onto
the inlet section in the orientation
shown below. The 2D target
should be loaded head in first.
Ensure the 2D lighting cable is in
the cavity.
2.
At Conveyor, click PCB In. The
target loads into the inspection
section, stops at the stopper and
clamps.
3.
At Miscellaneous, click Open
Door. Open the machine cover.
ASM ProcessLens Single-lane 03/2020 Edition
59
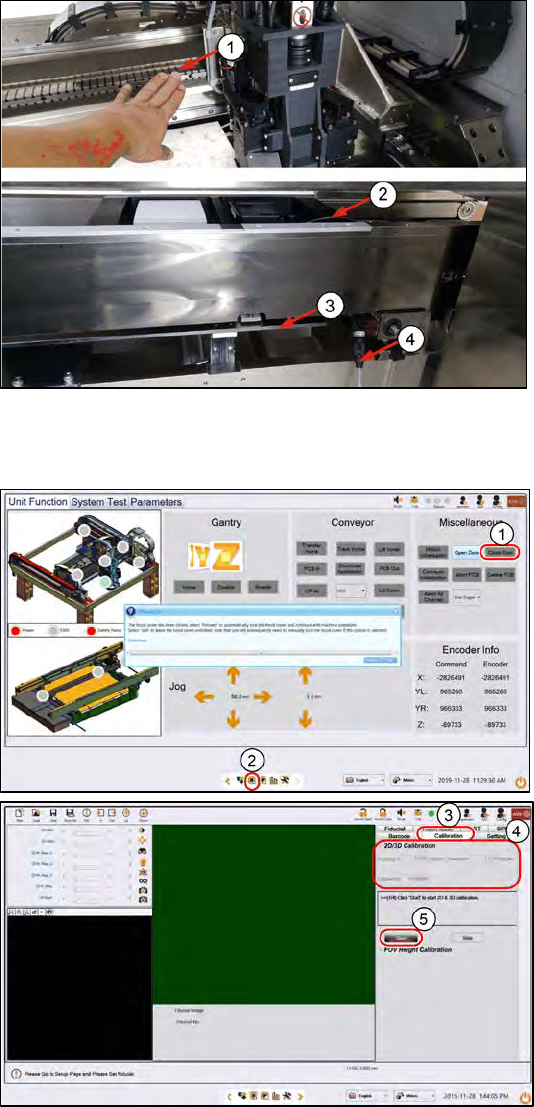
Step 3
1.
Push the gantry on the back
CAUTION! Do not push on the
camera module.
2.
Connect the lighting cable form
the calibration tool to the
machine´s through the gap under
the conveyor and to the right of
the lift table.
3.
Lift table.at the top position
4.
Ensure the lighting cable is lying
low and will not be in the path of
the moving camera module.
Step 4
1.
Close the cover. At
Miscellaneous > Click Close
Door. The machine locks the
cover.
2.
Click on the Vision page icon.
3. Click Calibration.
4.
Make
a note of the current 2D and
3D calibration values for before-
and-after calibration comparisons.
5.
Click Start. The camera moves to
the 2D target. The 2D target lights
up.