a2-100-en(v3_0).pdf - 第12页
A2 Automatic Dispenser V3 .0 10 Detailed steps as below: 1 ) Remove the connect ion pipe, l ift the locking handle as fi gure to l oosen the clea ning box. 2 ) Pull the cleaning bo x out as bel ow figure. 3 ) T ake the s…
A2 Automatic Dispenser V3.0 9
7
7
.
.
2
2
T
T
h
h
r
r
e
e
e
e
t
t
y
y
p
p
e
e
s
s
o
o
f
f
b
b
u
u
i
i
l
l
t
t
-
-
i
i
n
n
c
c
l
l
e
e
a
a
n
n
g
g
i
i
n
n
g
g
b
b
o
o
x
x
f
f
o
o
r
r
c
c
l
l
i
i
e
e
n
n
t
t
s
s
’
’
c
c
h
h
o
o
i
i
c
c
e
e
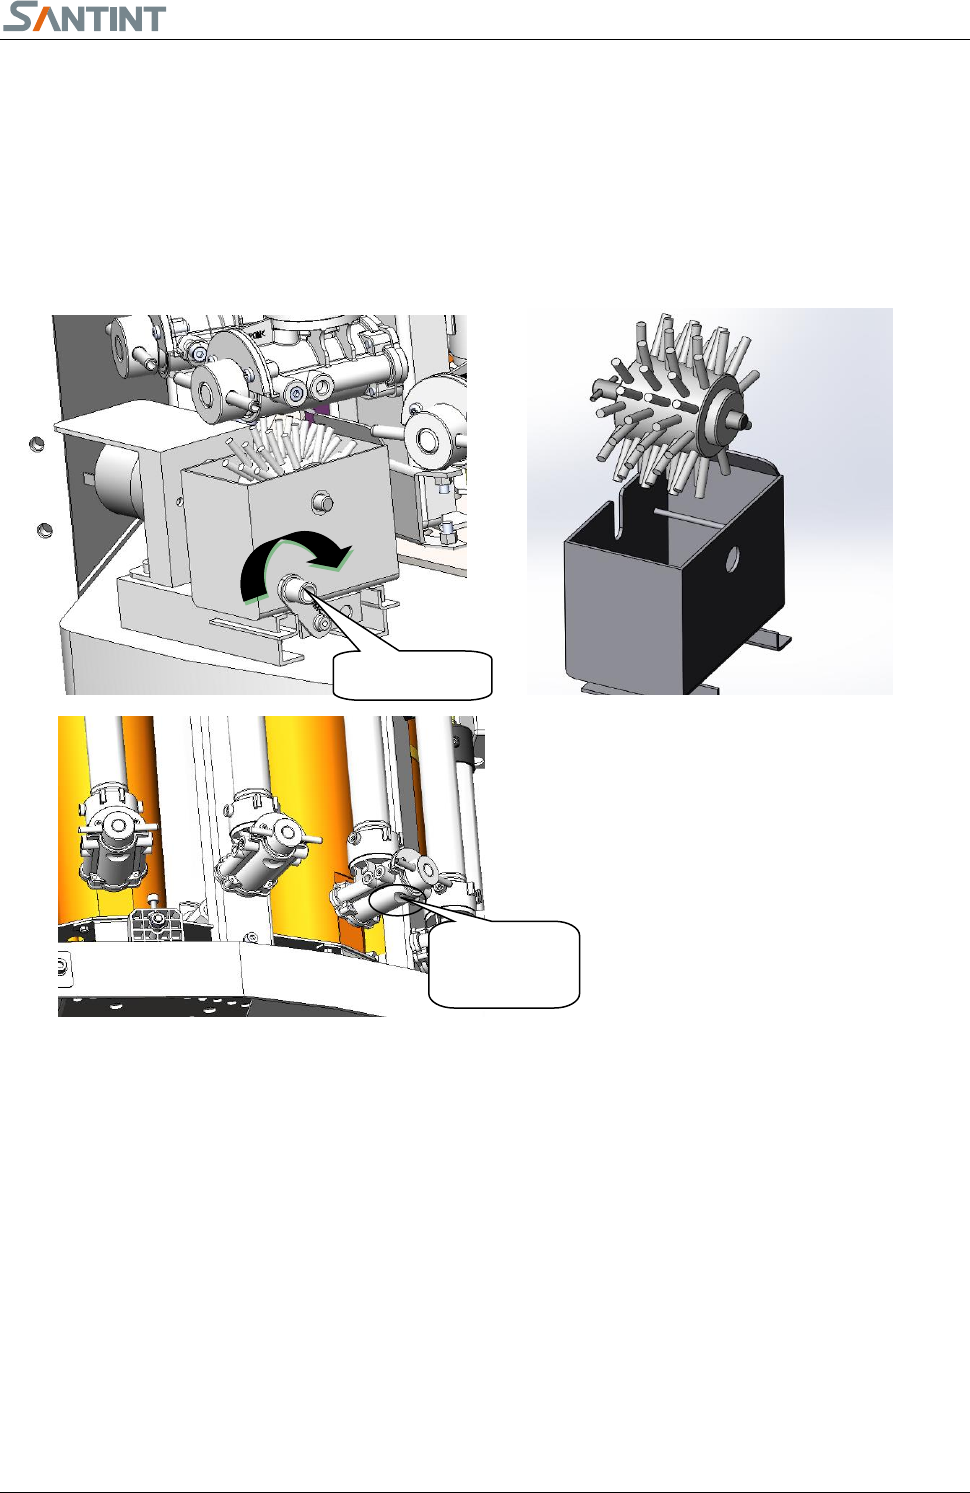
A.Cleaning of the type A built-in cleaning box
The cleaning box is build-in. The daily maintenance and periodically maintenance shall be implemented
by following the reminders from the dispensing software.
The hairbrush shall be used in the following manners to ensure the cleaning effects;
Detailed steps as below:
1) Lift the locking handle to loose the cleaning box.
2) Hold the box handle, take it out.;
3) You may clean the brush wheel and the cleaning box separately. Clean each valve bottom thoroughly.
4) Put the cleaning box back, please make sure it is in bottom position, and push down lock handle
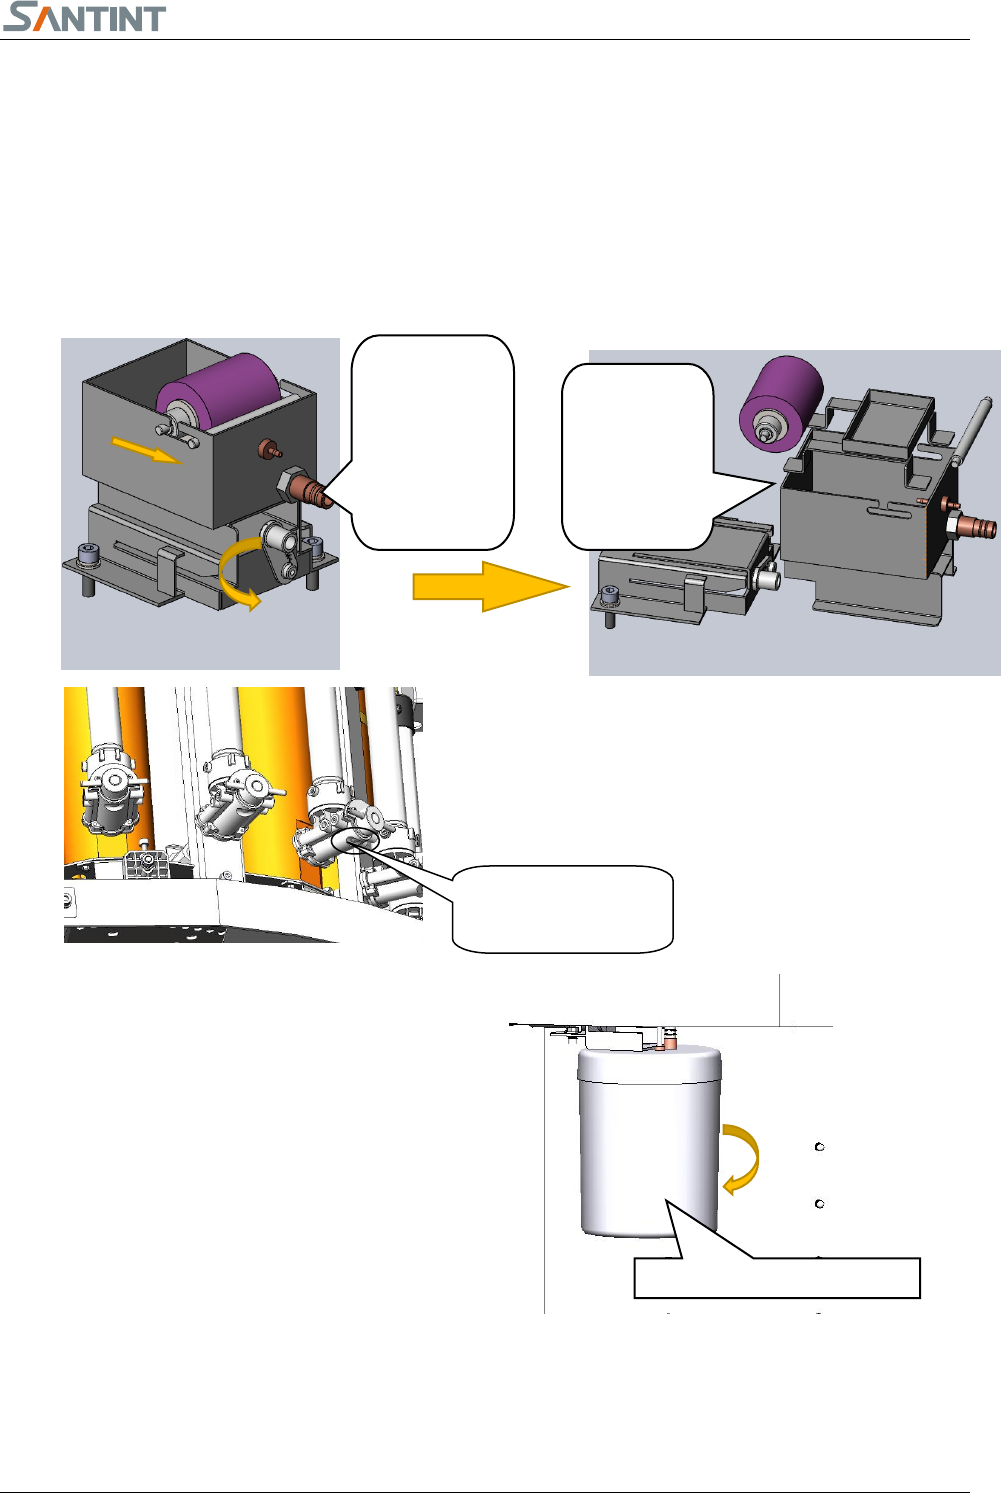
B. Cleaning of the type B built-in cleaning box.
1. Cleaning of the cleaning box
The cleaning box is built-in. The daily maintenance and periodically maintenance shall be implemented
according to the dispensing software reminders.
Please follow these steps to clean the cleaning box to ensure the cleaning effects.
Lock Handle
Clean each
valve bottom
A2 Automatic Dispenser V3.0 10
Detailed steps as below:
1) Remove the connection pipe, lift the locking handle as figure to loosen the cleaning box.
2) Pull the cleaning box out as below figure.
3) Take the sponge brush and other parts out and clean them with water.
4) Put back of the sponge brush and other parts in proper order.
5) Put the cleaning box back, turn the locking handle to press the cleaning, install the water pipe.
2. Clean the cup
1) Remove the cup as figure
2) Pour out the sewage, clean the cup and refill
3) 80%-90% fresh water of the cup capacity.
4) Put the cup back and screw it down.
C. Cleaning of the type C built-in cleaning box.
The cleaning box is built-in. The daily maintenance and periodically maintenance shall be implemented
Take inner
parts out and
clean them
with water.
Remove the
connection
pipe, loosen
the cleaning
box as figure.
Clean bottom of all
the valve body
Rotate the cup to remove it.

A2 Automatic Dispenser V3.0 11
according to the dispensing software reminders.
No need to add water to the dry brush container. Add some water to the wet brush container (Do not
exceed the cleaning wheel shaft). The clean shall be done by following manners to ensure the cleaning
effects.
Detailed steps as below:
1) Open the side door of the left front of the dispenser then turn the lock handle clockwise to loose the
cleaning box;
2) Pull the cleaning box out;
3) You may clean the brush wheel and the cleaning box separately. Rotate the wet brush for a better
clean of the cleaning box. Clean each valve bottom thoroughly.
4) Put the cleaning box back and push down lock handle. Lock the side door.
Lock Handle
Brush Assy
Dry
Brush
Wheel
Wet Brush
Wheel
Cleaning
Box
Clean bottom of
all the valve
bodies