a2-100-en(v3_0).pdf - 第7页
A2 Automatic Dispenser V3 .0 5 Before instal lation and m aintenance, must cut of f the pow er supply and unplug from outl et. Do not unplug by pulling on cord. T o unplug, grasp the plug, not the c ord. Do not operate a…
A2 Automatic Dispenser V3.0 4
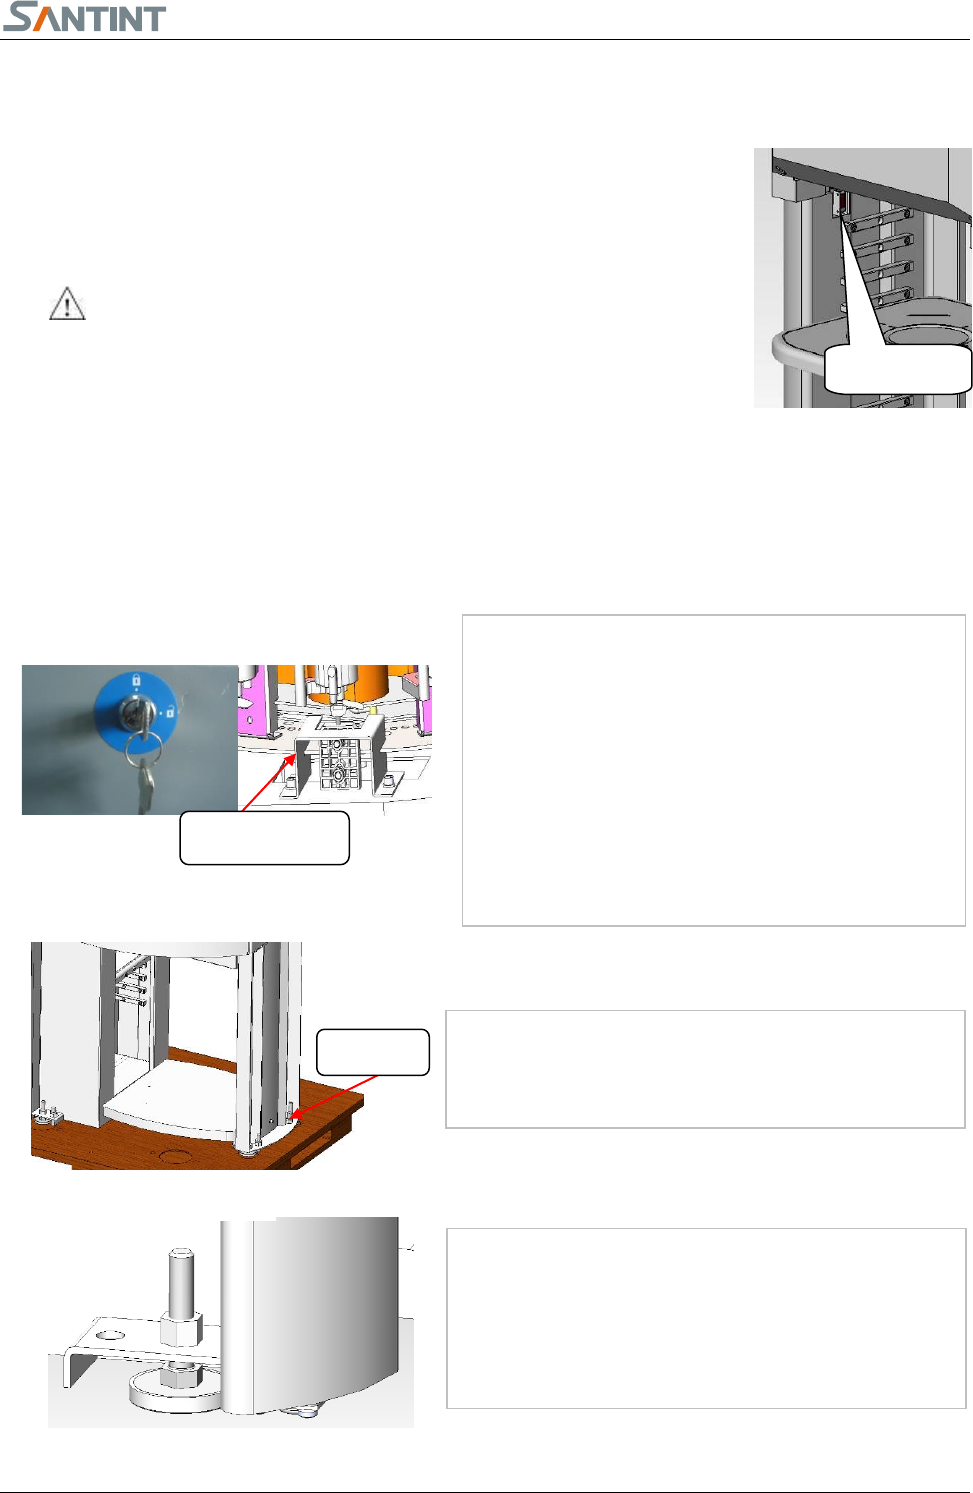
Fig. 4.5
colorants depositing.
Washing assembly:Clean the nozzle after colorant dispensing. The washing wheel wants to be keeping clean
to insure the washing function for the nozzles.
Lifting assembly:with the assistance of electrical control system, the
machine can make the piston up and down so to dispense colorant out.
Only authorized personnel are allowed to open the front door for service.
Loading plate:base paint can is located here. Put bracket up or side face
according to the size of paint cans. Photoelectric sensor(Fig. 4.5)will
sense the base paint can.
5. Installation
5
5
.
.
1
1
M
M
a
a
c
c
h
h
i
i
n
n
e
e
I
I
n
n
s
s
t
t
a
a
l
l
l
l
i
i
n
n
g
g
Unpack the wooden case and inner film of the
machine with necessary tools.
Take out tool box, check the items inside according
to the packing list. Preserve the tool box for next
use.
Get the side door keys from the tool box and
unlock the lock to open the side door.
Remove the transportation fixing plates using inner
hexagon spanner 5.
Remove the four screws on the foundation by using
the spanner 19. Move the machine to the working
site.
Use the spanner 19 to rotate the four feet clockwise.
Level the machine. Make sure the machine doesn’t
move or make noise.
Fig 5.1.3
Fig 5.1.1
Fixing Plate
Fig 5.1.2
M12Bolt
photosensor
A2 Automatic Dispenser V3.0 5
Before installation and maintenance, must cut off the power supply and unplug from outlet.
Do not unplug by pulling on cord. To unplug, grasp the plug, not the cord.
Do not operate any appliance with a damaged cord or plug, or after the appliance malfunctions or is dropped or
damaged in any manner. Contact the nearest authorized service facility for examination, repair, or electrical or
mechanical adjustment.
Do not lengthen the power line.
Do not operate the machine in case the machine shell is removed.
5
5
.
.
2
2
C
C
o
o
m
m
p
p
u
u
t
t
e
e
r
r
I
I
n
n
s
s
t
t
a
a
l
l
l
l
i
i
n
n
g
g
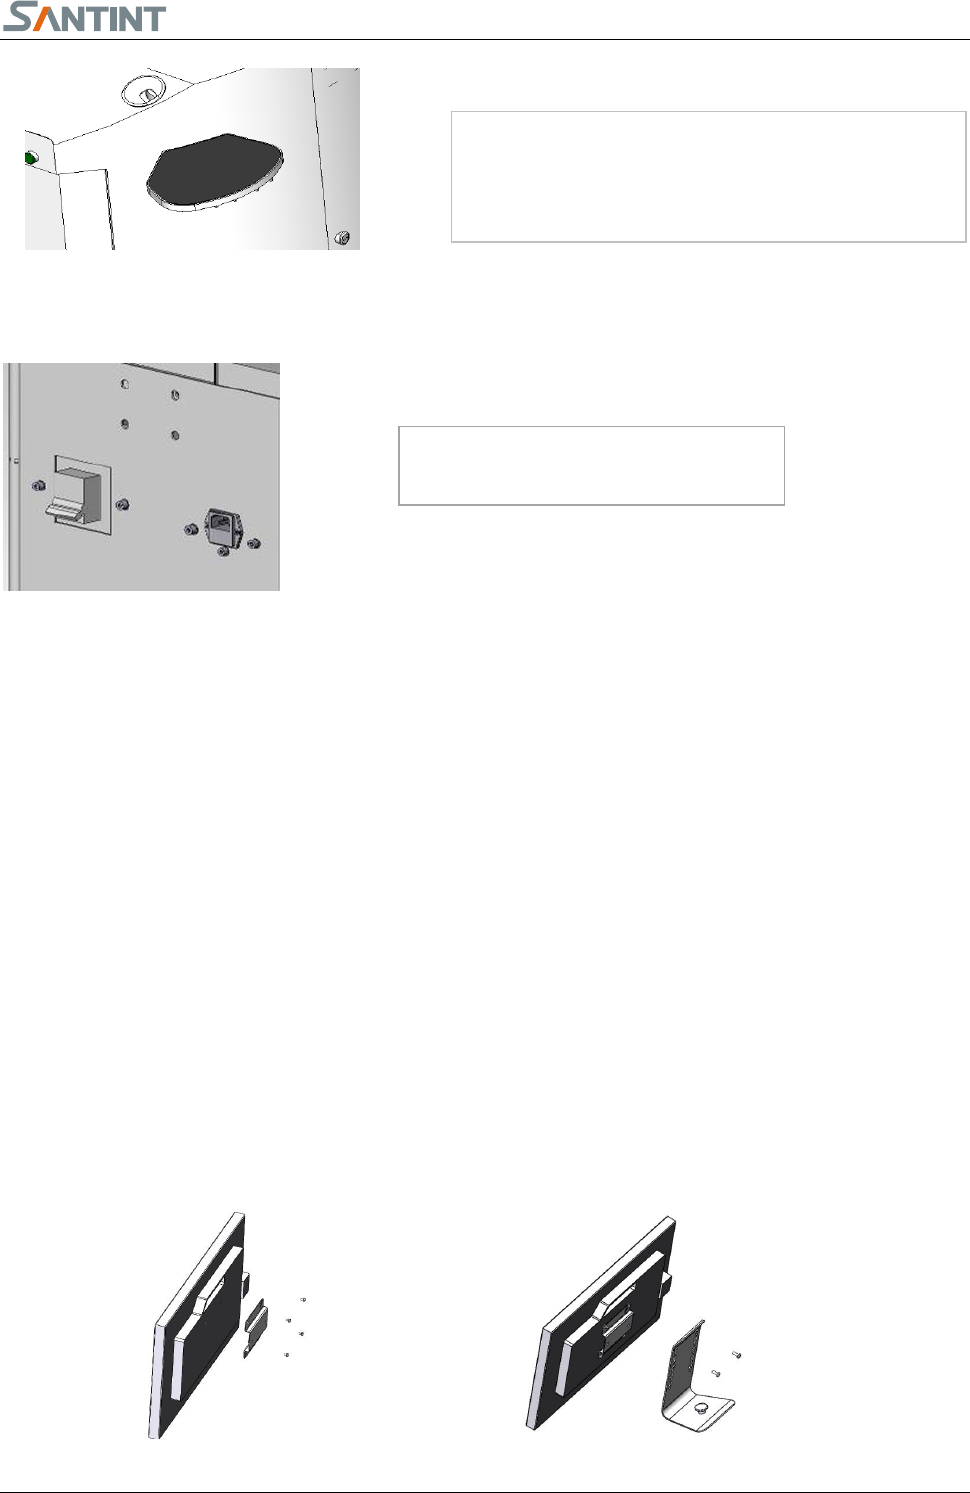
Unpack the carton, locate the computer on the bottom plate under the dispenser.
Locate the keyboard and the mouse on the top of the machine.
Install the monitor
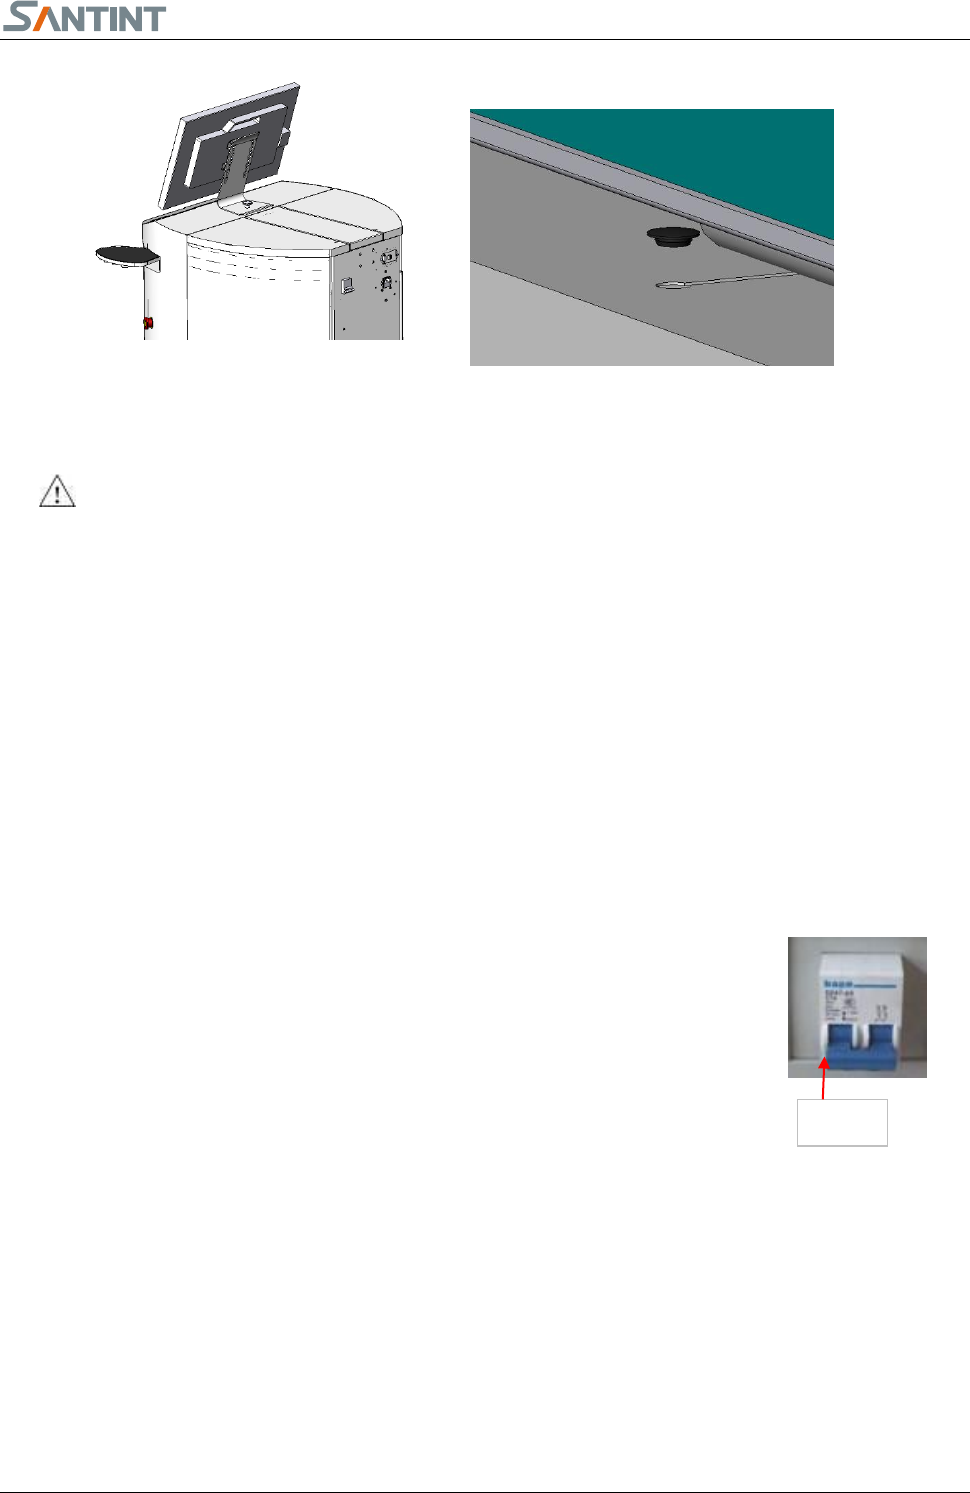
Find the mouse tray in the tool box and install it on
the left side of the machine.
Fig 5.1.4
Fig. 5.1.5
Insert the power chord as shown in
5.1.5
A2 Automatic Dispenser V3.0 6
Connect the power supply wire, data wire with the monitor.
Connect the series port wire to the corresponding plugs, the installation is finished.
Hot plug of serial port line is prohibited
5
5
.
.
3
3
I
I
n
n
s
s
t
t
a
a
l
l
l
l
i
i
n
n
g
g
s
s
o
o
f
f
t
t
w
w
a
a
r
r
e
e
1. Turn on the switch on the bottom of the machine.
2. Open CD-ROM, put in the installing disk, run the CD-ROM;
See Software Manual for detail info about installation and using
6. Machine Adjustment
The machine has been tested before leaving factory, normally the professional go to your site to do machine
adjustment. If you don’t need, please install and adjust the machine under the guidance of the professional
6.1
S
S
o
o
f
f
t
t
w
w
a
a
r
r
e
e
a
a
d
d
j
j
u
u
s
s
t
t
m
m
e
e
n
n
t
t
1. Turn on the switch on the back of machine. Ensure that the emergency stop button
is on (if equips uninterruptable power supply, ensure that the power supply is on)
2. Open(double-click the icon)Color Expert 3.0 program
3. Machine begins to initialize, and pop up the below figure(See use introduction for details of how to use), if
there is abnormal sound coming from the machine, press emergency stop button and start problem solving.;
6
6
.
.
2
2
M
M
a
a
c
c
h
h
i
i
n
n
e
e
A
A
d
d
j
j
u
u
s
s
t
t
m
m
e
e
n
n
t
t
When the software shows Ready, please start to adjust the machine.
Check whether the piston is on the bottom; the initialization of turntable should be in normal condition.
Locate the paint can in the center of the loading plate. If there is no paint can or take away the paint can
1、如图所示,将左侧立板用
两个六角螺栓 M8×20、两个垫圈
8 通过底板固定到底梁上。
2、如图所示,区分小桶架板
总成、大桶架板总成、顶层架板总
成。
Switch