ET8383-說明書(英文).pdf - 第29页
25 5 L ack material alarm* A/B/C/D Stop i mmediately 6 Block m aterial al ar m* A/B/C/D Stop i mmediately Cauti on : If it was i nterrupted by emer gency stop, y ou can continue after di smiss the emer gency stop and r…
24
11) P
ress F3 button and the teach pendant will test if the program is out of the limit range. If it disappear
DATA CORRECT, you can operate the follow steps. If it don’t disappear DATA CORRECT, you must back
and edi
t the program.
12) The
n you can run the program after press ENT. If you are not satisfied with the Dispensing result, you
can do t
he STEP.
3
.7 Interrupt and Continue
1. F
unction: For an interrupted processing file, it can continue to work at the next point of the interrupted
point after troubleshooting.
2. The
manner of continue the interrupted work: after troubleshooting, press the “START” button
and
keep m
ore than 2s not loosen, the robot will continue to work from the interrupted point. If press and hold the
“START” button for 2s, the robot will start the work from the start-point of the processing file.
3. As the
different interrupt type, it can classify the interrupted point as the following table:
No. Inte
rrupted condition
Mark
Action o
f Stop after be
Inte
rrupted
1 P
ress STOP BTN A/B/C/D Stop immediately
2 P
ress EMERGENCY BTN A/B/C/D Stop immediately
3 P
ress ORG BTN A/B/C/D Stop immediately
4 P
ress PAUSE BTN A/B/C/D Stop immediately

25
5 L
ack material alarm* A/B/C/D Stop immediately
6 Block m
aterial alarm* A/B/C/D Stop immediately
Cauti
on:
If it was interrupted by emergency stop, you can continue after dismiss the emergency stop and reset.
The above “interrupt type” is effective in the processing mode, and at the teaching mode and debu
gging
mode, the “interrupt type” with “*” is ineffective.
A/B/C/D is interrupted mark, these mean:
Inte
rrupt
m
ark
Inte
rrupted station
Con
tinue station
A
F
rom Start feeding to dispensing
process finish.
Jump interruption dispensing point, and go
straight to next point.
B
Mov
ing between two dispensing
points.
Go straight to next dispensing point.
C P
ause Go to next dispensing point.
D
Holding
up distance after
dispensing process.
Go to next dispensing point.
Cauti
on: If power outages during the operation, it cannot continue the interrupted work after
troubleshooting.
26
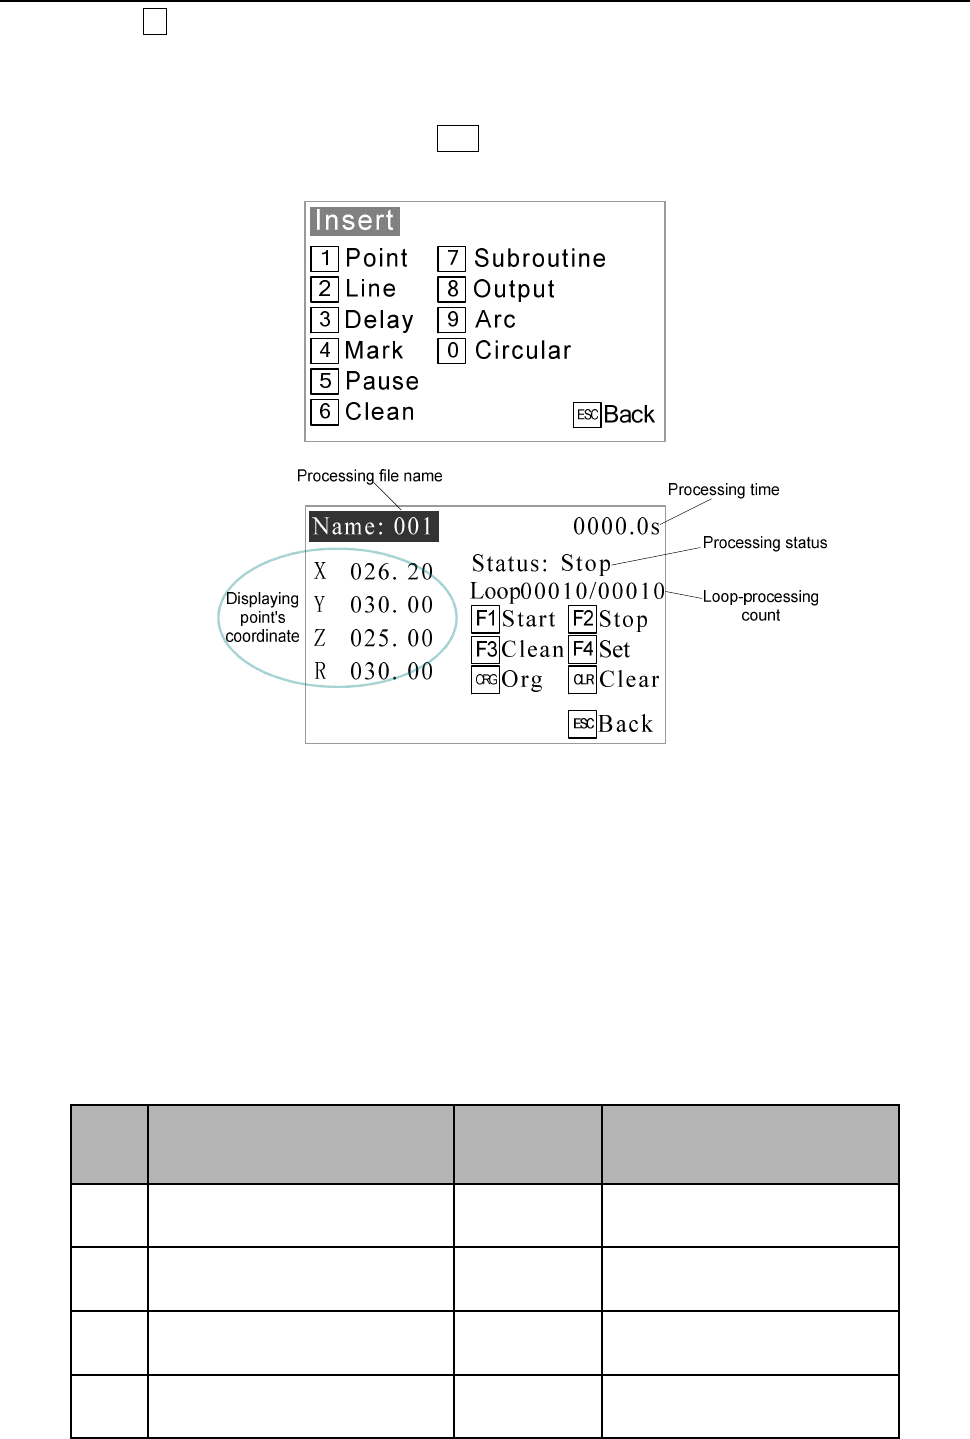
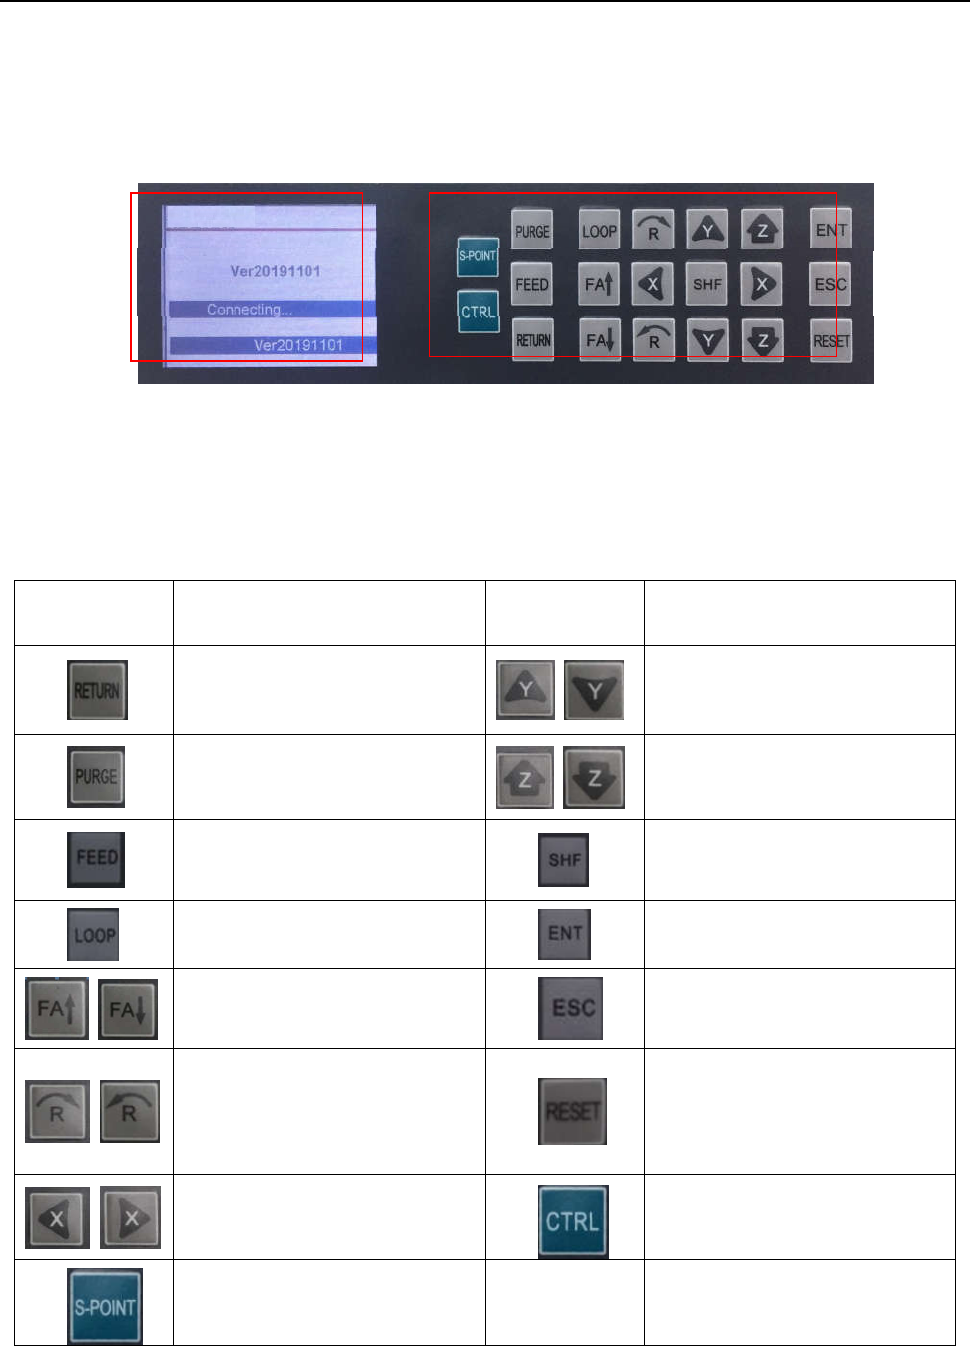
Ⅳ. Operation Panel Instruction
4.1 Introdu
ction
① Display
area
Display communication\version information.
② Operation button
Operation button functions list:
ITEM FUNCTION ITEM FUNCTION
Wir
e back button
Y a
xis position (+)/(-)
Nozzle
purge button
Z axi
s position (+)/(-)
Wir
e feeder button(used in
soldering robot)
Speed control button
Pro
duct cycle processing mode
Enter butt
on
Cyl
inder open / close switch (used
for screw robot)
Back butt
on
R a
xis motor rotating direction
(counter clockwise/ clockwise).
Reset
button(movement go to
machine default position)
X axis posi
tion (+)/(-)
Heating
controller ON/OFF
switch
Sta
rt point button
① ②