JAKA Zu 12及JAKA Zu 12 pro -电控柜V2.1-硬件手册(英文版).pdf - 第15页
10 JAKA Zu 12 v 1.0 2 W el come from JAKA Zu Robot Before read ing this chapter , please e nsure that c hapter 1 Safety h as been re ad and fu lly unders tood. In this c hapter the basics of JAKA Zu Robots would be intro…

JAKA Zu 12 v1.0 9
1.8 Movement without Drive Power
In the unlikely event of an emergency situation where robot power is either not possible or unwanted, the
robot joint can be forced to move in two ways:
1. Forced manual drive: By pushing or pulling the robot arm, it can force the joint to rotate. The brake of
each joint has a friction clutch. When the joint is subjected to a torque greater than the friction torque of the
friction clutch, the joint rotates.
2. Manual brake release: Remove the joint cover by removing the screws (four for big joints and three for
small joints) that fix it. Press the plunger on the small electromagnet (shown below) to release the brake.
Warnings:
1. Moving the robot arm manually is intended for urgent emergencies only and might damage the joints.
2. If the brake is released manually, gravitational pull can cause the robot arm to fall. Always support the
robot arm, tool and work item when releasing the brake.
1.9 Precautions for Transportation and Handling
Transport the robot in the original packaging. Save the packaging material in a dry place; you may need to
pack down and move the robot later on.
Lift both tubes of the robot arm at the same time when moving it from the packaging to the installation
place. Hold the robot in place until all mounting bolts are securely tightened at the base of the robot.
Cautions:
1. Make sure not to overload your back or other bodyparts when the equipment is lifted. Use proper lifting
equipment. All regional and national guidelines for lifting shall be followed. JAKA cannot be held responsible for
any damage caused by transportation of the equipment.
2. Make sure to follow the installation instructions when installing the robot.
Fig
1-1
10 JAKA Zu 12 v1.0
2 Welcome from JAKA Zu Robot
Before reading this chapter, please ensure that chapter 1 Safety has been read and fully understood.
In this chapter the basics of JAKA Zu Robots would be introduced , for future hardware specifications and
software usages please refer to other chapters.
During using of JAKA Zu robots,if quick help is needed, feel to free to dail our hotline:(+86)400-006-2665.
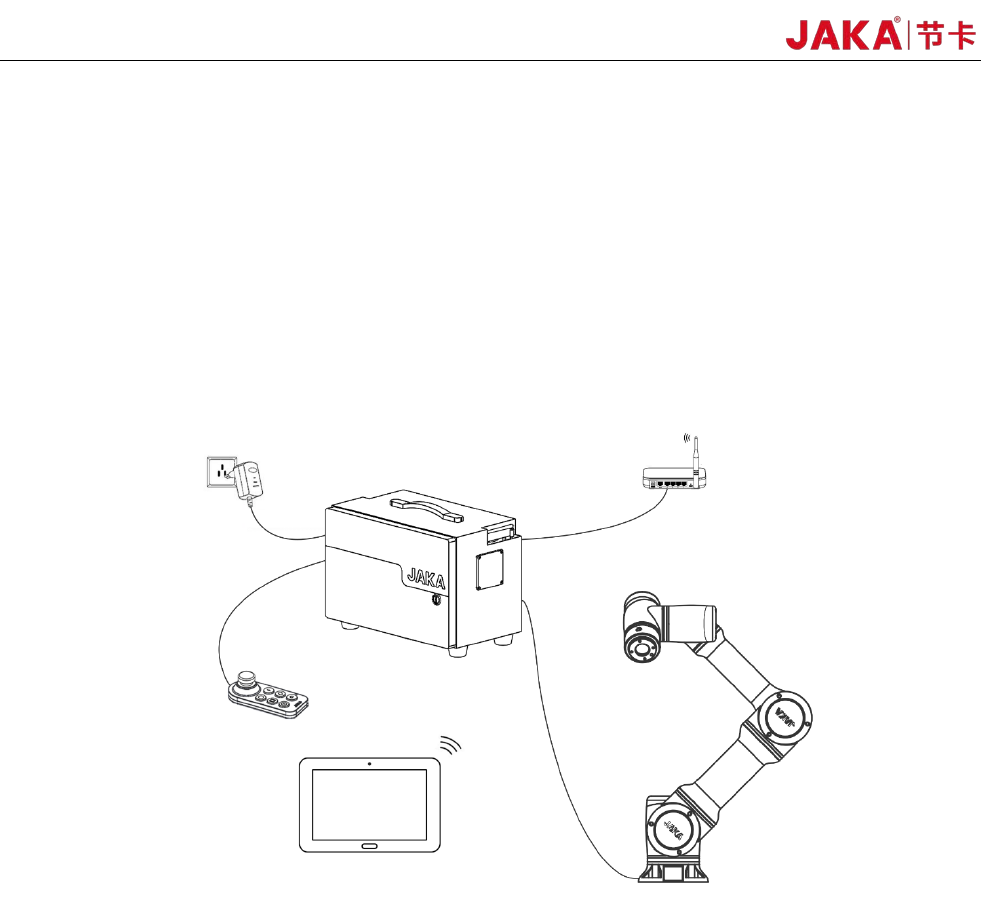
2.1 Overview of robot configurations
Fig
2-1 Overview of robot configurations
As shown in Fig 2-1, JAKA Zu robots uses wireless connection, and the followings are needed:
Operation Terminal:Device used to program and set robot.
Robot Arm
:The core moving part of robot to achieve designated movements. And at the end of the arm,a
ring indicator, buttons used to drag and tech, TIO interface are located.
Electrical Cabinet and Control Stick:The cabinet contains the robot controller and many different kinds
of electrical interface,And also equipped with a control stick.
Router and network cables
:The Ethernet port of the cabinet is connected to the router, so as the
operation terminal. It is recommend that a dedicated router is used to ensure reliable connection.
2.2 Operation Terminal
JAKA Zu APP is provided by JAKA on Android system, and the required configurations are as follows:
JAKA Zu 12 v1.0 11
Terminal Type Tablet PC
OS Android 8.0 or above
CPU Kirin695or Snapdragon 660
ROM 32GB
RAM 4GB
Screen Size 8.0 inch
Network WIFI
Table2-1 Operation Terminal Required Hardware Configurations
The operation terminal can be requested during purchasing or provided by user themselves.
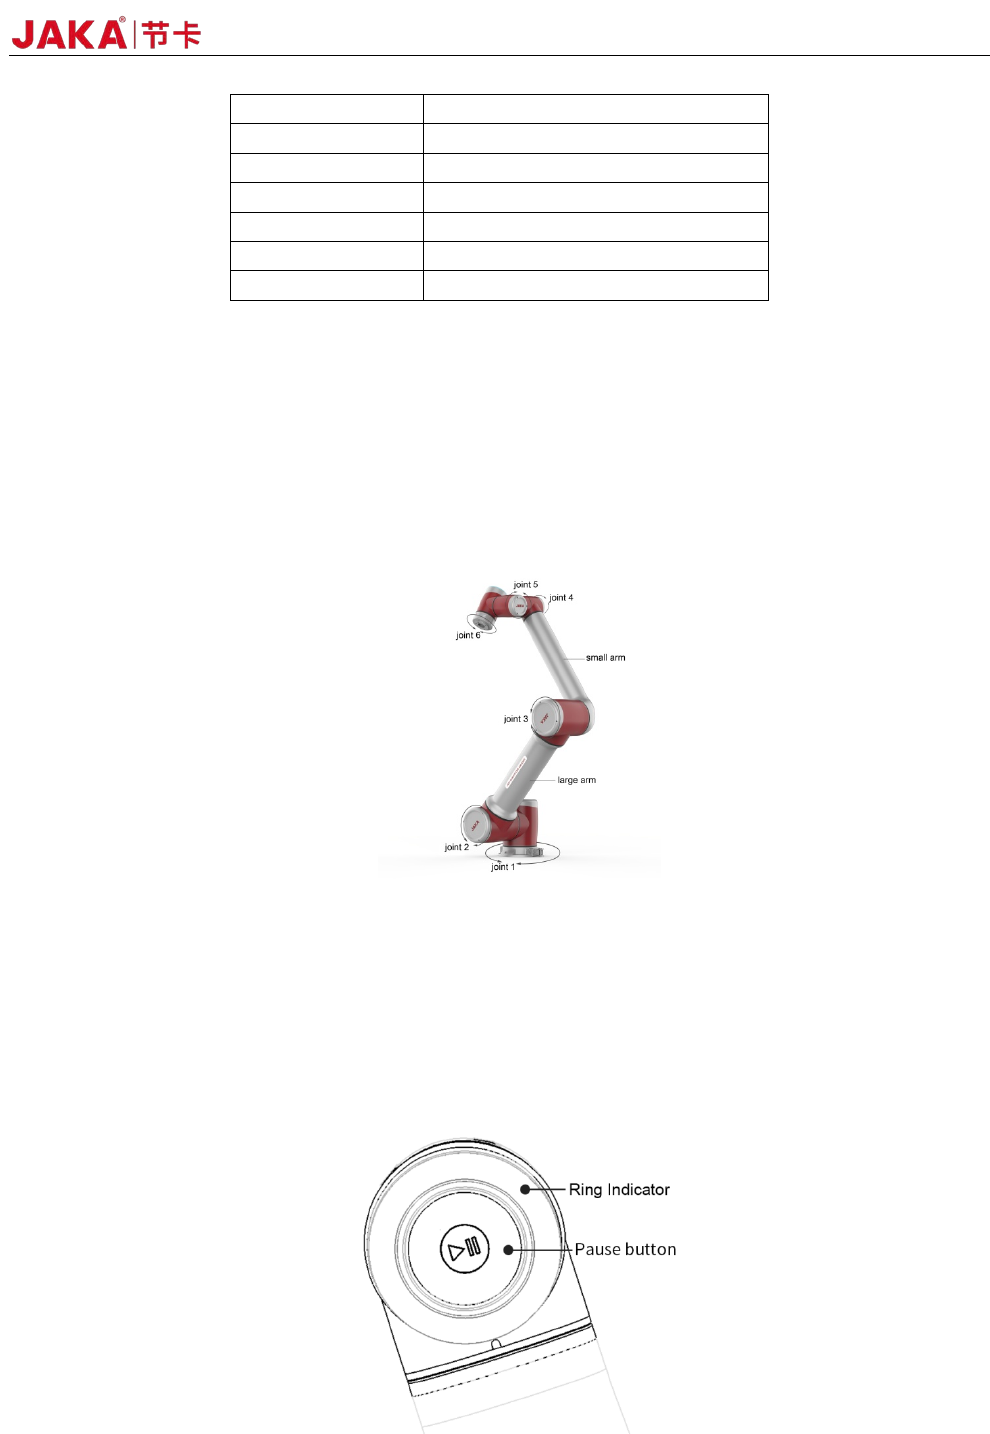
2.3 Robot Arm
The robot arm is shown as Fig 2-1, and is composed of six rotation joints with two linkages. And at the end
of the arm,a ring indicator, buttons used to drag and tech, TIO interface are located.
Fig
2-1 Robot Arm
2.3.1 Robot End
At the end of the robot, an indicator and apause button is located.
The indicator and the pause button is located as Fig 2-2 and the meanings of different color are listed in
table 2-2. When the robot is running program, press the pause button could pause and resume the program.
Fig 2-2 Ring Indicator and Pause Button