JAKA Zu 12及JAKA Zu 12 pro -电控柜V2.1-硬件手册(英文版).pdf - 第17页
12 JAKA Zu 12 v 1.0 Color Robot St atus Blue Power on Green Enabled Red Falut Ye l l o w Drag Mode Flashing Ye l l o w Pause Mode T able 2 - 2 Indicator Meanin gs W ar nings: The risks related to using of pause butt on s…
JAKA Zu 12 v1.0 11
Terminal Type Tablet PC
OS Android 8.0 or above
CPU Kirin695or Snapdragon 660
ROM 32GB
RAM 4GB
Screen Size 8.0 inch
Network WIFI
Table2-1 Operation Terminal Required Hardware Configurations
The operation terminal can be requested during purchasing or provided by user themselves.
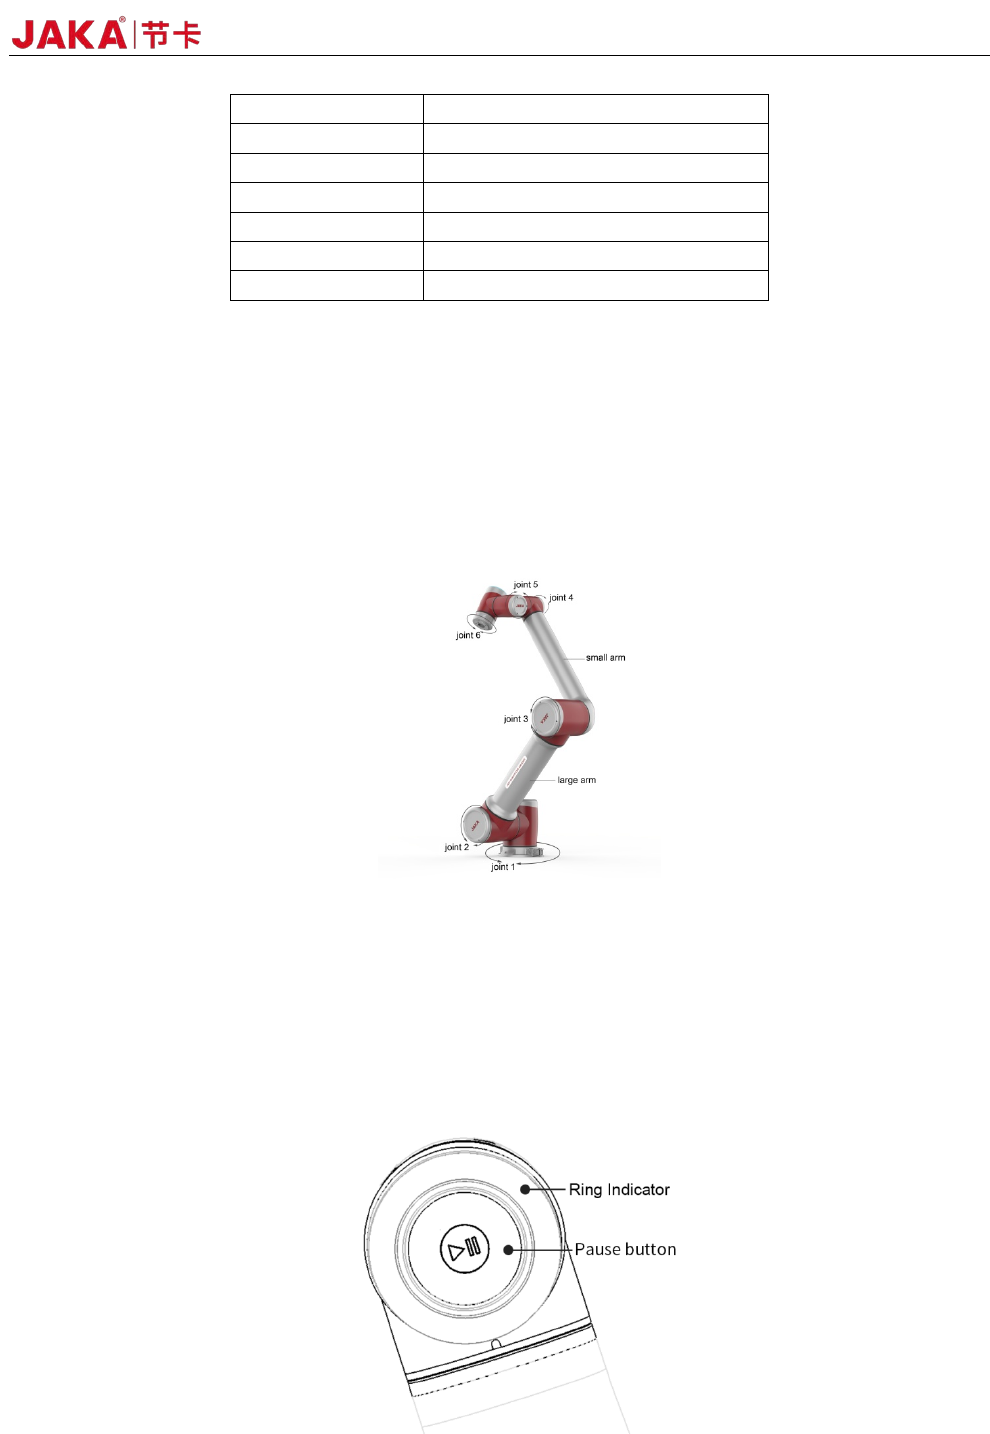
2.3 Robot Arm
The robot arm is shown as Fig 2-1, and is composed of six rotation joints with two linkages. And at the end
of the arm,a ring indicator, buttons used to drag and tech, TIO interface are located.
Fig
2-1 Robot Arm
2.3.1 Robot End
At the end of the robot, an indicator and apause button is located.
The indicator and the pause button is located as Fig 2-2 and the meanings of different color are listed in
table 2-2. When the robot is running program, press the pause button could pause and resume the program.
Fig 2-2 Ring Indicator and Pause Button
12 JAKA Zu 12 v1.0
Color Robot Status
Blue Power on
Green Enabled
Red Falut
Yellow Drag Mode
Flashing
Yellow
Pause Mode
Table 2-2 Indicator Meanings
Warnings:
The risks related to using ofpause button should be evaluated carefully, the contact of robot and personnel
could cause server injury of personnel or damage of equipment.
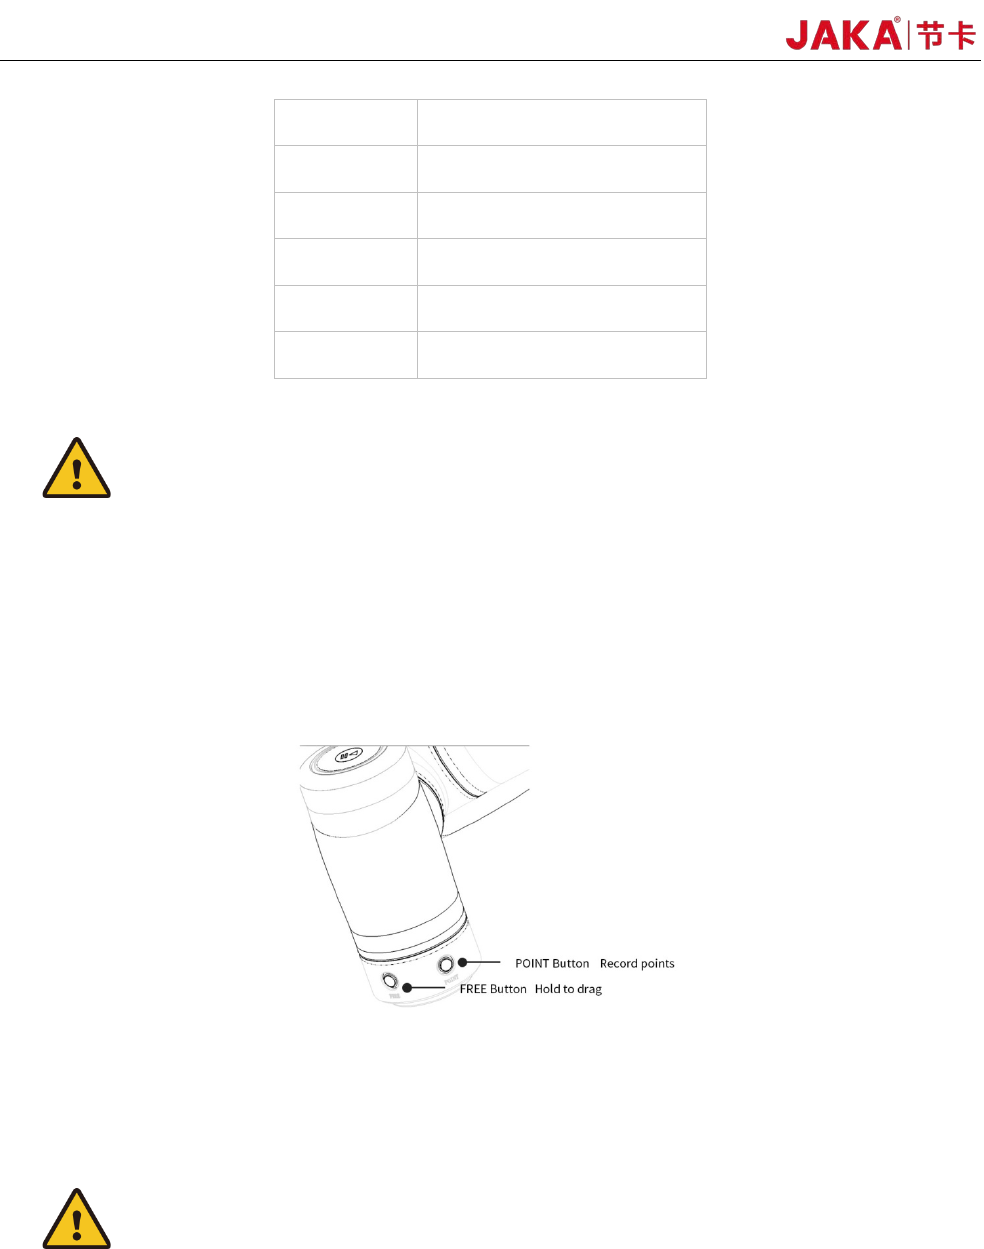
2.3.2 Flange Buttons and interfaces
On the side of flange located two buttons and TIO interface.The buttons are FREE button and POINT
button Respectively, shown as below:
The detailed description of TIO is in chapter 4.
When the free button is pressed, the robot would enter free-drive mode.
The point button could be used with the robot APP, and when this button is pressed the robot positon
would be recorded in the APP.
Warnings:
The risks related to using of pause button should be evaluated carefully, the playload、TCP setting should
be set properly, otherwise the contact of robot and personnel could cause server injury of personnel or
damage of equipment.
2.4 Electrical Cabinet and Control Stick
The cabinet of JAKA Zu Robots contains several kinds of interfaces which are described in chapter 4.
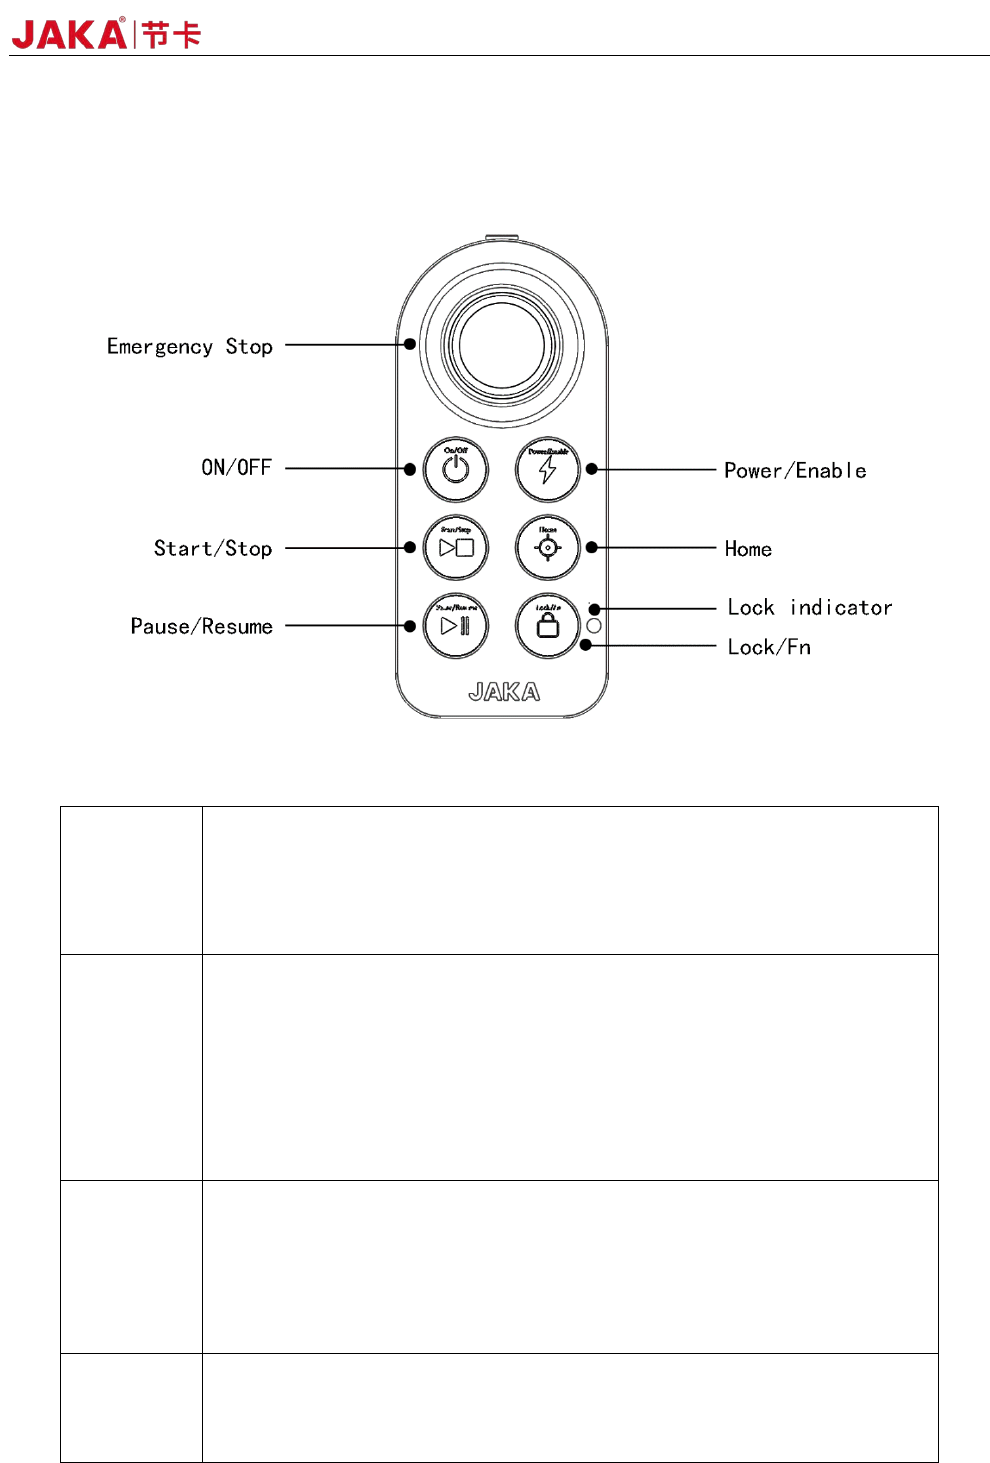
JAKA Zu 12 v1.0 13
Along with the cabinet a stick is provided, and when the programming job is finished , the stick could be
sued to control the robot.
Commands can be sent to the robot using buttons on thestick, and are described as follows:
Fig 2-3 St
ick Function Description
ON/
OFF
ON:Press the power button for 1 second and release it, The buzzer will ring
and the electric control cabinet will start up.
OFF:Press and hold the power button for more than 3s, the handle buzzers
6~7 times, and the electric control cabinet is turned off.
Power/
Enable
Turn on robot:When robot turned off, short press the button to turn on the
robot.
Turn off robot:When robot turned on, short press the button to turn off the
robot.
Enable robot
:When robot turned on, short press the lock button a nd
enable button.
Disable robot
:When robot enabled, short press the lock button + enable
button
Start/
Stop
Run program: press the terminate button to start the default loaded
program. After robot moves to the initial position of the program, execute the
default program .
Terminate program: Whenprogram operating, short press the button to
terminate the program.
Home
Reset:After robot enabled, when no program is operating, press
continuously to control the robot to run to the set default position. When robot
moves to the default position, press continuously and the lock indicator light is