Installation_Manual_SIPLACE_Explorer_2.4_EN.pdf - 第59页
Installation and Configuration Guide SIPLACE Explorer 4 Configuration Edition 08/2008 EN 4.1 Standard Monitoring Application (SMA) 59 4.1.1.2 Step 1 - Edit Line List → Crea te the releva nt product ion line(s) he re. 4 F…
4 Configuration Installation and Configuration Guide SIPLACE Explorer
4.1 Standard Monitoring Application (SMA) Edition 08/2008 EN
58
4.1.1.1 Starting Line Configuration
→ Open Line Configuration.
Proceed by selecting Programs → SIPLACE Explorer 2.4 → Line Configuration from the
menu in Windows or by clicking on the icon in the console. Right-click with the mouse to
select the Line Configuration menu.
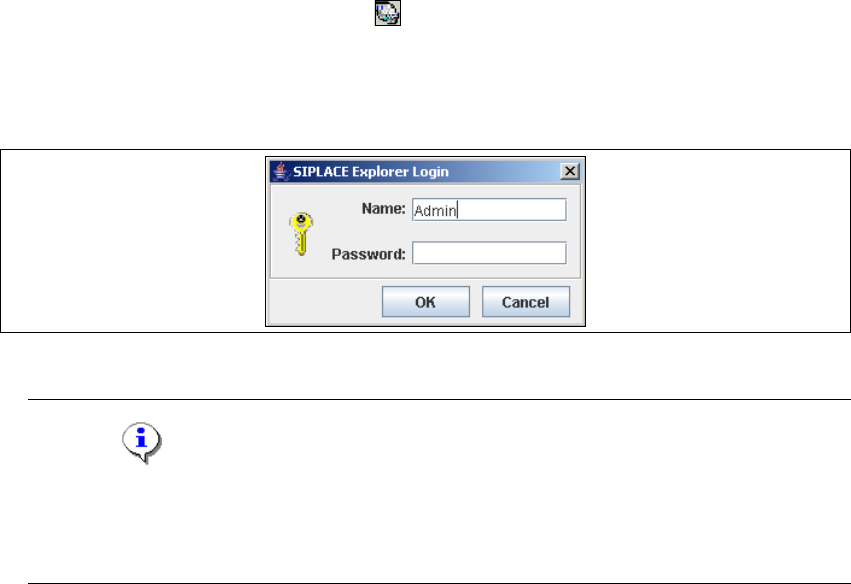
→ When you first start the Line Configuration, the login dialog box will open. Register yourself
as a default user with "Admin" or "Operator" and leave the password field empty.
4
Fig. 4 - 1 SIPLACE Explorer login
NOTE
Access to the Runtime Environment tools is restricted or permitted as required, by using the
SE Security Manager. For details of the relevant settings in the SE Security Manager, refer
to the Getting Started for SIPLACE Explorer 2.4. 4
→ The Line Configuration dialog box will open. This is the first step of the line configuration
process.
Installation and Configuration Guide SIPLACE Explorer 4 Configuration
Edition 08/2008 EN 4.1 Standard Monitoring Application (SMA)
59
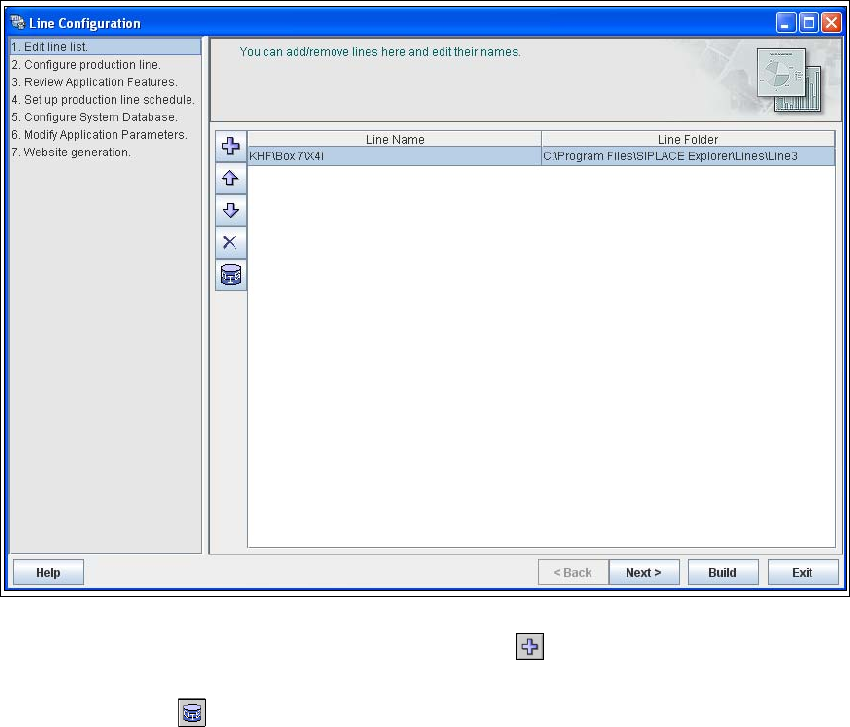
4.1.1.2 Step 1 - Edit Line List
→ Create the relevant production line(s) here.
4
Fig. 4 - 2 Step 1: edit line list
→ New production lines can be created with the Add line icon.
→ An existing production line can be imported with the OIS import function. Simply click on the
OIS Import icon .
4 Configuration Installation and Configuration Guide SIPLACE Explorer
4.1 Standard Monitoring Application (SMA) Edition 08/2008 EN
60
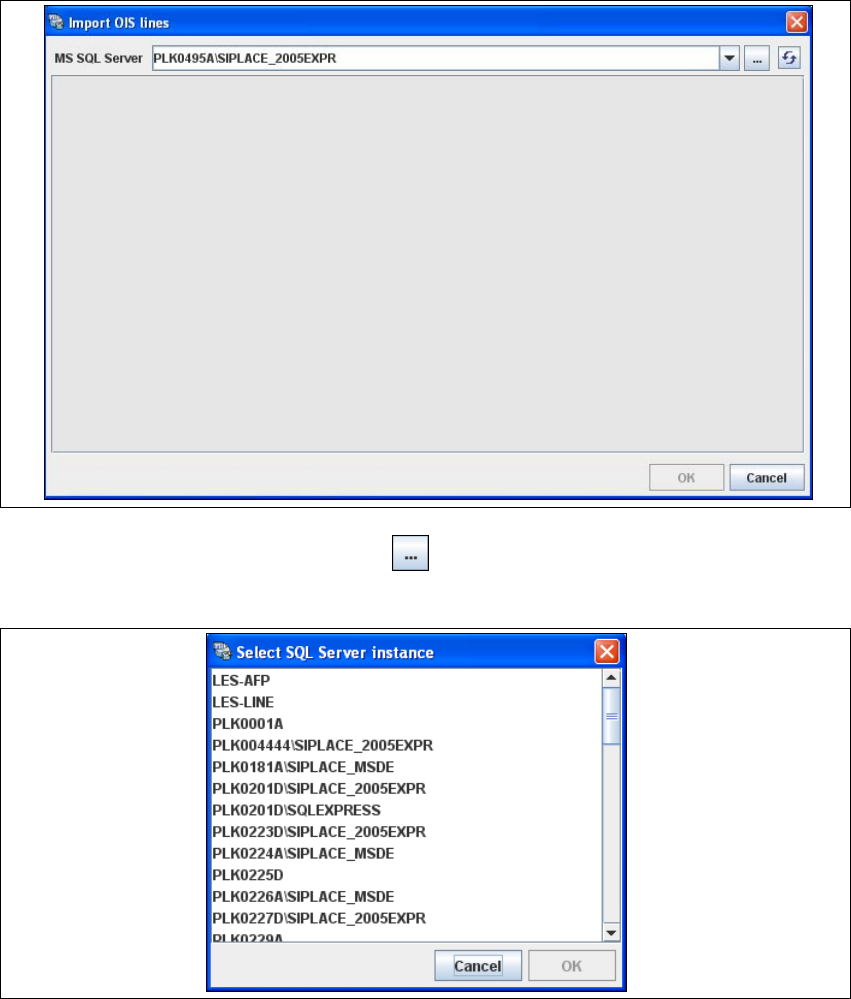
→ The Import OIS Lines dialog box will open.
4
Fig. 4 - 3 Step 1: import OIS lines
→ Click on the Browse for SQL instances icon. All SQL server instances available will be
shown in the Select SQL Server instance dialog box.
4
Fig. 4 - 4 Step 1: Select SQL Server instance
→ Select the required SQL server instance and confirm with OK. You will be taken back to the
Import OIS Lines dialog box.