M3_MaintenanceManual_e.pdf - 第40页
Chapter 4 How to r eplace consumable par ts T able of Contents 1. Nozzle leaf springs . . . . . . . . . . . . . . . . . . . . . . . . . . . . . . 4-1 2. Ejector valves . . . . . . . . . . . . . . . . . . . . . . . . . . …
3-12
3
Periodic maintenance items
4
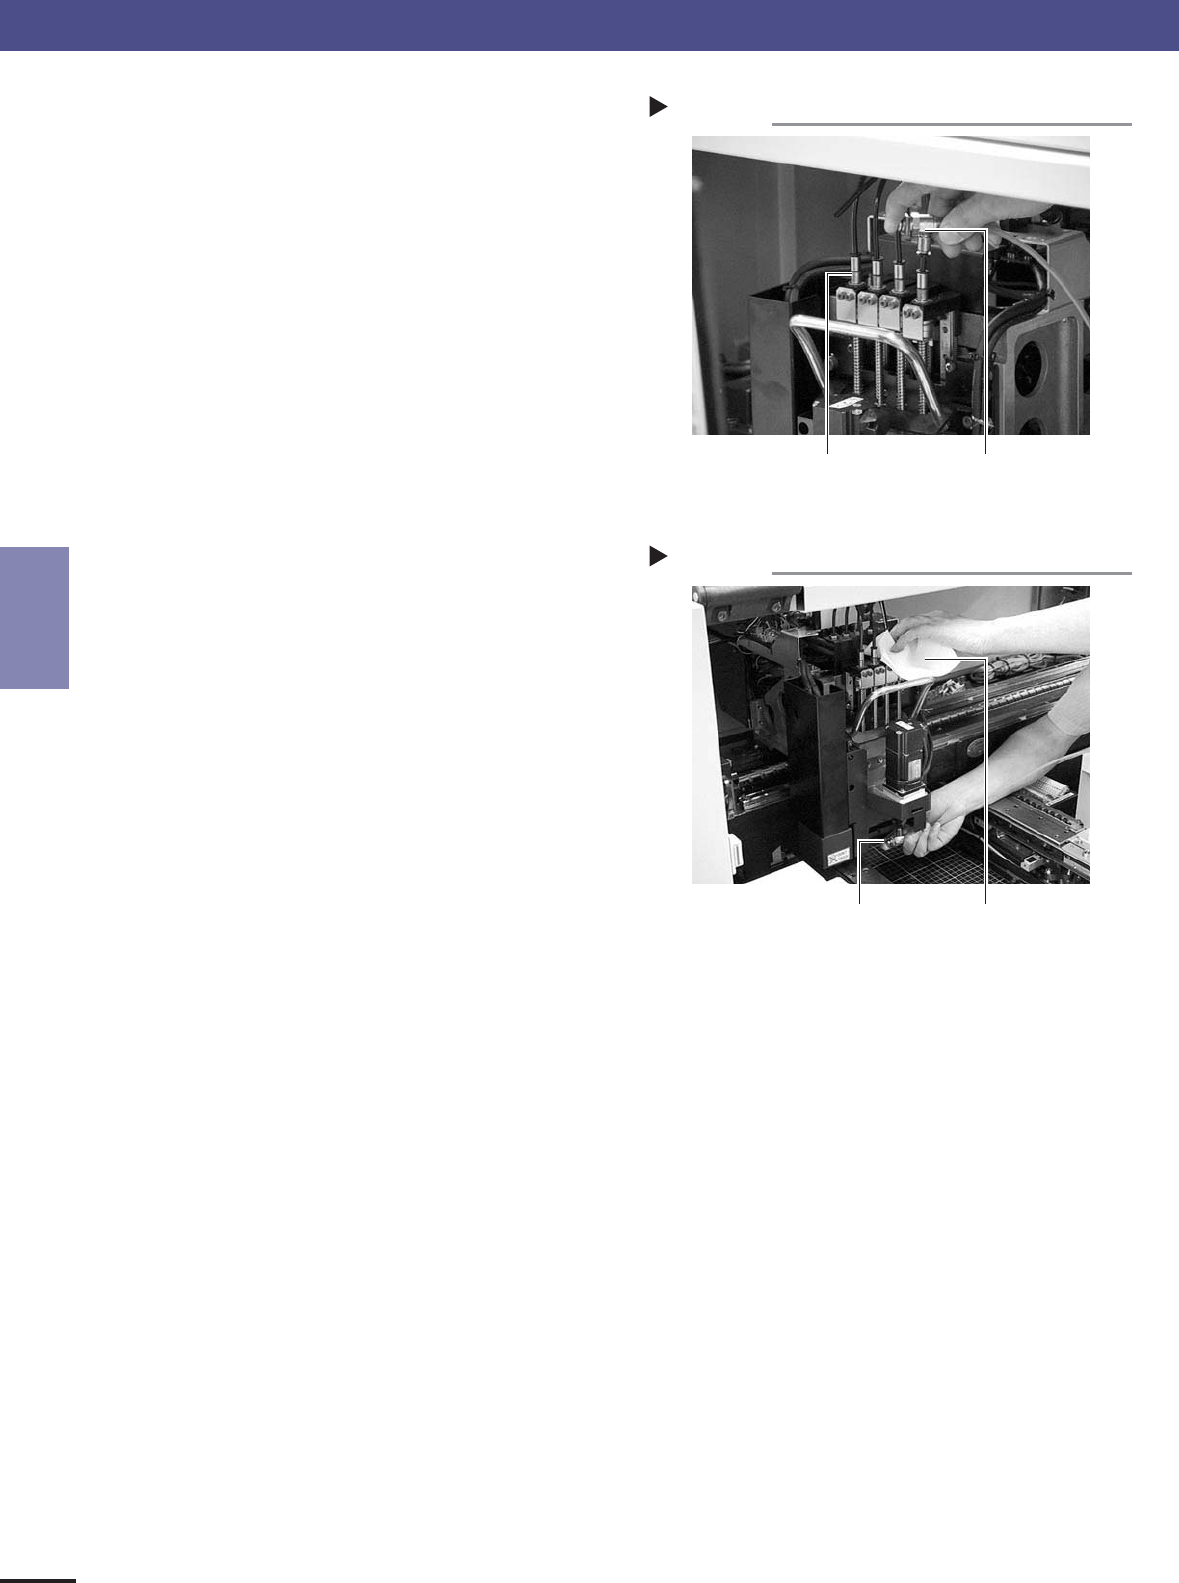
Blow air into the spline from the top.
After cleaning with alcohol, insert the air blow gun
into the air joint blow air while placing cloth just
under the lower end of the head.
43312-E5-00
5
Blow air into the spline shaft from the
bottom.
Insert the air blow gun into the nozzle holder, and
blow air while placing cloth over the air joint at the
top of the alpine shaft.
43313-E5-00
6
Check the vacuum level.
On the operation display, open the [Unit]-[Head]
tab screen and press the [Vacuum] button to
generate a vacuum. Then check the current
vacuum level shown on the screen. When this
value is smaller than 80, cleaning of the spline shaft
is satisfactory.
Blowing air from the top
Step 4
Air blow gun
Air joint
Blowing air from the bottom
Step 5
Cleaning paper or cloth
Air blow gun
3. 6-month inspection

Chapter 4
How to replace consumable parts
Table of Contents
1. Nozzle leaf springs . . . . . . . . . . . . . . . . . . . . . . . . . . . . . . 4-1
2. Ejector valves . . . . . . . . . . . . . . . . . . . . . . . . . . . . . . . . 4-2
3. Conveyor belt . . . . . . . . . . . . . . . . . . . . . . . . . . . . . . . . 4-3
4-1
How to replace consumable parts
4
1. Nozzle leaf springs
1
Press the emergency stop button.
e
The machine must be in emergency stop to ensure
safety during work.
2
Remove the nozzle.
Remove the nozzle attached to the leaf springs to
be replaced, by pulling it downwards by hand.
3
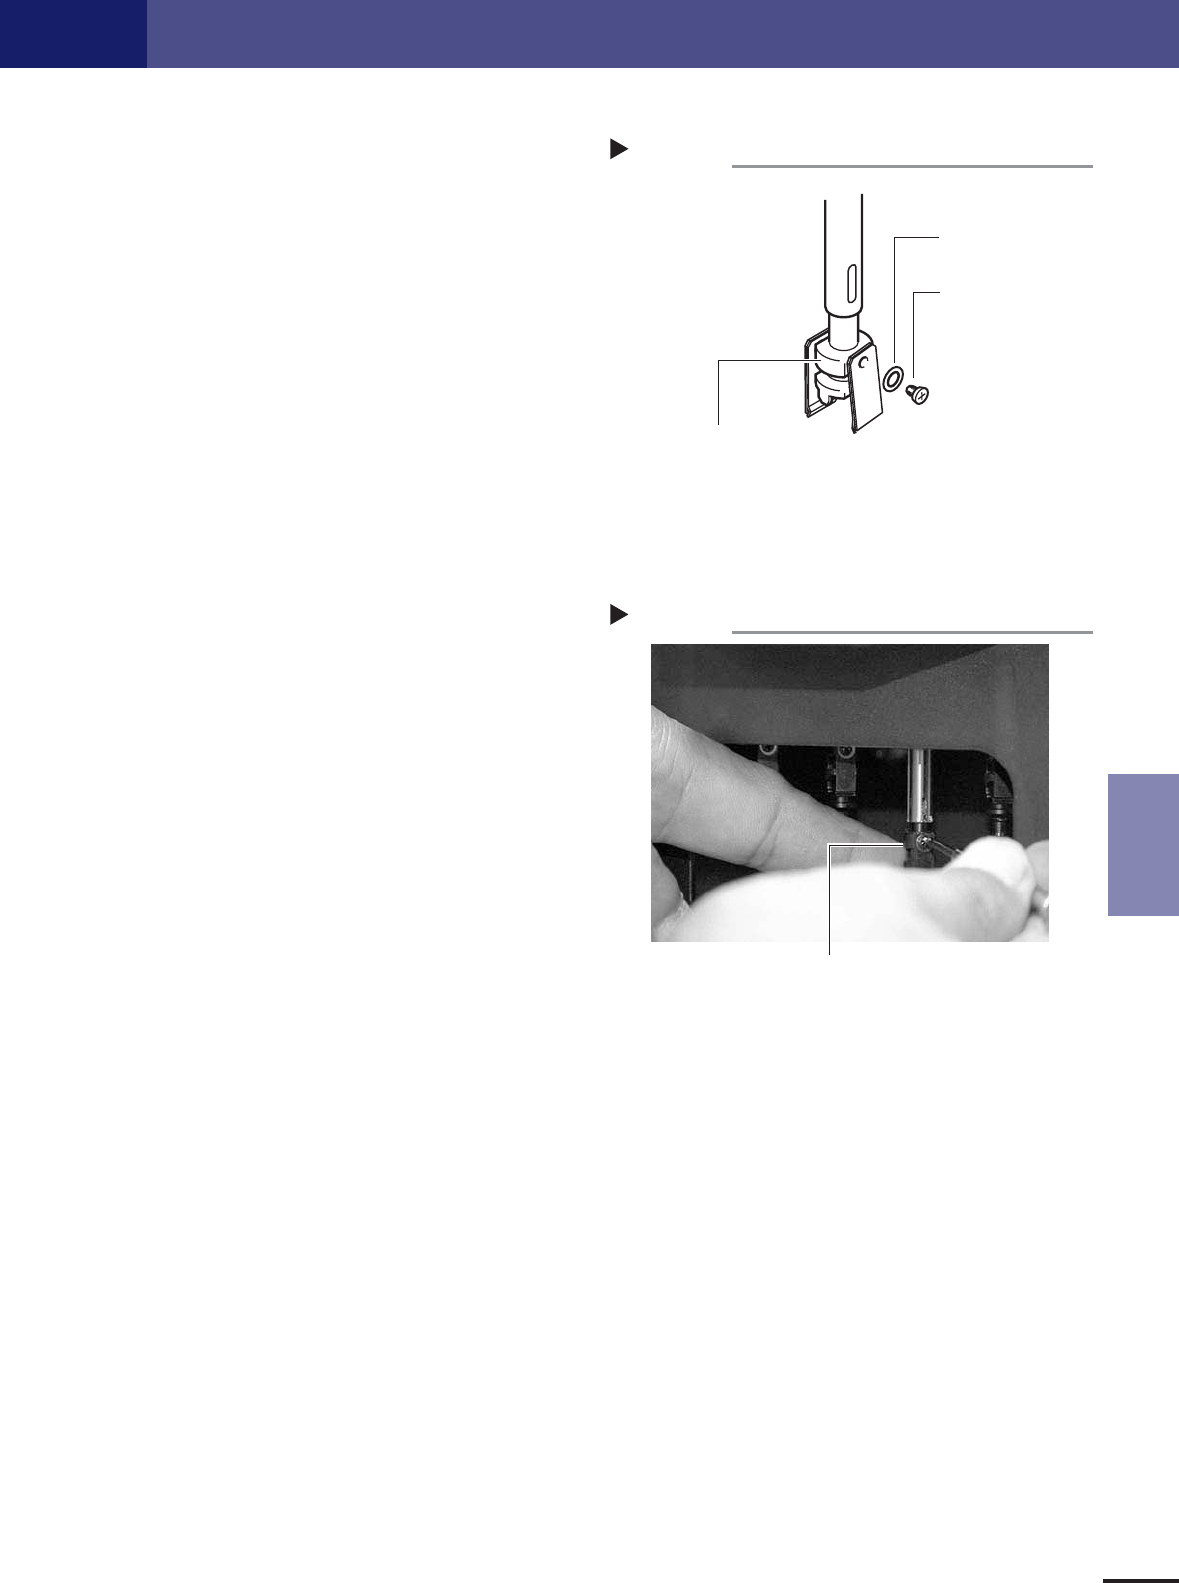
Remove the leaf springs.
Use a Phillips precision screwdriver to loosen the
screws securing the defective leaf springs and
remove the leaf springs from the nozzle holder.
43400-E5-00
4
Attach new leaf springs.
While pressing the new leaf spring up against the
nozzle holder, tighten the screw with the Phillips
precision screwdriver to assemble the leaf spring.
At this point, do not forget to fit the washer.
43401-E5-00
5
Check the assembled condition.
1. Check the gap between the leaf springs and
nozzle.
2. Attempt detaching and attaching a nozzle
several times to check that there is no
looseness.
Removing leaf springs
Step 3
Nozzle leaf spring
mounting washer
Nozzle holder
Nozzle leaf spring
mounting screw
Attaching leaf springs
Step 4
While pressing here, tighten the screw.