O_03._DE68_04547E_03_IB_FULL_MW3500K_MS23K3513AK_SP_EN_061025.pdf - 第11页
English 11 Oven use Setting the time When power is supplied, 88:88 and then 12:00 is au tomatically displayed on the display . Please set the current time . The time can be displayed in either the 24-hour or 12- hour not…
10 English
Oven use
Oven use
How a microwave oven works
Microwaves are high-frequency electromagnetic waves; the energy released
enables food to be cooked or reheated without changing either the form or the
colour.
You can use your microwave oven to:
• Defrost
• Reheat
• Cook
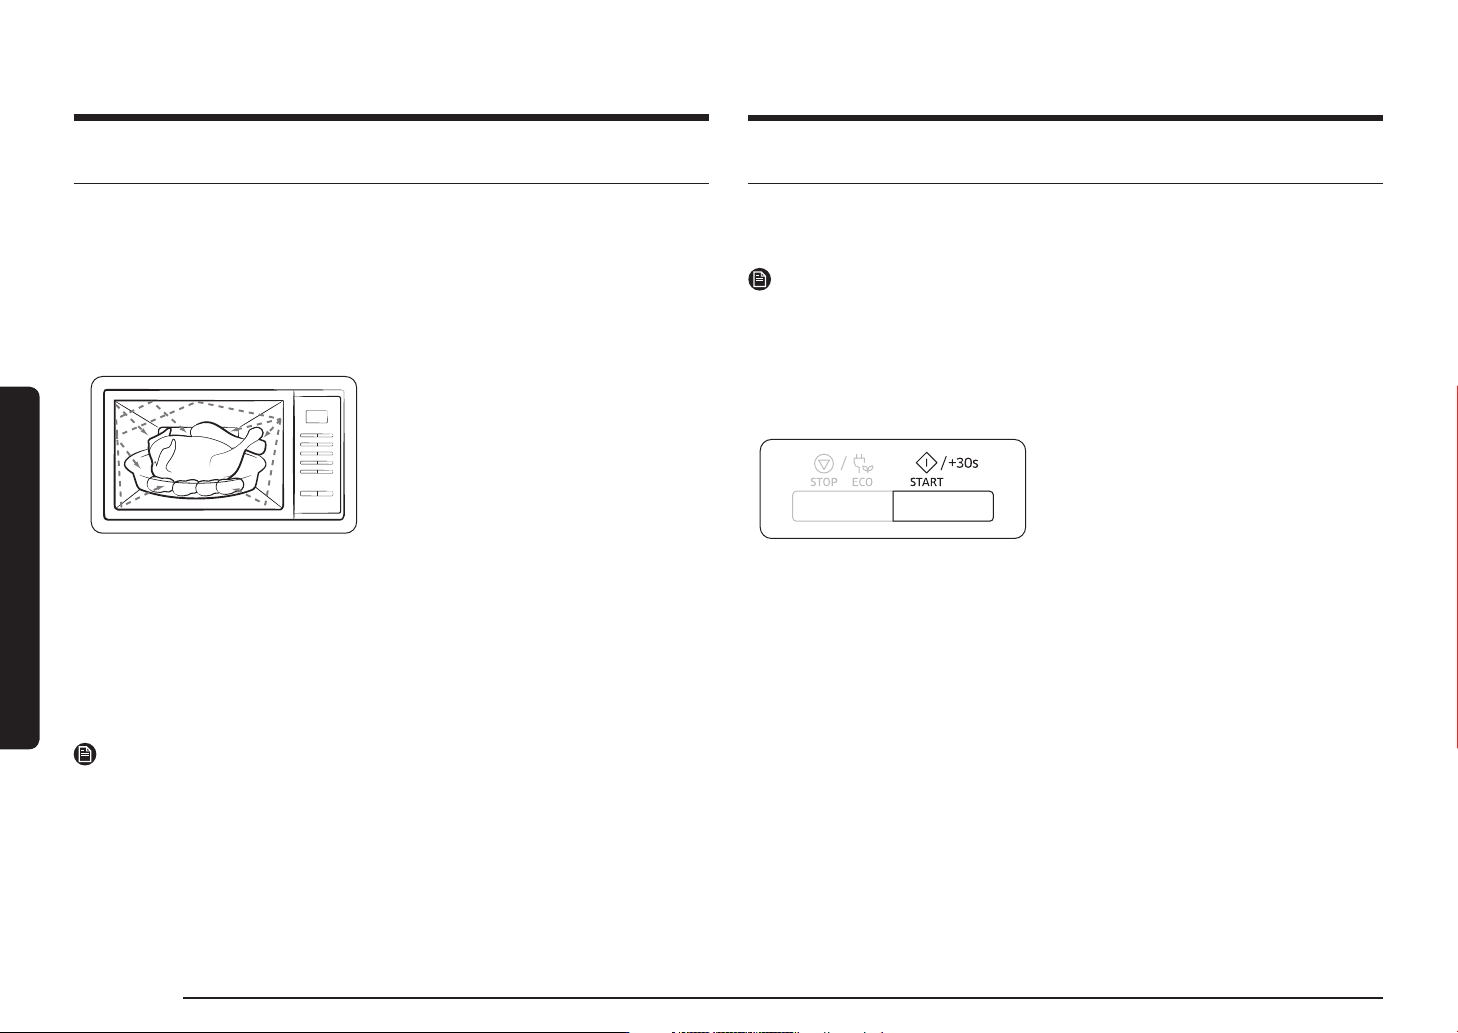
Cooking principle.
1. The microwaves generated by the
magnetron reflected at cavity and
are distributed uniformly as the food
rotates on the turntable. The food is
thus cooked evenly.
2. The microwaves are absorbed by the
food up to a depth of about 1 inch
(2.5 cm). Cooking then continues as the
heat is dissipated within the food.
3. Cooking times vary according to the
container used and the properties of the
food:
• Quantity and density
• Water content
• Initial temperature (refrigerated or
not)
NOTE
As the centre of the food is cooked by heat dissipation, cooking continues even when
you have taken the food out of the oven. Standing times specified in recipes and in
this booklet must therefore be respected to ensure:
• Even cooking of the food right to the centre.
• The same temperature throughout the food.
Checking that your oven is operating correctly
The following simple procedure enables you to check that your oven is
working correctly at all times. If you are in doubt, refer to the section entitled
Troubleshooting on the pages 21 to 23.
NOTE
The oven must be plugged into an appropriate wall socket. The turntable must be
in position in the oven. If a power level other than the maximum (100 % - 800 W)
is used, the water takes longer to boil.
Open the oven door.
Place a glass of water on the turntable. Close the door.
Press the START/+30s button and set the
time to 4 or 5 minutes, by pressing the
START/+30s button the appropriate number
of times.
The oven heats the water for 4 or 5
minutes.
The water should then be boiling.
English 11
Oven use
Setting the time
When power is supplied, 88:88 and then 12:00 is automatically displayed on the
display.
Please set the current time. The time can be displayed in either the 24-hour or 12-
hour notation. You must set the clock:
• When you first install your microwave oven
• After a power failure
NOTE
Do not forget to reset the clock when you switch to and from summer and winter
time.
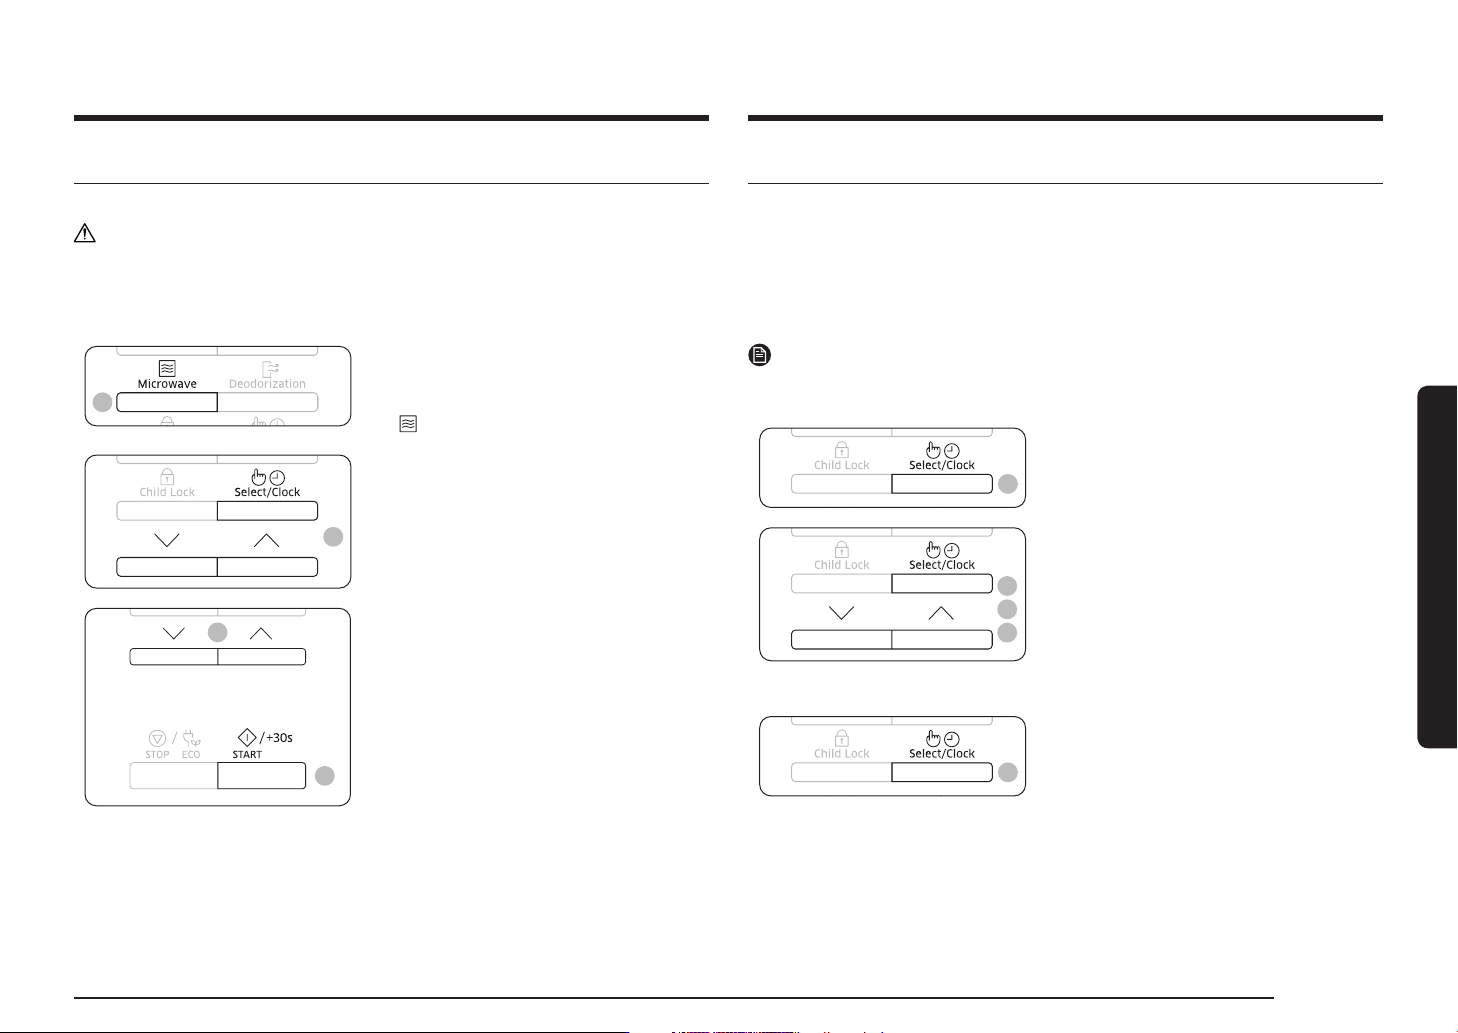
1
1. Press the Select/Clock button.
4
3
2
2. Set the 24-hour or 12-hour notation by
pressing the Up or Down button. And
then press the Select/Clock button.
3. Press the Up or Down button to set the
hour. And then press the Select/Clock
button.
4. Press the Up or Down button to set the
minute.
5
5. When the right time is displayed, press
the Select/Clock button to start the
clock.
The time is displayed whenever you are
not using the microwave oven.
Cooking/Reheating
The following procedure explains how to cook or reheat food.
CAUTION
ALWAYS check your cooking settings before leaving the oven unattended.
Open the door. Place the food in the centre of the turntable. Close the door. Never
switch the microwave oven on when it is empty.
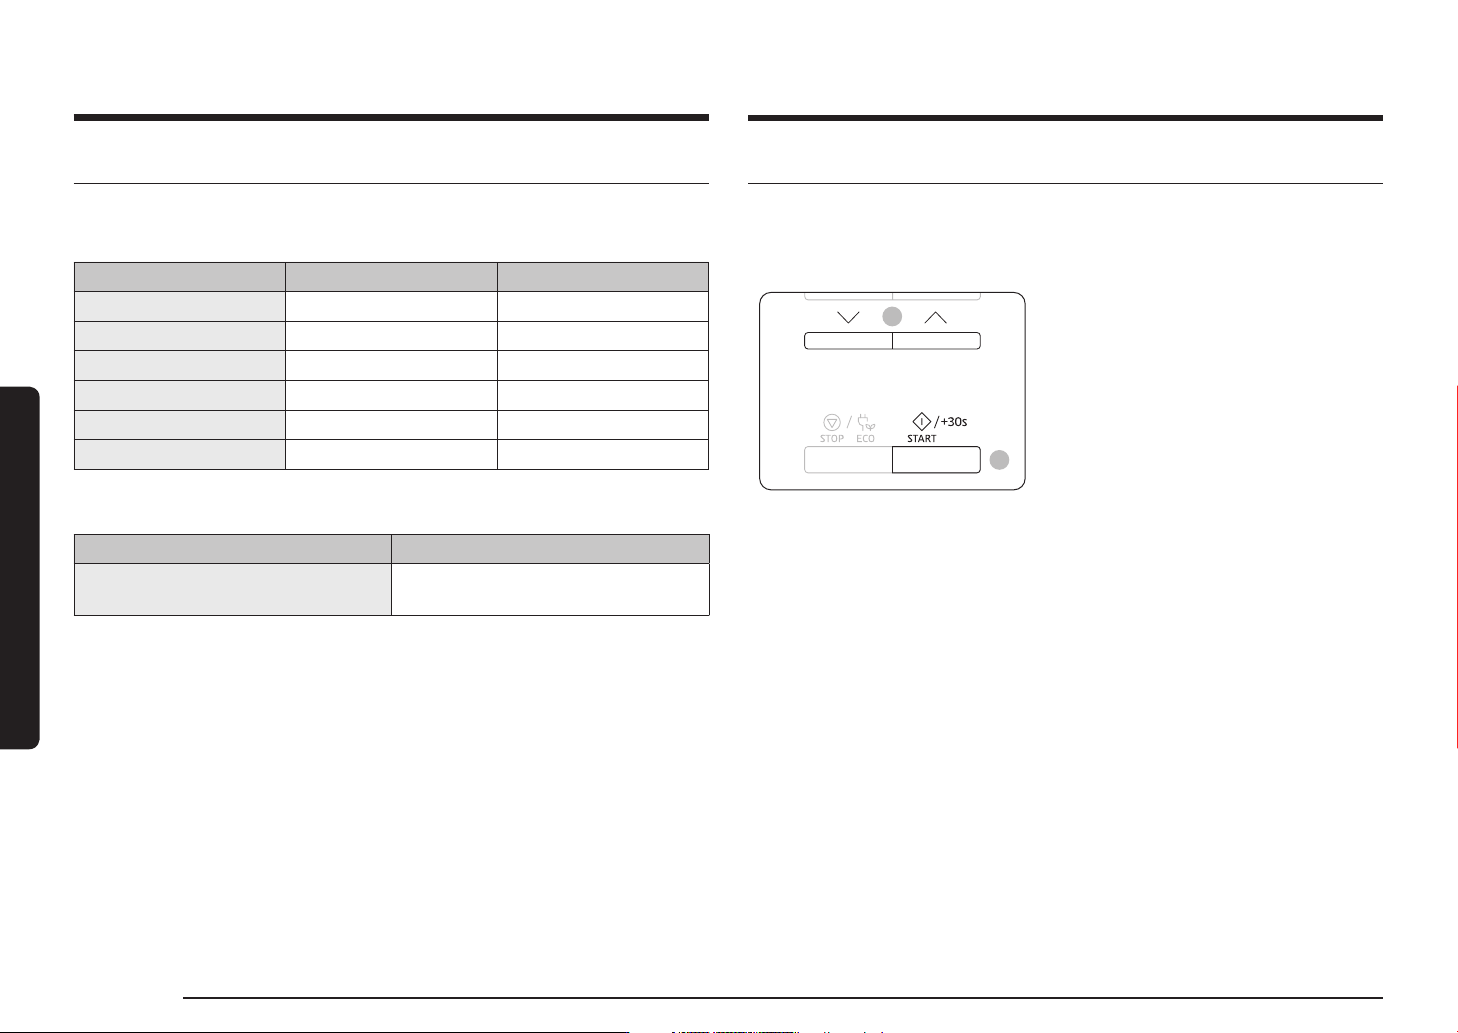
1
1. Press the Microwave button.
The 800 W (Maximum cooking power)
indications are displayed:
(microwave mode)
2
2. Select the appropriate power level by
pressing the Up or Down button. (Refer to
the power level table.) And then press the
Select/Clock button.
4
3
3. Set the cooking time by pressing the Up
or Down button.
The cooking time is displayed.
4. Press the START/+30s button.
The oven light comes on and the
turntable starts rotating. Cooking starts
and when it has finished.
1) The oven beeps 4 times.
2) The end reminder signal will beep
3 times (once every minute).
3) The current time is displayed again.
12 English
Oven use
Oven use
Power levels and time variations
The power level function enables you to adapt the amount of energy dissipated
and thus the time required to cook or reheat your food, according to its type and
quantity. You can choose between six power levels.
Power level Percentage Output
HIGH 100 % 800 W
MEDIUM HIGH 75 % 600 W
MEDIUM 56 % 450 W
MEDIUM LOW 38 % 300 W
DEFROST 23 % 180 W
LOW 13 % 100 W
The cooking times given in recipes and in this booklet correspond to the specific
power level indicated.
If you select a... Then the cooking time must be...
Higher power level
Lower power level
Decreased
Increased
Adjusting the cooking time
You can increase the cooking time by pressing the START/+30s button once for
each 30 seconds to be added.
• Check how cooking is progressing at any time simply by opening the door
• Increase the remaining cooking time
1
2
Method 1
To increase the cooking time of your food
during cooking, press the START/+30s
button once for each 30 seconds that you
wish to add.
• Example: To add three minutes, press
the START/+30s button six times.
Method 2
Just pressing the Up or Down button to
adjust cooking time.