Printer 710_810 v8 Adjustable Screen Mount.pdf - 第9页
ADJUSTA BLE SCREEN MOUN T (ASM) REPLACEMENT PROCEDURES Chapter Issue 7 Oct 06 Technical Reference Manual 12.9 REPLACEMENT PROCEDURES Chase Rail Assembly WARNING BOARD CLAMPS. EXTREME CAR E MUST BE EXERCISED WHEN W ORKING…
ADJUSTABLE SCREEN MOUNT (ASM)
ADJUSTMENTS AND SETTINGS
12.8 Technical Reference Manual Chapter Issue 7 Oct 06
Auto Screen Loader
Screen Position
Sensor
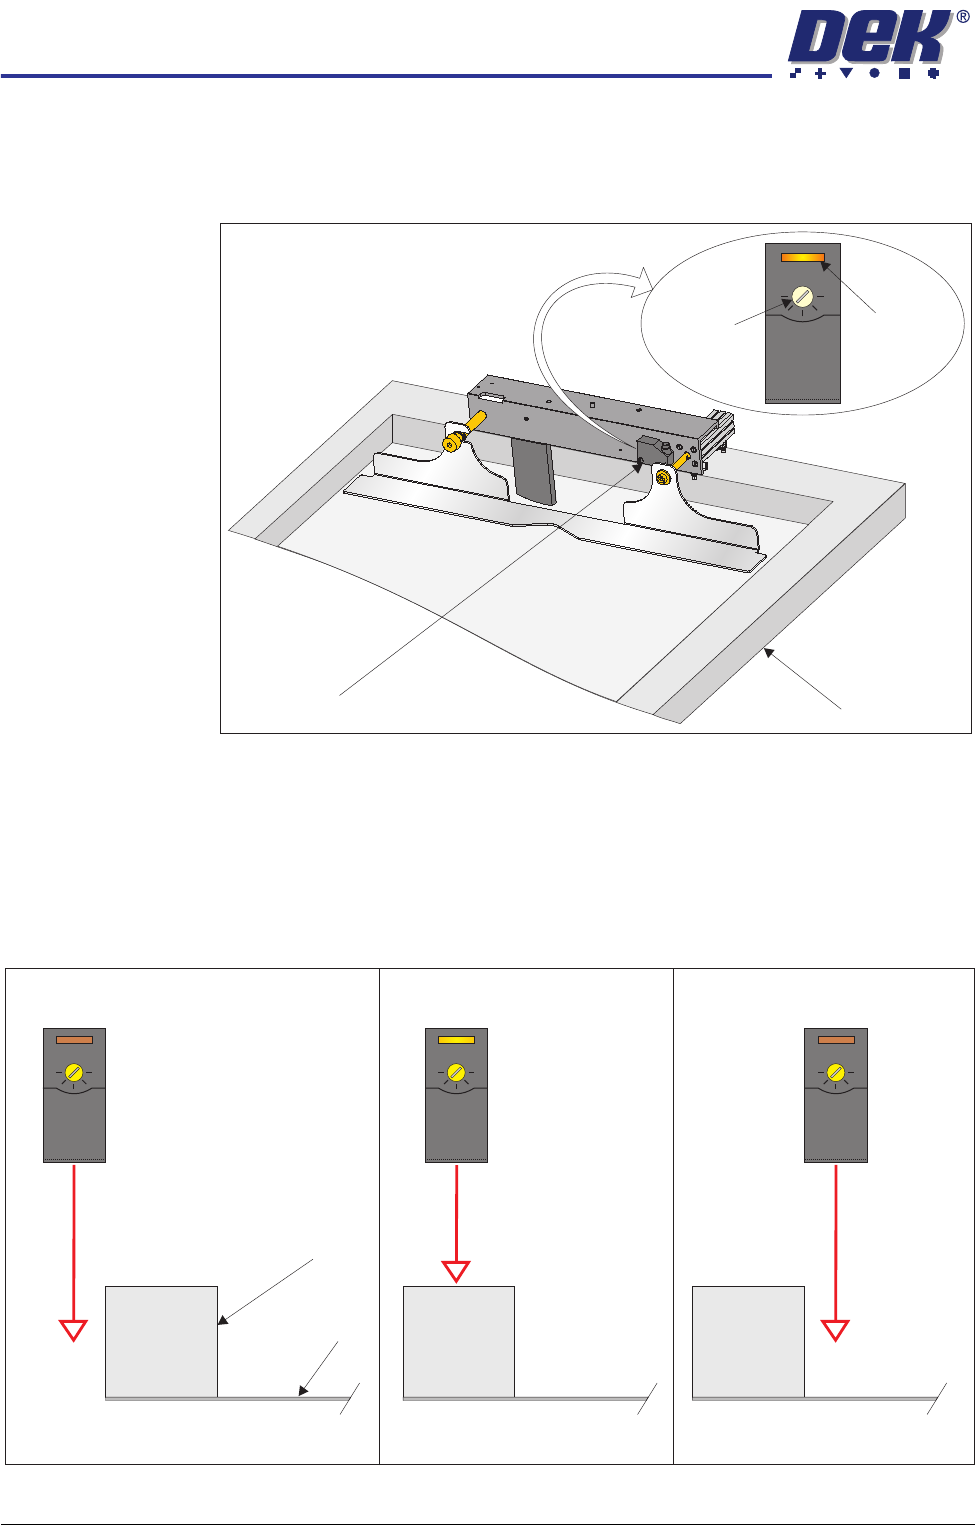
1. Position a screen in the machine so the rear screen frame is beneath the
screen position sensor.
2. Using a potentiometer trimming tool adjust the sensor sensitivity anti-
clockwise until the sensor test LED extinguishes.
3. Turn the sensor sensitivity clockwise until the sensor test LED illuminates.
4. Turn the sensor sensitivity clockwise a further half turn.
5. Move the rear screen frame backwards and forwards under the sensor to
ensure that the test LED is only activated by the screen frame.
Screen Frame
Screen Position Sensor
Adjuster
Test LED
+
-
+
-
+
-
+
-
Sensor Behind Screen Sensor Over Screen Frame Sensor Over Screen
Test LED Off Test LED On Test LED Off
Screen
Screen Frame
ADJUSTABLE SCREEN MOUNT (ASM)
REPLACEMENT PROCEDURES
Chapter Issue 7 Oct 06 Technical Reference Manual 12.9
REPLACEMENT PROCEDURES
Chase Rail Assembly
WARNING
BOARD CLAMPS. EXTREME CARE MUST BE EXERCISED WHEN WORKING IN
THE TOOLING AREA OF THE MACHINE TO AVOID INJURY. THE FOILS ON THE
FRONT AND REAR BOARD CLAMPS ARE VERY SHARP.
WARNING
COMPRESSED AIR. COMPRESSED AIR SHOULD NEVER IMPINGE UPON THE
BODY. PORTS, PIPES, ETC MUST NEVER BE BLOCKED BY HAND. BEFORE
CONNECTING ANY PNEUMATIC EQUIPMENT TO A COMPRESSED AIR SUPPLY,
ALL MOUNTINGS, FITTINGS, PIPEWORK AND ELECTRICAL CONNECTIONS
SHOULD BE REMOVED FOR SAFETY. NO PIPEWORK ALTERATIONS OR
REMOVAL OF FITTINGS SHOULD BE ATTEMPTED WITH AIR SUPPLIES
CONNECTED.
Removal 1. Open the front printhead cover/shutter and centralise the chase rail assem-
blies.
2. Power down the machine and disconnect the pneumatic supply to the
machine.
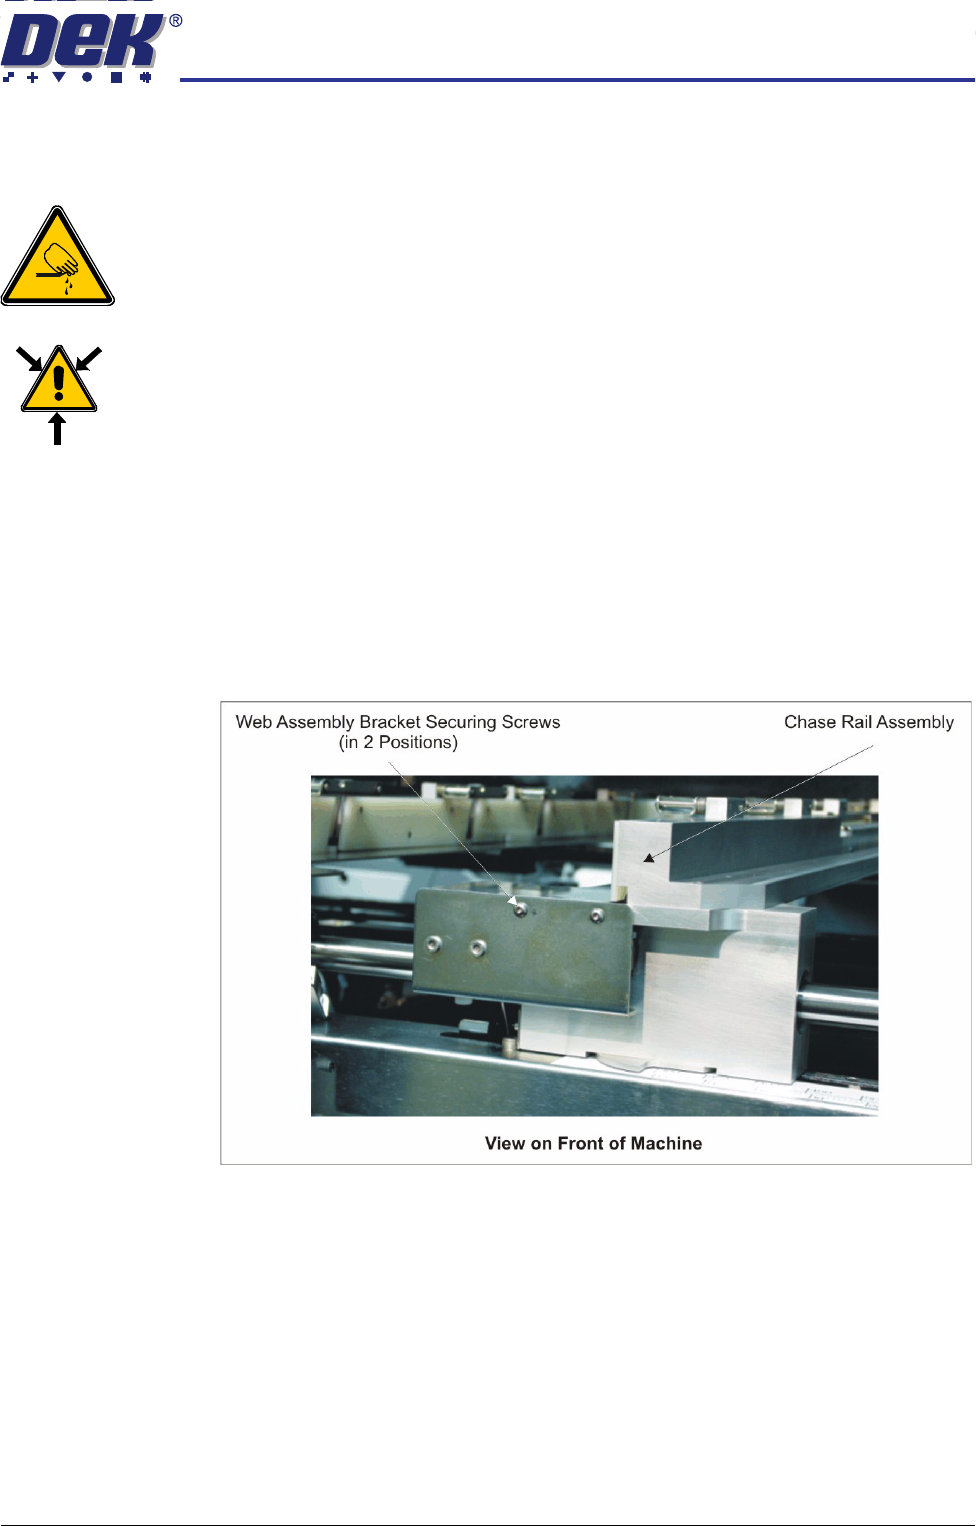
3. Remove the two web assembly bracket securing screws.
4. Tilt the web bracket forward to expose the pneumatic pipes.
ADJUSTABLE SCREEN MOUNT (ASM)
REPLACEMENT PROCEDURES
12.10 Technical Reference Manual Chapter Issue 7 Oct 06
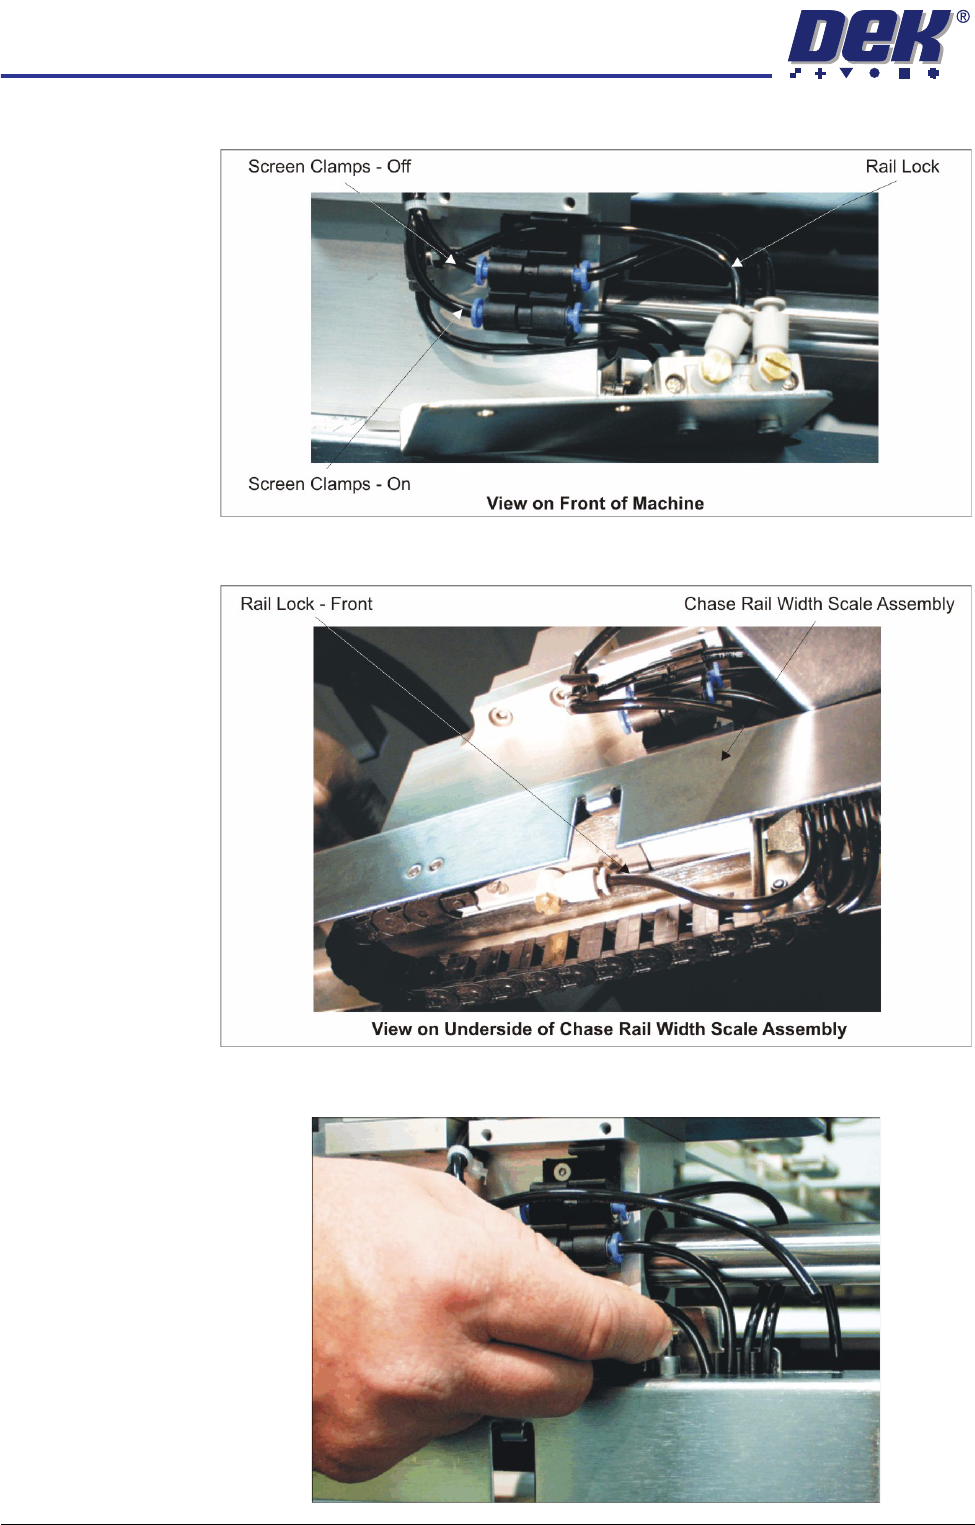
5. Disconnect the following pneumatic pipes shown in the graphic below:
6. Disconnect from the underside of the chase rail width scale assembly the
pneumatic pipe marked Rail Lock - Front.
7. Uncouple from the tube clip the pneumatic supply pipe to the Rail Lock -
Front (disconnected in Step 6).