YSM40 Mainte_E.pdf - 第109页
3-41 3 Periodic maintenance items 5. One-year inspection n When carr ying out inspection without removing the head e T akethefollowingprecautionstocarryoutinspection. 1. T akeoffthewristwatch,magneticIDcar…
3-40
3
Periodic maintenance items
4.1.4 Side-view camera (HS head)
Thelightdiffuserplate(springholder)andmirroroftheside-viewcameraareattachedtothehead.Sincethelightdiffuser
plateormirroroftheside-viewcameramaybecontaminatedbydust,itisrecommendedtocleanthemperiodically.
1
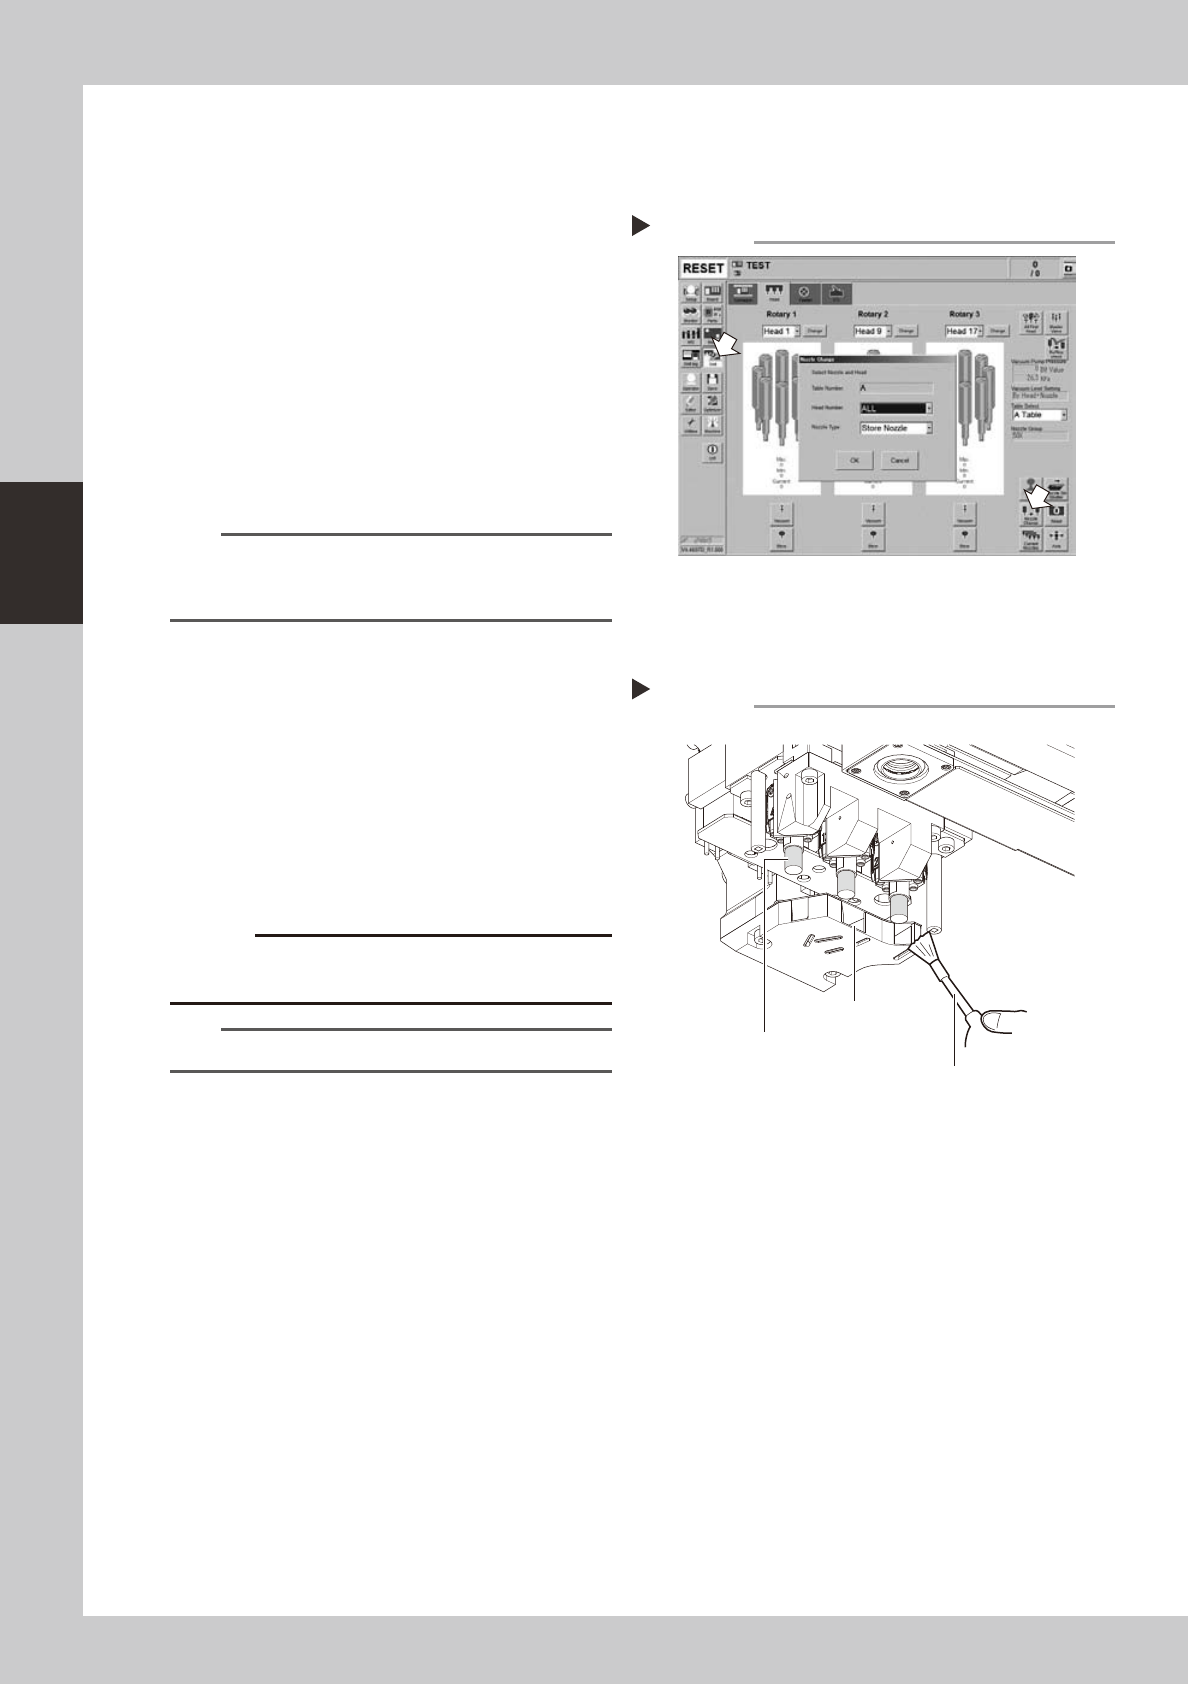
Store all nozzles.
1. Press the [Unit] button to open the [Head]
tab screen. Press the [Nozzle Change]
button.
2. In the “Nozzle Change” dialog box,
select “ALL” in the “Head Number” field
and “Store nozzle” in the ”Nozzle Type”
field.
3. Press the [OK] button to store the nozzles
of all heads.
54313-N2-00
n
NOTE
When the machine is not equipped with a nozzle
station, press the [Emergency Stop] button and remove
the nozzles by hand.
e
2
Move the head.
Press the [Emergency Stop] button and
move the head unit to an easy work position
by hand.
3
Clean the opening and spring
holder.
Use an optical brush to remove the dust
from the opening and spring holder.
533G1-N2-00
c
surface of the diffuser plate to be discolored.
TIP
The optical brush is an optional purchase product.
Storing the nozzles
Step 1
Cleaning the opening and spring holder
Step 3
Opening
Spring holder (diffuser plate)
Optical brush
3-41
3
Periodic maintenance items
5. One-year inspection
n
When carrying out inspection without removing the head
e
Takethefollowingprecautionstocarryoutinspection.
1.Takeoffthewristwatch,magneticIDcards,andanyitemssusceptibletomagneticfields.
2.Presstheemergencystopbuttontostopthemachine.
3.Placeasquareclothunderthelocationwhereinspectionistobecarriedout.
c
5.1 MU head
5.1.1 Cleaning the spline shaft
Adheredforeignmatterandsoilinginsidethesplineshaft'sairpassagescancausepickupandplacement
errors.Topreventthis,thespineshaftinteriorshouldbecleanedonceperyear(generalguideline),although
thismayvarysomewhatdependingonthesuppliedairconditionandtheoperatingtime.
1
Remove the nozzles from all heads.
Either remove the nozzles by hand, or place
all nozzles in the nozzle station.
2
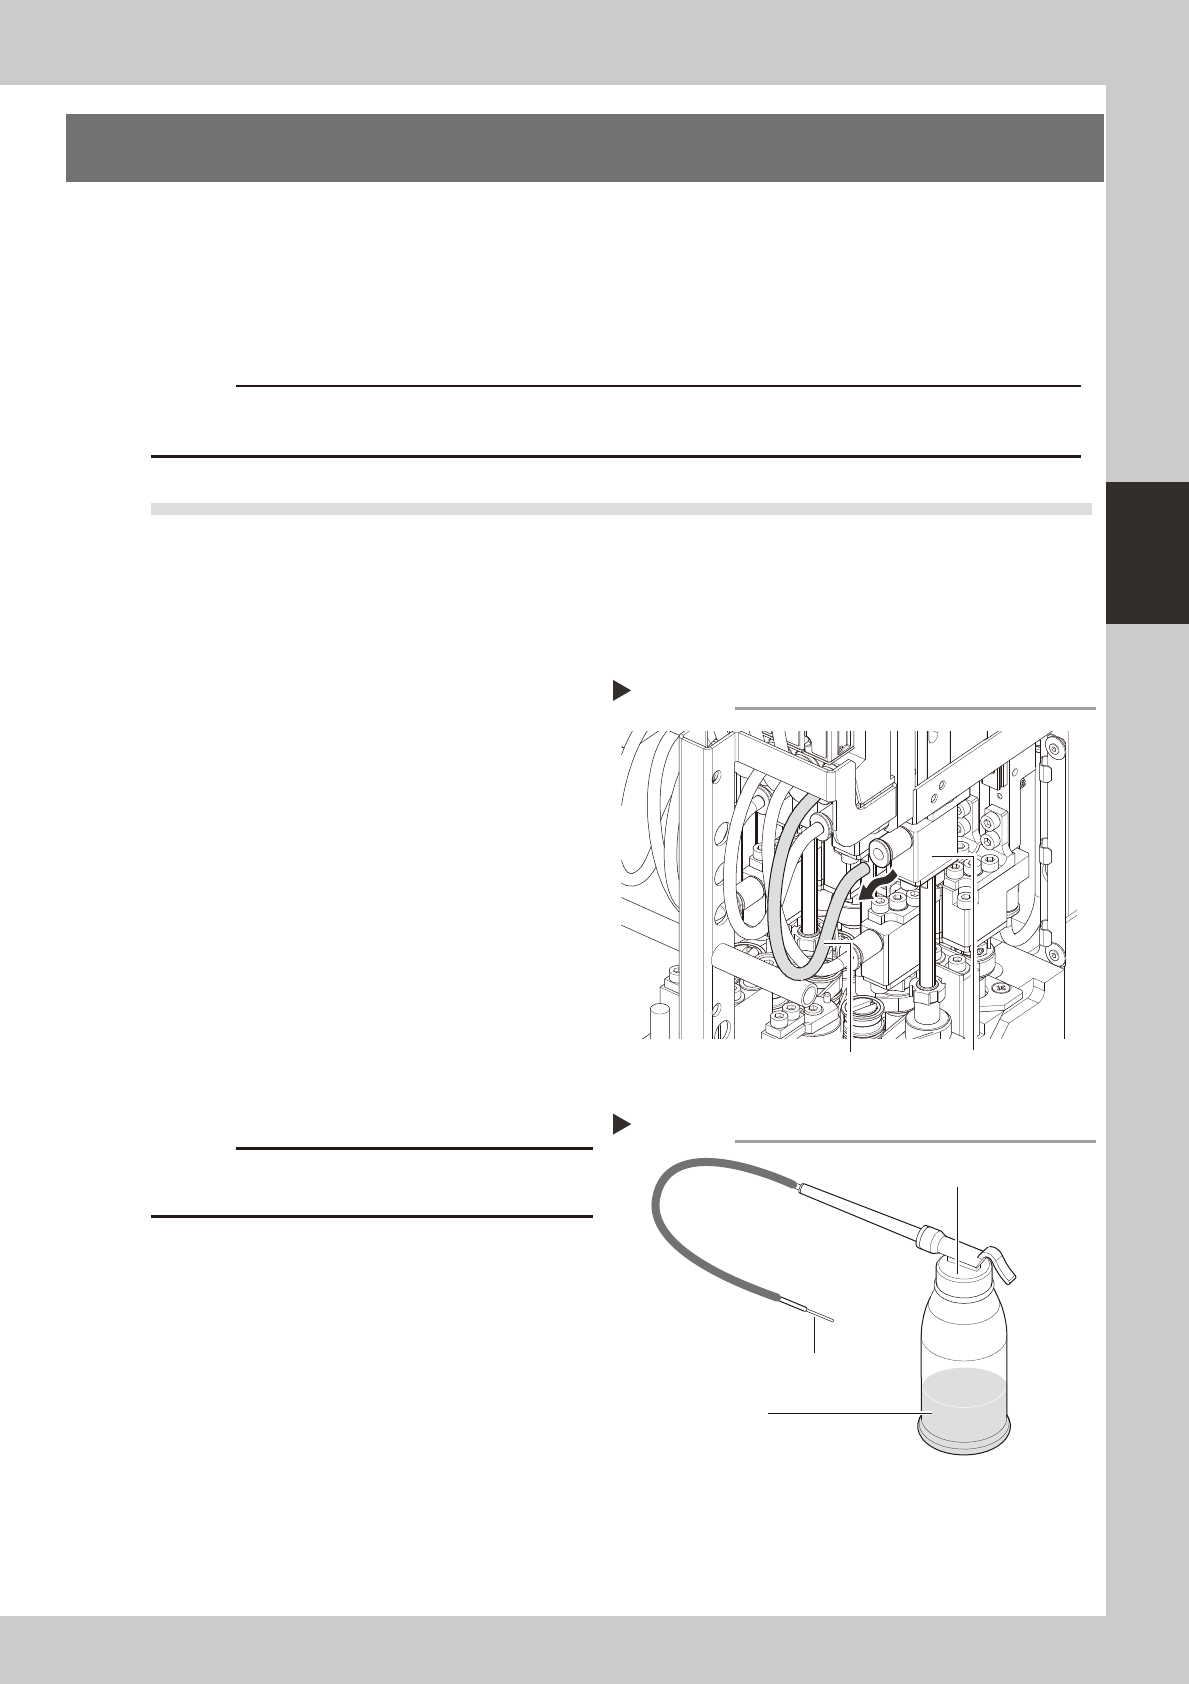
Disconnect the air hose from each
spline shaft.
Disconnect all air hoses from the bearing
holders at each head.
53334-N5-00
3
Prepare the cleaning kit (KHN-
M8860-00X).
1. Pour IPA (isopropyl alcohol) into the
container of the cleaning kit.
2. Spread a cloth directly below the
working position, or place a paper cup,
etc., there.
53335-N5-00
c
Disconnecting the air hoses
Step 2
Air hose
Bearing holder
Cleaning kit
Step 3
Pump
Nozzle
IPA
3-42
3
Periodic maintenance items
4
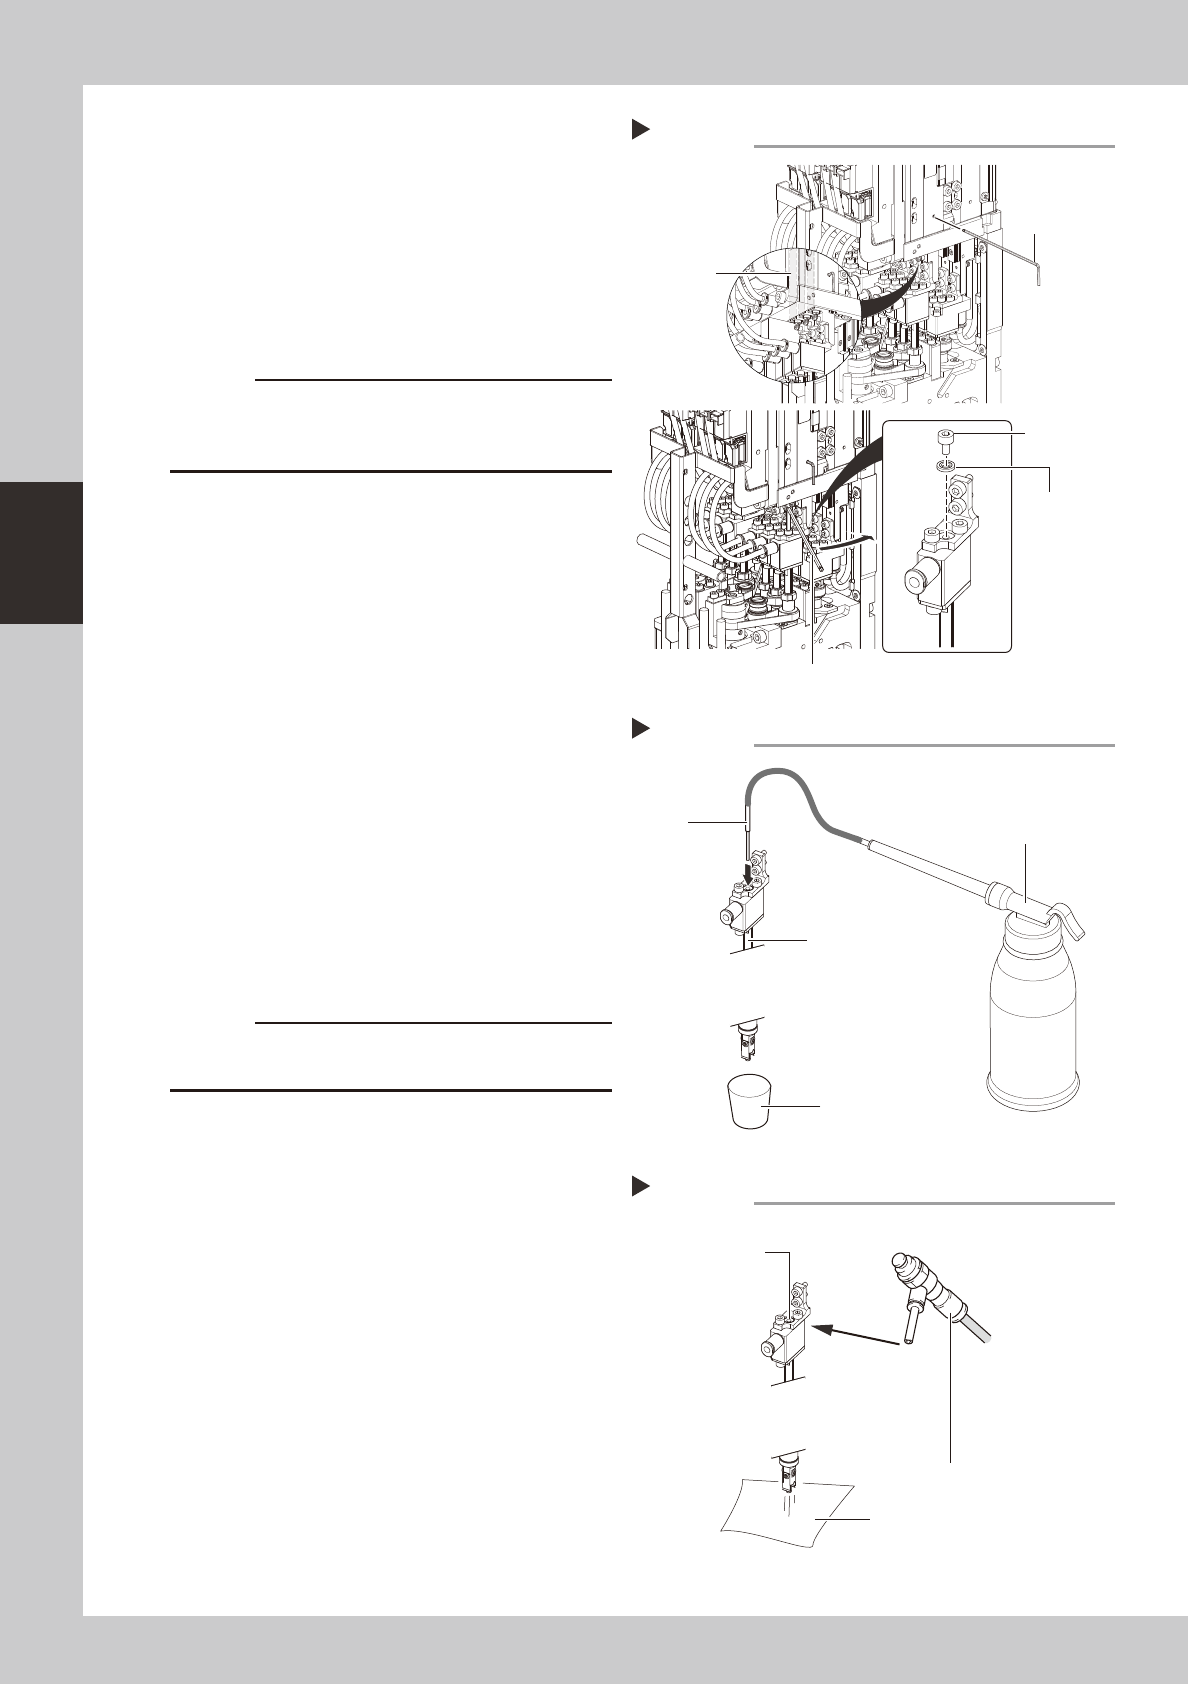
Remove the maintenance bolt.
1. Lower all heads and put a hex wrench (2)
through the hole shown in the figure on
the right to keep the heads in the down
status.
2. Use a hex wrench (2.5) to remove the
maintenance bolts shown in the figure on
the right.
53336-N5-10
c
lower the head with great care.
53336-N5-00
5
Clean the inside of the spline shaft.
1. Insert the nozzle of the cleaning kit into
the cleaning hole of the spline shaft.
2. Pour alcohol (IPA) into the spline shaft air
path to clean away dust and grime.
53337-N5-00
6
Blow air into the spline air path.
1. Connect an air blow tool (optional
purchase item) to the air joint.
2. Place a cloth against the end of the
spline shaft, then air-blow the spline shaft
interior with the air blow tool.
3. When the cloth placed against the spline
shaft end is no longer being soiled by the
exiting air, screw the maintenance bolt in
again.
53338-N5-00
c
to wear safety goggles.
7
Repeat the cleaning procedure.
Repeat steps 6 to 7 to clean the inside of
the spline shafts of all heads.
8
Reinstall the air hose and nozzle
back to their original positions.
Cleaning the spline shaft
Step 5
Nozzle
Spline shaft
Pump
Paper cup, etc.
Air blow into spline shaft
Step 6
Blow the air from this hole.
Air blow tool
Cleaning cloth or paper
Removing the maintenance bolt
Step 4
Maintenance
bolt
Hexagon wrench (2.5)
Hexagon wrench
(2)
Linear scale
Packing