00198596-02_JC_3M_C&P20P2M3_EN.pdf - 第50页
14 3-monthly C&P20 P2/M3 Head Finishing the head maintenance 1 min 2 / 2 Refer to safety instructions in user manual before commencing Maintenance NOTICE! ESD guidelines are to be followed Tool: T7, T8, T9, T21, T42,…
14 3-monthly C&P20 P2/M3 Head Finishing the head maintenance 1 min 1 / 2
Refer to safety instructions in user manual before commencing Maintenance
NOTICE! ESD guidelines are to be followed Tool:
T7, T8, T9, T21, T42, T53, T94
Wear Part:
W25, W59
Consumables:
C3, C5, C21
www.asm-smt.com
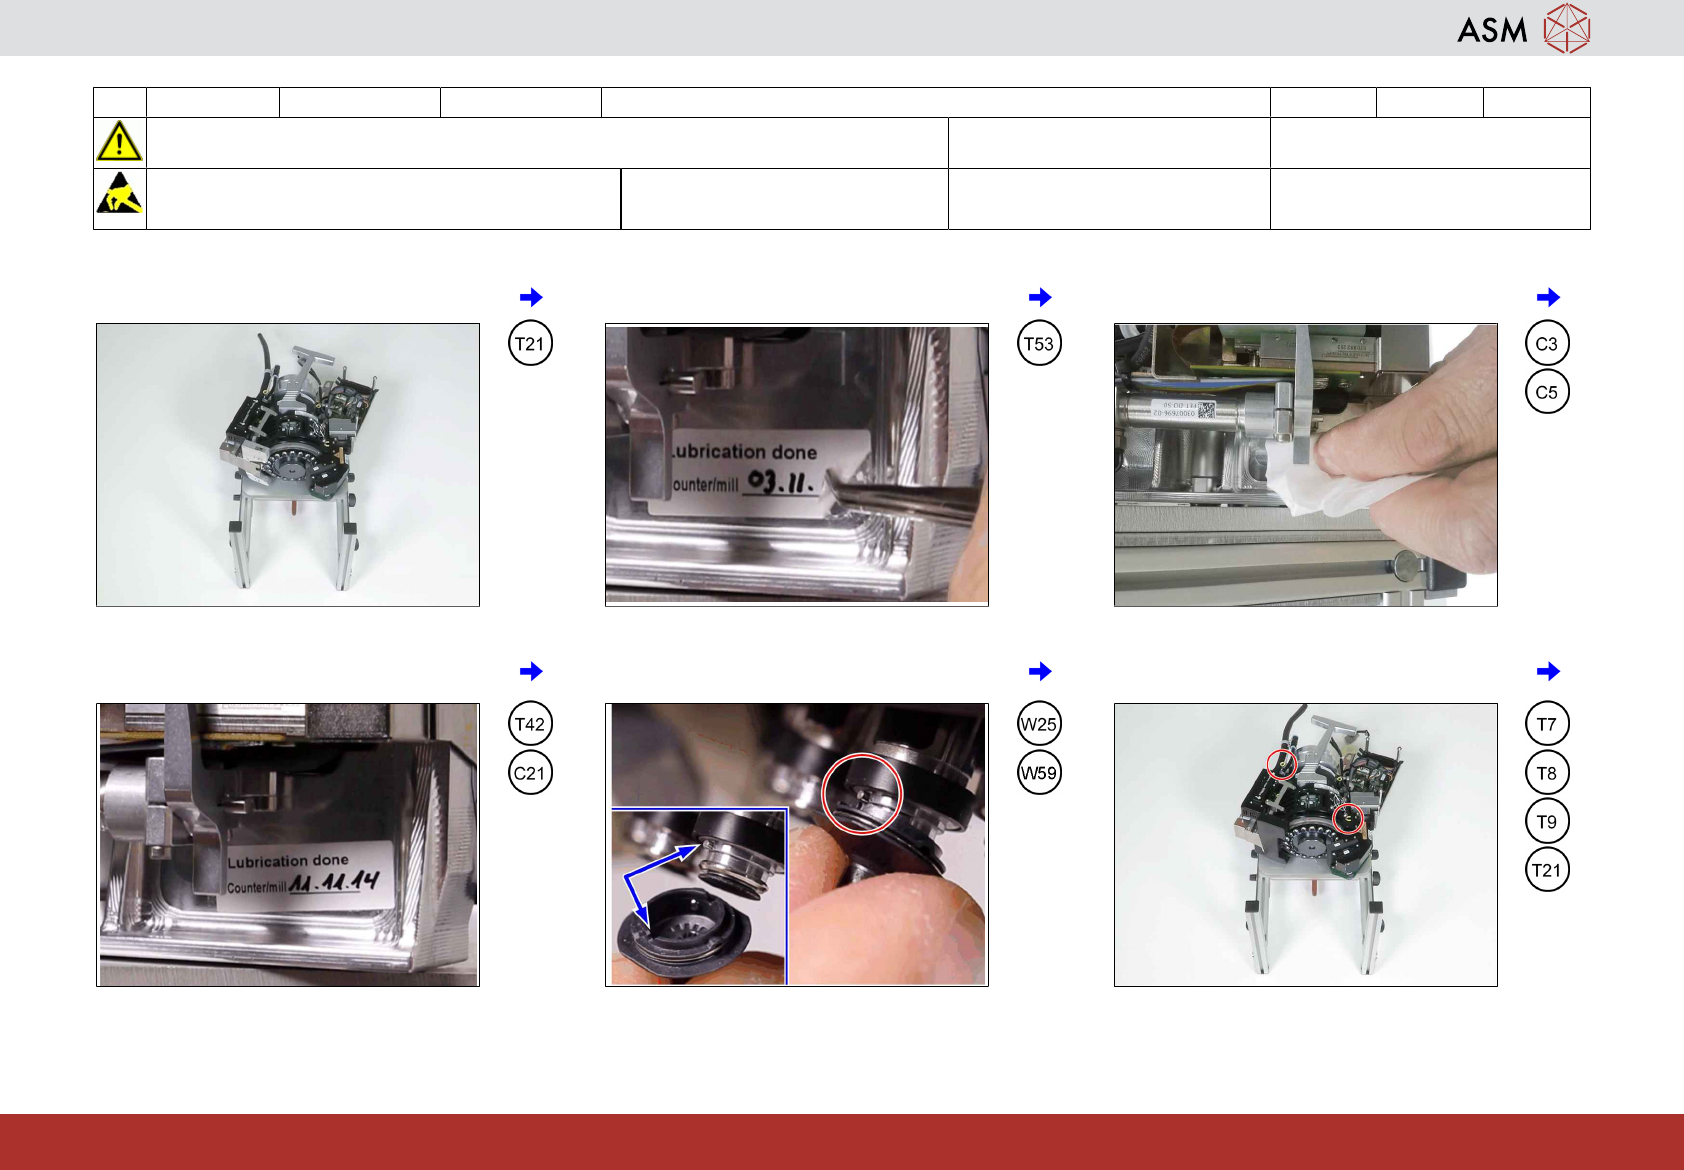
1 Put the headstand flat on the table. 2 Remove the maintenance label 3 Clean the area of the label
4 Attach the label with the actual date 5 Mount the calibration nozzles to each
segment.
6 Remove the head from the headstand by
loosing the 2 screws.
14 3-monthly C&P20 P2/M3 Head Finishing the head maintenance 1 min 2 / 2
Refer to safety instructions in user manual before commencing Maintenance
NOTICE! ESD guidelines are to be followed Tool:
T7, T8, T9, T21, T42, T53, T94
Wear Part:
W25, W59
Consumables:
C3, C5, C21
www.asm-smt.com
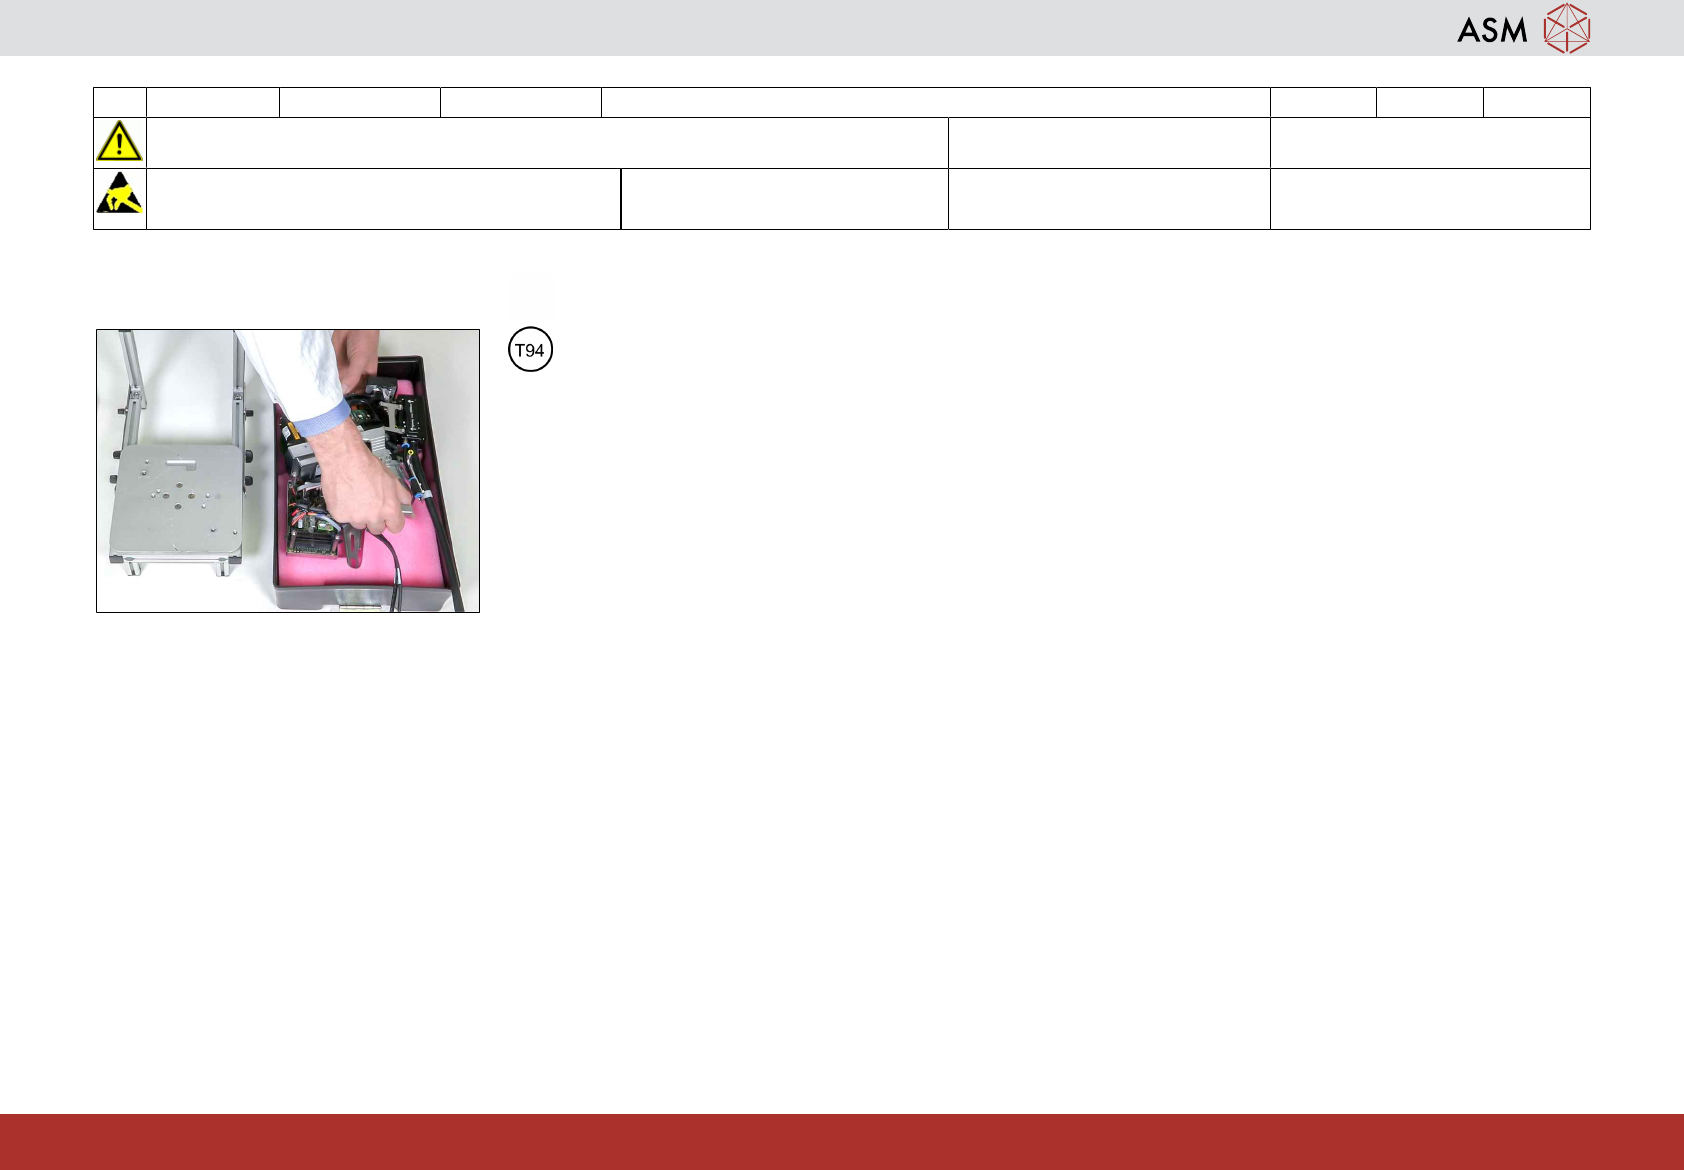
7 Place the head into the transport con-
tainer.
15 3-monthly C&P20 P2/M3 Appendix: Maintain the holding circuit 35 min 1 / 2
Refer to safety instructions in user manual before commencing Maintenance
NOTICE! ESD guidelines are to be followed Tool:
T22, T38, T57, T92
Wear Part:
W10, W54
Consumables:
C5, C19, C24, C31, C45
www.asm-smt.com
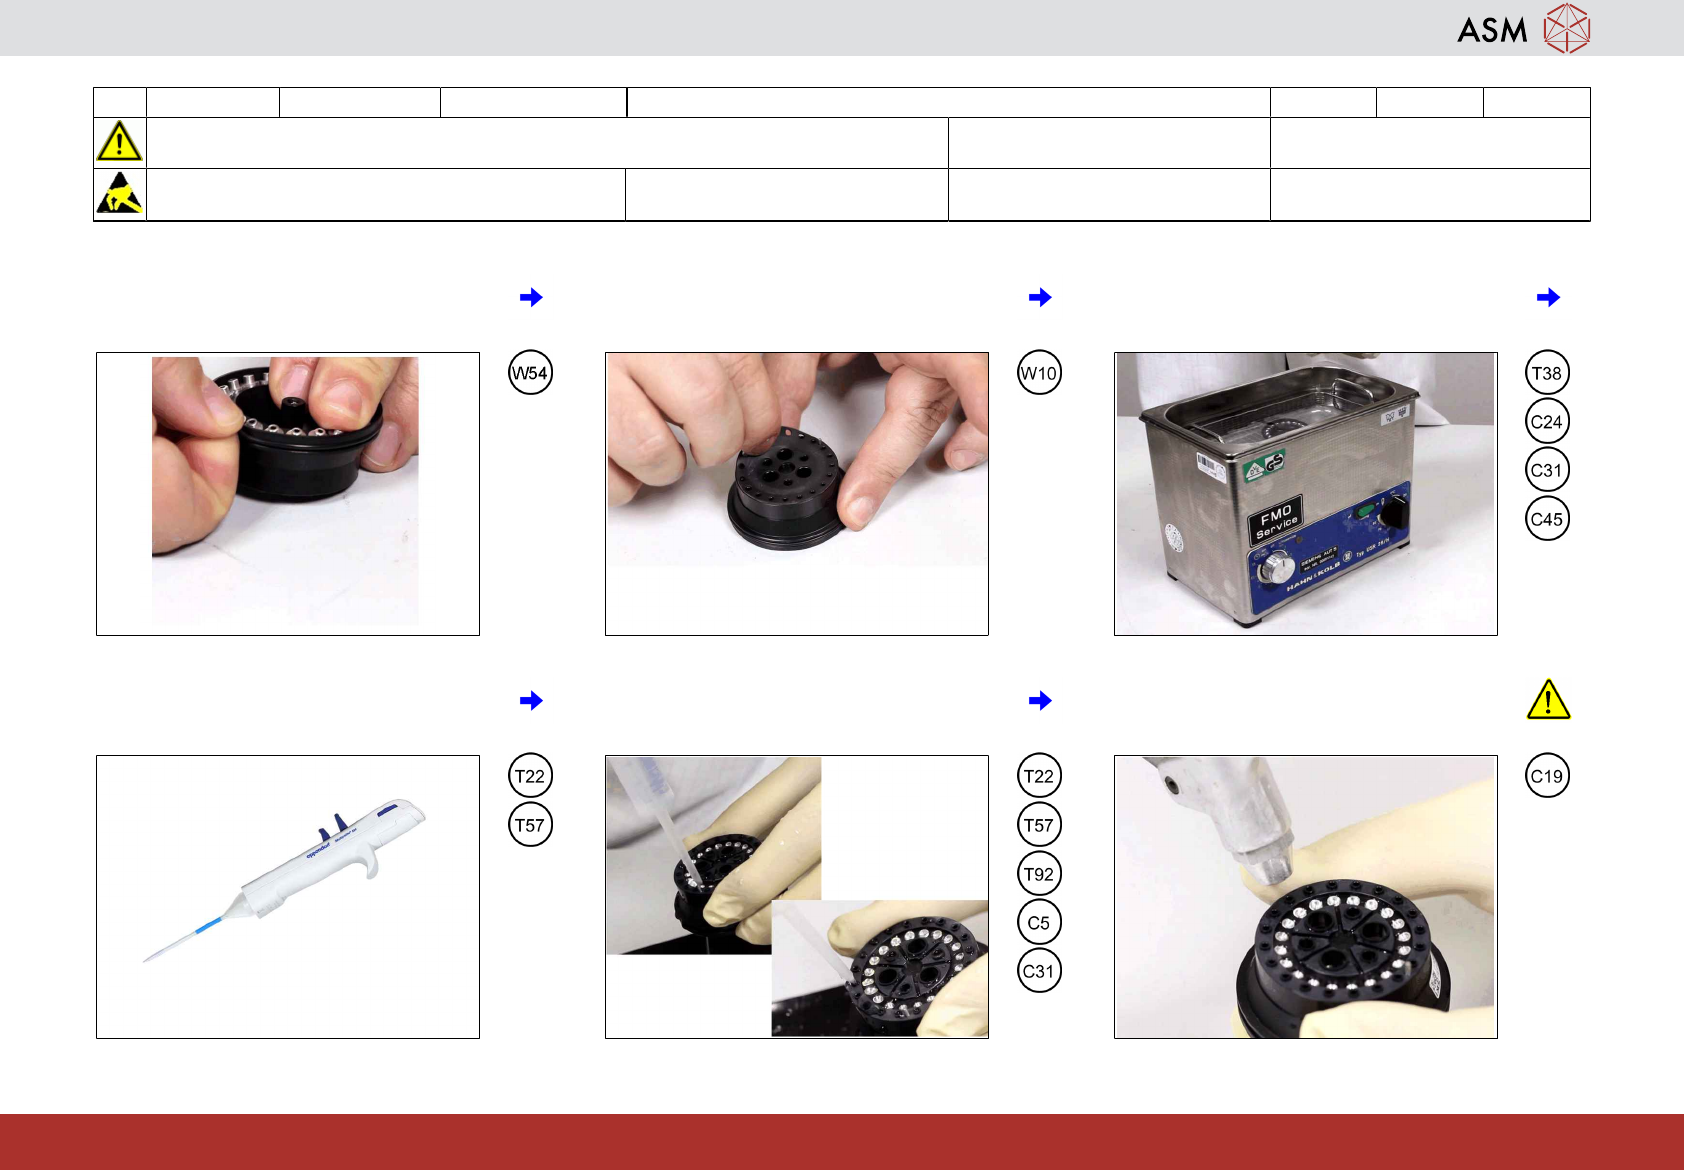
1 Remove the O-ring from the holding cir-
cuit.
2 Remove the seal from the holding circuit. 3 Put the holding circuit into the ultrasonic
bath. Cleaning liquid = 5% C24 and 95%
C45, temp = 50°C, time = 30min.
4 Prepare the multipette. See appendix
"Prepare the multipette".
5 When finished rinse the holding circuit
from below starting with the inner venturi
holes
6 Dry the venturi holes of the holding circuit.
Note: Ensure to keep a distance and be
careful not to hit the index pin.