00198705-01_AI_Portalmodularität_SX12_V3_DE_EN.pdf - 第100页
3 Fitting the Gantry 3.4 Installing the Gantry 100 Assembly Instructions / Montageanleitung SIPLACE SX1/SX2 V3 Gantry Modularity Portalmodularität 05/2020 Tilt guard on the gantry carrier Fig.26: Tilt guard on the gantr…
3 Fitting the Gantry
3.3 Gantry Preparations
Assembly Instructions / Montageanleitung SIPLACE SX1/SX2 V3 Gantry Modularity Portalmodularität 05/2020 99
3.3.4 Transportation Locks and Tilt Guard
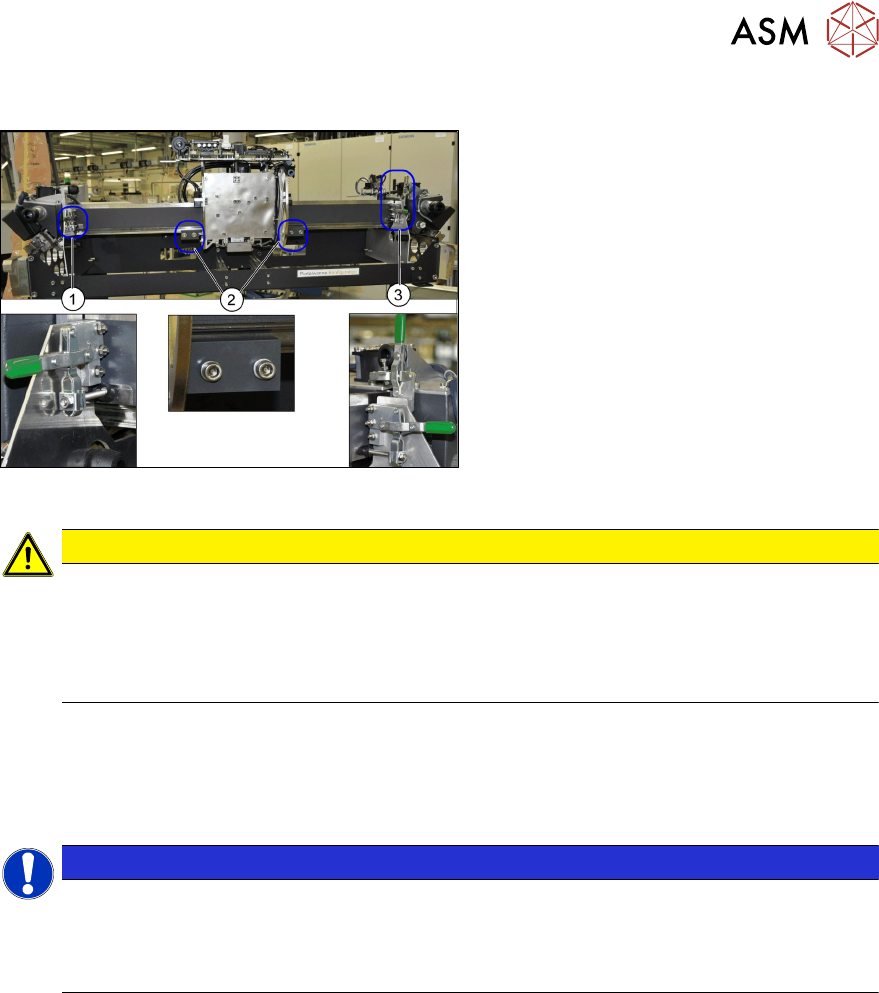
Fig.25: Transportation locks
The gantry is locked with three transporta-
tion locks (1) and (3) at the gantry carrier. In
addition, the head plate has two transporta-
tion locks (2) for the placement head.
CAUTION
Docking
► Flap down the transportation lock plates right before the docking.
► Make sure that the gantry does not slide off the gantry carrier during rerailing respec-
tively derailing and that the tilt guard is suspended in order to hold the gantry in posi-
tion.
► Move the green lever upwards and swivel the transportation lock to one side.
► There is another lever at (3). Move the green lever upwards and remove it.
► Loosen the two screws fastening the transportation locks (2) to the head plate in each case
and remove both locks.
NOTICE
Storing the transportation locks
If the gantry is transported or packed back into the transportation crate, you need to refit the
transportation locks.
► Place the transportation locks in the crate for later usage.

3 Fitting the Gantry
3.4 Installing the Gantry
100 Assembly Instructions / Montageanleitung SIPLACE SX1/SX2 V3 Gantry Modularity Portalmodularität 05/2020
Tilt guard on the gantry carrier
Fig.26: Tilt guard on the gantry carrier
The gantry is also fitted with a tilt guard (1)
on the gantry carrier.
CAUTION!
Tilt guard on the gantry carrier
When the tilt guard is open, the gantry
could fall off the gantry carrier.
Only open the tilt guard once you have
hooked the gantry carrier onto the
machine docking unit.
.
NOTICE
Tilt guard on the gantry
The tilt guard may need to be adjusted to the gantry type "standard gantry" or "40mm VHF
Twin gantry". For more details see the technical information "Description of correct pack-
aging for an SX gantry" [DE:TI2013‑05D06] [EN:TI2013‑05E06].
3.4 Installing the Gantry
Fig.27: Moving the gantry in
► (1) Use the gantry lift to move the
gantry in front of the machine location.
CAUTION!
Move the gantry carefully
Make sure that you do not hit the
gantry anywhere and do not move it
too far into the machine (2). Always
check the right and left sides.
.
3 Fitting the Gantry
3.4 Installing the Gantry
Assembly Instructions / Montageanleitung SIPLACE SX1/SX2 V3 Gantry Modularity Portalmodularität 05/2020 101
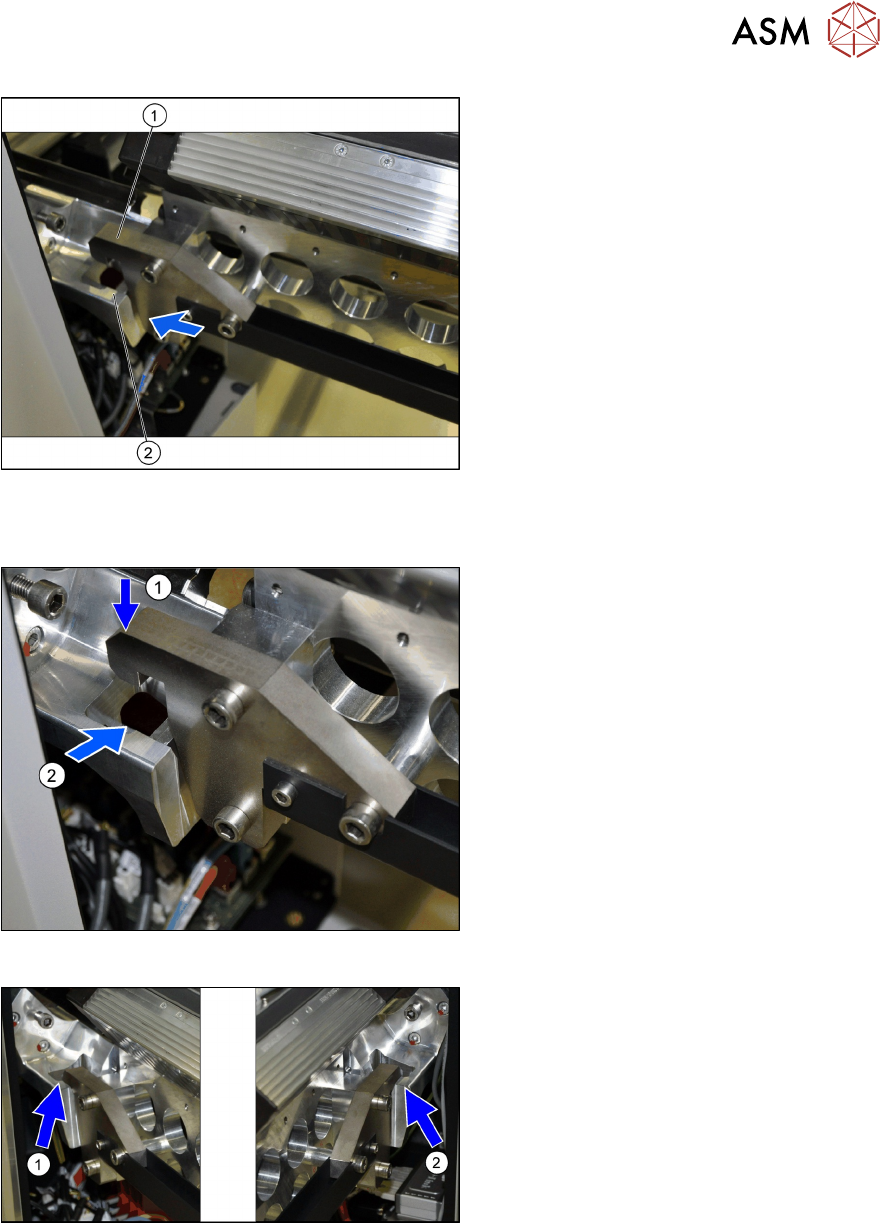
Fig.28: Docking in at the gantry carrier
1. Docking hook on the gantry carrier
2. Docking unit on the machine linear
guides
► Move the gantry forwards so that the
gantry carrier docking hooks (1) are in
front of the machine docking unit (2).
► Always check the right and left sides.
Hooking the gantry carrier into place on the machine
Fig.29: Lifting the gantry
► Lift the gantry so that the gantry carrier
docking hooks (1) are above the
machine docking unit (2).
► Carefully lower the gantry so that the
two docking hooks (1) slide reliably into
the openings in the docking unit (2).
► Always check the right and left sides.
Fig.30: Docking hook hooked into place
The docking hooks are hooked into place on
the left (1) and right (2) sides.
The gantry carrier with the gantry is now
fixed reliably onto the machine.