00197089-02_AI_EA-Verl_X-Serie_S_de_en.pdf - 第59页
Installation Overview of Conveyor Sides Extension Input/Output Conveyor and Hand Guard Ein-/Ausga beband verlängerung und Eingreifschutz 59 3 3 I n s t a lla t io n Installation 3.1 3 . 1 O v e r v ie w o f C o n v e y o…
Brief Description
Tools and Equipment Required 2.4.5 Overview of Parts
58 Extension Input/Output Conveyor and Hand Guard Ein-/
2.4.5
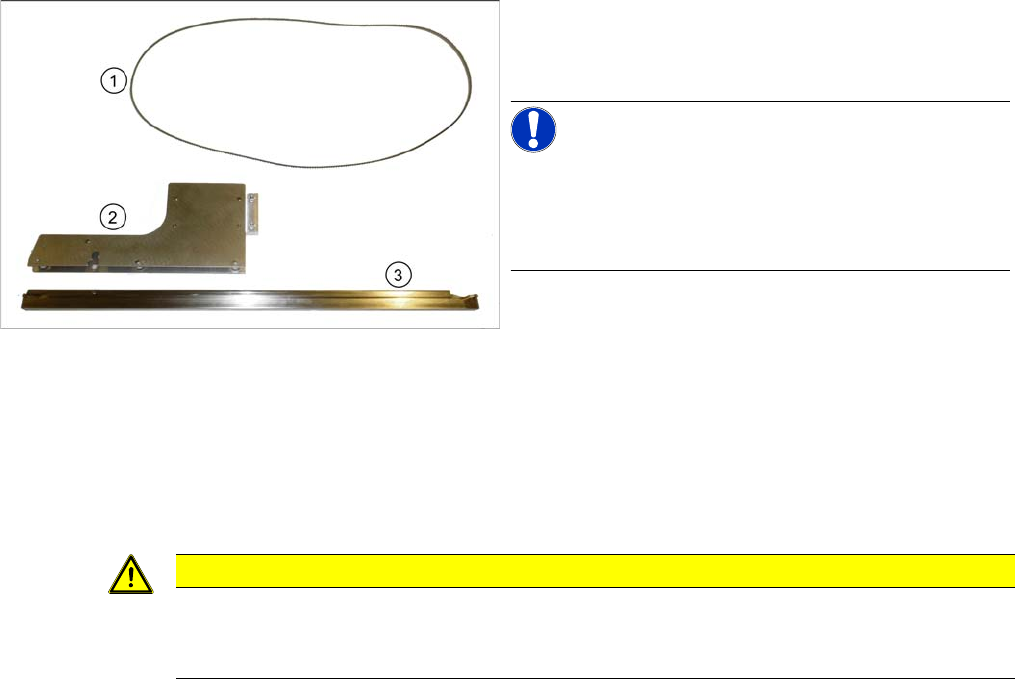
2.4.5 Overview of Parts
Overview of Parts
2.5
2.5 Tools and Equipment Required
Tools and Equipment Required
▪ Standard tool
▪ Belt tension device (00326015-xx)
▪ Service manual for your machine
▪ Torx screwdriver TX25
2.6
2.6 Required Working Time
Required Working Time
Installation of the input conveyor extension takes approx. 1 hour for single conveyor machines and ap-
prox. 2 hours for dual conveyor machines.
Installation of the output conveyor extension takes approx. 1 hour for single conveyor machines and ap-
prox. 2 hours for dual conveyor machines.
1. Toothed belt
2. Extension lower part
3. Belt guidance
NOTICE!
Some parts may already be prefitted.
You may need to remove the belt guidance on the lower
section of the output conveyor before fitting the conveyor
extension.
CAUTION
Use the correct Torx screwdriver
► Make sure that you use the correct size of Torx screwdriver, otherwise the screws could be
damaged.
Installation
Overview of Conveyor Sides
Extension Input/Output Conveyor and Hand Guard Ein-/Ausgabebandverlängerung und Eingreifschutz 59
3
3 Installation
Installation
3.1
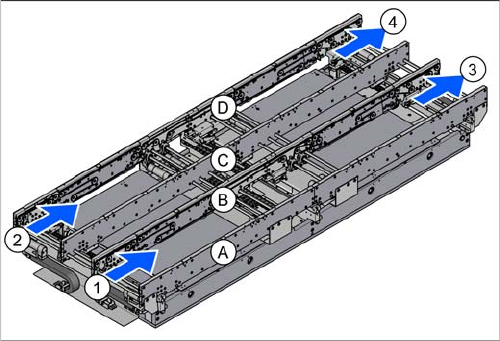
3.1 Overview of Conveyor Sides
Overview of Conveyor Sides
1. Input side, conveyor lane 1
2. Input side, conveyor lane 2
3. Output side, conveyor lane 1
4. Output side, conveyor lane 2
(A) to (D) = conveyor side A to D
Installation
Overview of Conversion (Before/After) 3.2.1 Input Conveyor – Conveyor Side A
60 Extension Input/Output Conveyor and Hand Guard Ein-/
3.2
3.2 Overview of Conversion (Before/After)
Overview of Conversion (Before/After)
The following diagrams give an overview of all required conversion steps for the conveyor side.
3.2.1
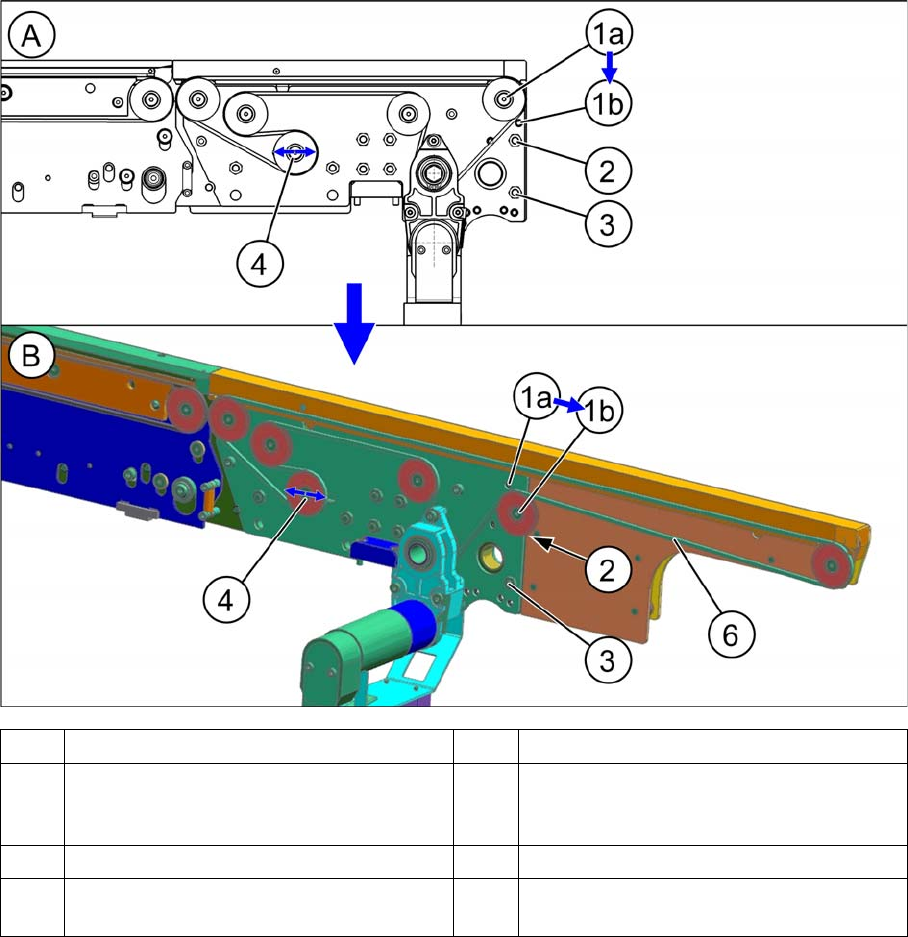
3.2.1 Input Conveyor – Conveyor Side A
Input Conveyor – Conveyor Side A
A Conveyor side without extension B Conveyor side with extension
1 The idler pulley is converted from (1a) to
(1b).
2 The screw M5x16 (TX25) with nut is re-
placed with a shorter screw M5x14.7 with-
out nut.
3 The screw M5x16 (TX25) with nut remains. 4 Idler (loosen only)
6 Measurement point for belt tension: 85+-
9Hz