00198481-01_Technical_Training_E_by_DEK_EN.pdf - 第50页
6 Print Head 6.1 Squeegee Module 50 Technical Training E by DEK 12/2017 6.1.3 Parts Exchange / Settings / Calibrations 6.1.3.1 Parts Exchange / Settings / Calibrations Squeegee Parts Exchange Tools/ Setting Calibration S…
6 Print Head
6.1 Squeegee Module
Technical Training E by DEK 12/2017 49
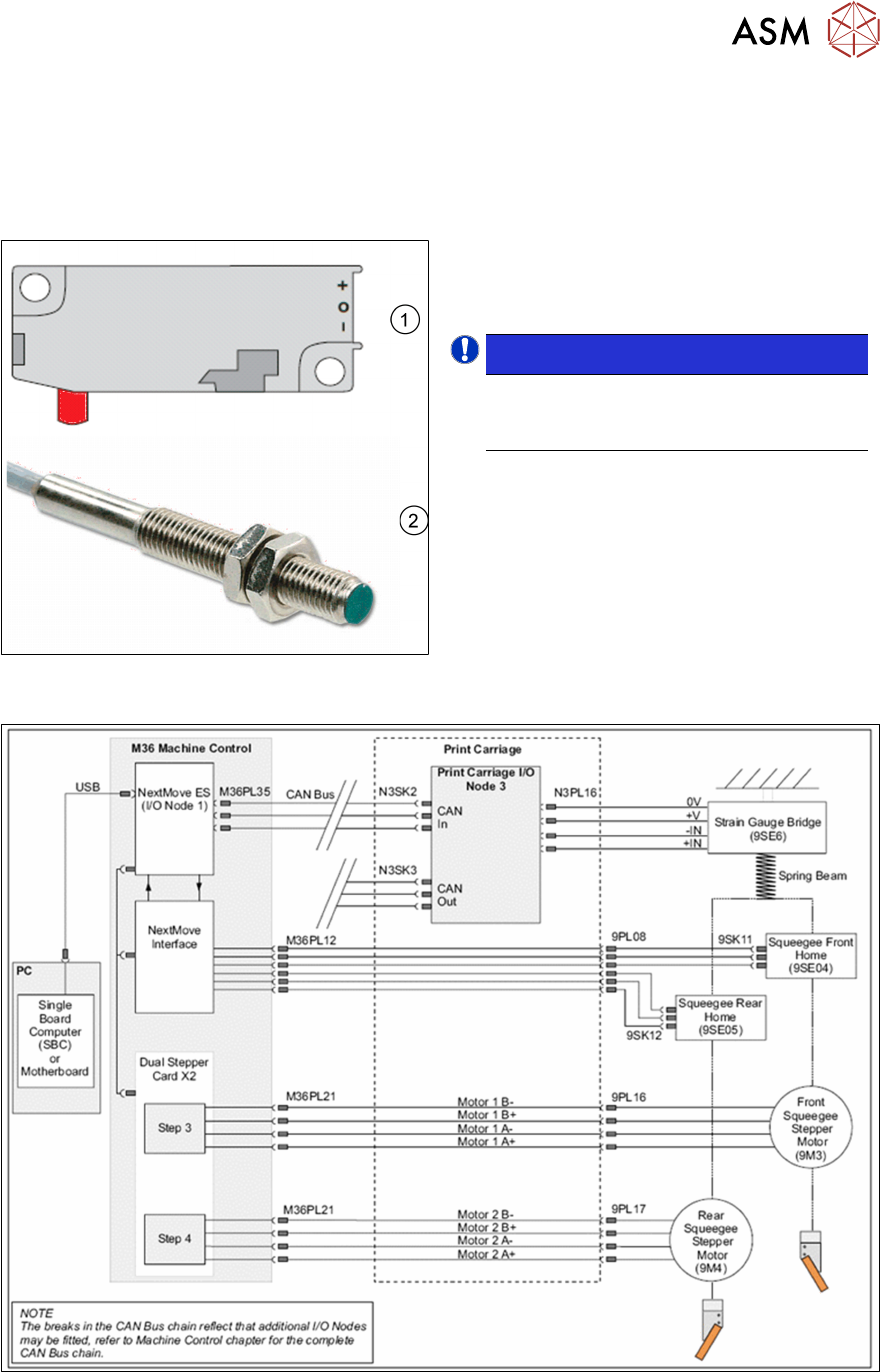
6.1.1.1 Reference run / Homing sequence
●
During the reference run the system is initialized. The squeegee drives slowly upwards
towards the home sensor until the sensor is activated.
●
Then the motor changes direction and moves away until the sensor is deactivated.
●
The motor stops and the home is reached.
1. Micro Switch
2. Inductive Sensor
NOTICE!
Depending on machine build date 2
different sensors are used. The
functionality remains the same.
.
6.1.2 Overview Squeegee Module Electrical System
6 Print Head
6.1 Squeegee Module
50 Technical Training E by DEK 12/2017
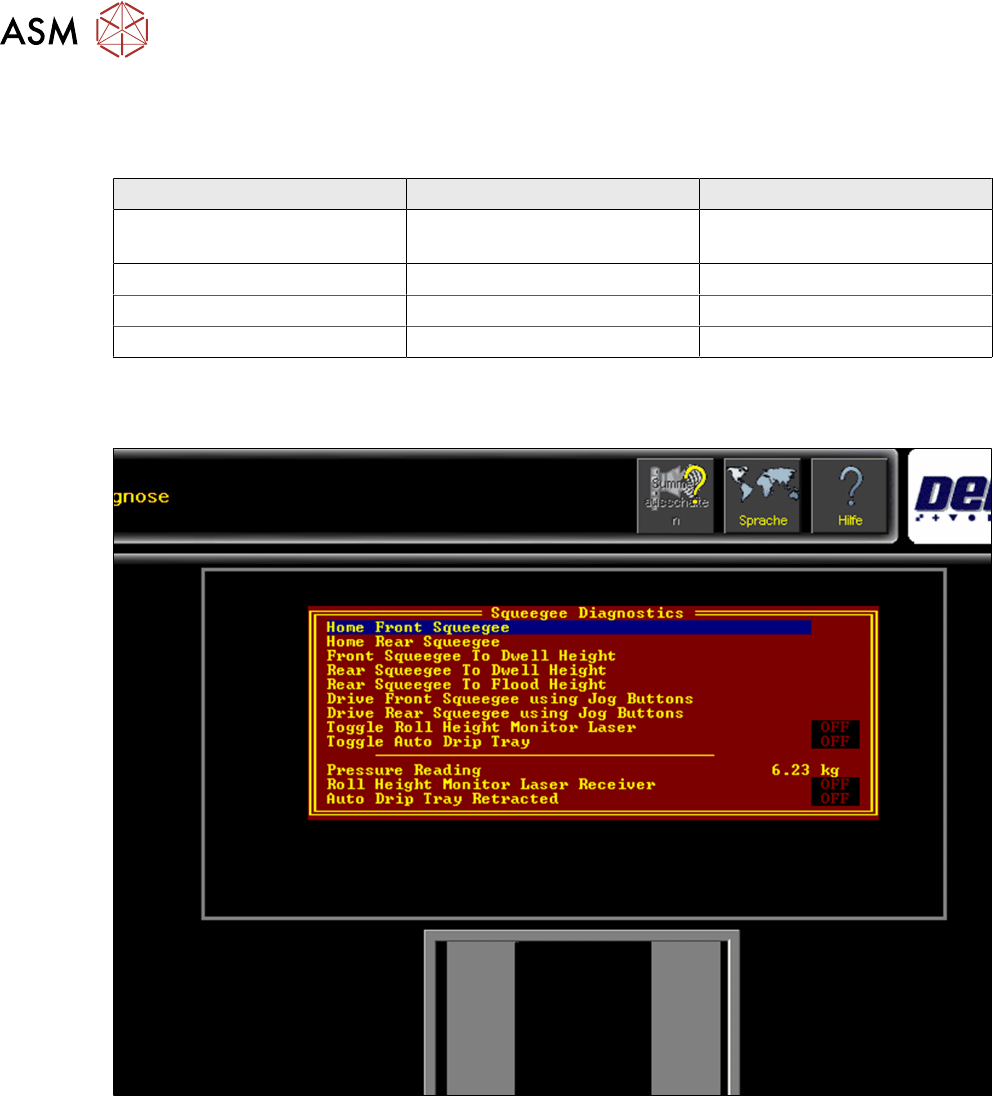
6.1.3 Parts Exchange / Settings / Calibrations
6.1.3.1 Parts Exchange / Settings / Calibrations
Squeegee Parts Exchange Tools/ Setting Calibration
Strain Gauge or Node 3 Strain Gauge calibration jig
●
Squeegee pressure
feedback calibration
Drive Belt Force Meter with hook 3-4 kgs
Stepper motor Force Meter with hook 3-4 kgs
Stepper drive card DIP switch settings
For further details please refer to the technical reference manual.
6.1.3.2 Squeegee Calibrations
Fig.5: Menu for setting up and calibrating the Squeegee home positions
6 Print Head
6.2 Print Cycle
Technical Training E by DEK 12/2017 51
6.1.4 Analysis Common error list
Error Description Possible Cause Action
Squeegee print problems during
first production new product
●
Calibration required
●
Incorrect PCB height
●
Incorrect tooling
●
Calibrate squeegee height
●
Check PCB height
●
Check tooling
●
Calibrate strain gauge
(special tools required
Sporadic squeegee errors (after
the above has been done)
Mechanical wear
●
Check spindle movement
●
Check squeegee blades
●
Check squeegee paste
deflectors
●
Check strain gauge
diagnostic to see if
measurements are
repeatable
●
Replace strain gauge /
squeegee head / print
carriage node
6.1.5 Maintenance
Maintenance tasks for squeegee.
Maintenance content Interval Requirement
Check and clean surfaces daily IPA wipes
Inspect wiring and connections 3 monthly
Lubricate Bearings 3 monthly THK AFB grease
Grease gun
Clean and Lubricate Super nuts and lead screws 3 monthly Aeroshell 5 (only)
Check condition and belt tension drive belts 3 monthly Force meter 3-4 kgs
Cycle squeegee over travel range to ensure smooth running 3 monthly
For detailed information refer to the maintenance manuals.
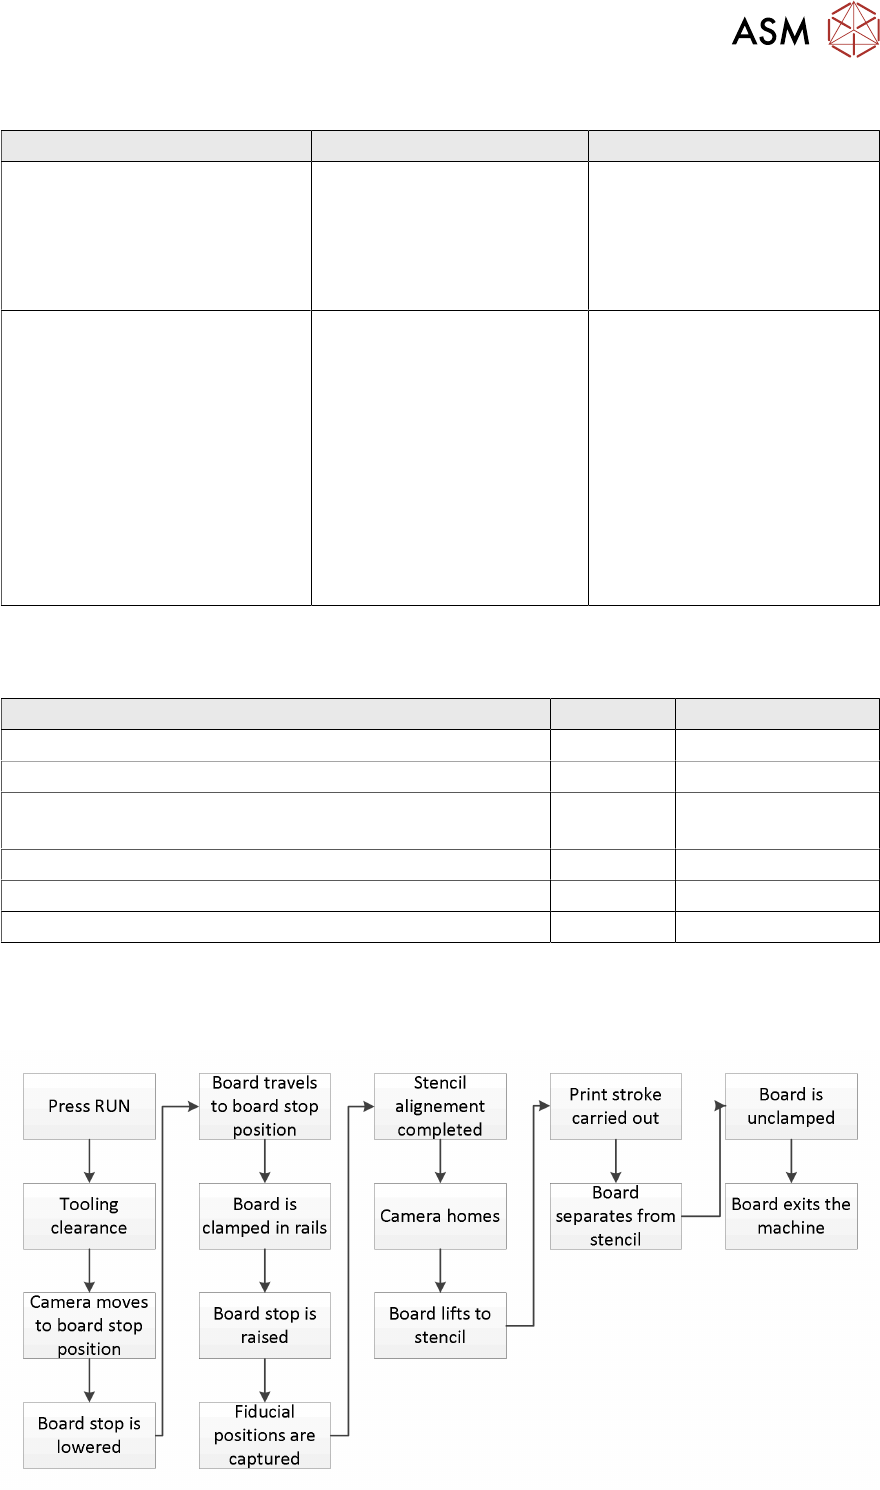
6.2 Print Cycle