00192792-02.pdf - 第60页
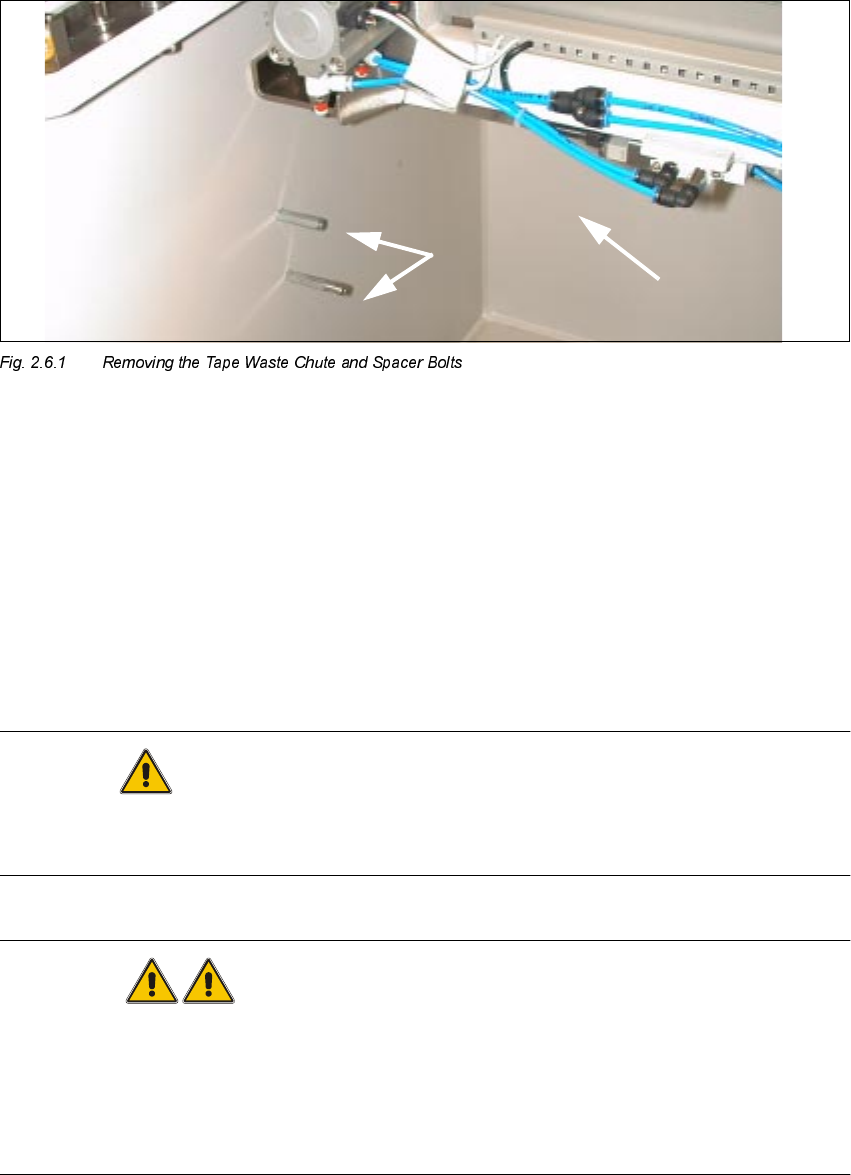
2 Retrofitting Instructions: M atrix Tray Changer MTC on S-25 HM (Option) SIPLACE 80 S-25 HM 2.6 Preparatory Steps 01/01 Issue 60 .H\ 1. T ape w aste chut e (removed ) 2. Remove 2 spacer b olts each, l eft and right Å R…

SIPLACE 80 S-25 HM 2 Retrofitting Instructions: Matrix Tray Changer MTC on S-25 HM (Option)
01/01 Issue 2.6 Preparatory Steps
59
3UHSDUDWRU\ 6WHSV
WARNING
The movable blade, fixed blade and the tape deflector on the cutter pose a high risk of injury.
Never reach into the cutter from below or into the empty-tape duct from above, not even if tape is
jammed, e.g., while disconnecting the movable component changeover tables.
NOTE:
Store all of the parts removed in such a manner that they will be available again later for re-instal-
lation.
5HPRYLQJ7DSH:DVWH&KXWHDQG6SDFHU%ROWV
NOTE:
The MTC is retrofitted on S-25 HM (with 6- or 12-segment head) at location 1 AND / OR at
location 3.
Å To disconnect the movable component changeover table, turn the machine and then the com-
pressed air ON.
Å Disconnect the movable component changeover table from the machine and move it out of the
machine.
Å Turn the machine OFF and disconnect it from the mains. Turn the compressed air supply on
the compressed air unit OFF and bleed the needle valve (see DANGER text in Section 2.4).
Å Disassemble the tape waste chute (1 socket hex head cap screw M5 each left and right).
2 Retrofitting Instructions: Matrix Tray Changer MTC on S-25 HM (Option) SIPLACE 80 S-25 HM
2.6 Preparatory Steps 01/01 Issue
60
.H\
1. Tape waste chute (removed)
2. Remove 2 spacer bolts each, left and right
Å Remove the spacer bolts completely, 2 each on left and right (see Fig. 2.6.2).
Save the parts in such a manner that they will be available later for re-installation.
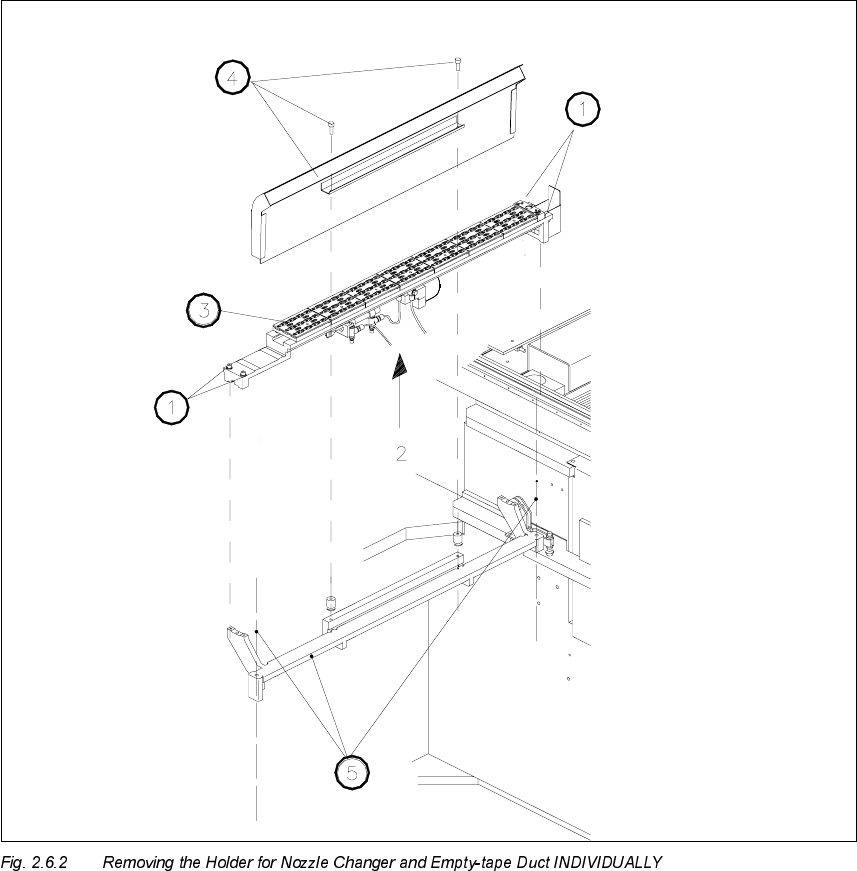
5HPRYLQJWKH+ROGH UIRU1R]]OH&KDQJHUD QG(PSW\ 7DSH'XFW
CAUTION
Make certain that no screws/small components drop into the cutter during the following disassem-
bly.
WARNING
After dismantling the empty-tape ducts - taking care to avoid injury, e.g., due to slipping - put a
wide piece of insulating tape on the top of the cutter, such that the gap between cover plate and
fixed blade is completely covered. This tape will be removed during a subsequent step.
In addition, during the retrofitting make shure that danger symbol and danger text are mounted on
the cover plate of the cutter (see Section 2.7.6).
SIPLACE 80 S-25 HM 2 Retrofitting Instructions: Matrix Tray Changer MTC on S-25 HM (Option)
01/01 Issue 2.6 Preparatory Steps
61
.H\
1. Fasteners for the nozzle changer. 4 M4 socket hex head cap screws M4
2. Electrical and pneumatic connection on the bottom of the nozzle changer
3. Nozzle changer
4. An empty-tape duct (is only dismantled as a complete unit)
Fastener: 2 socket hex head cap screws M4
5. Carrier for empty-tape duct and nozzle changer,
Fastened to the machine frame with 1 socket hex head cap screw M6 each, left and right