4OM-1343-009_w.pdf - 第118页
1-60-2 AKFEMT -ID (2) Insertthelterreplacementjigintotheholeonthelterholderand pull it up upward. Hole on Filter Holder Jig with pulled-out holder (filters) Filter Replacement Jig Fig. 4A62 (3) Replacet…
1-60-1
AKFEMT-ID
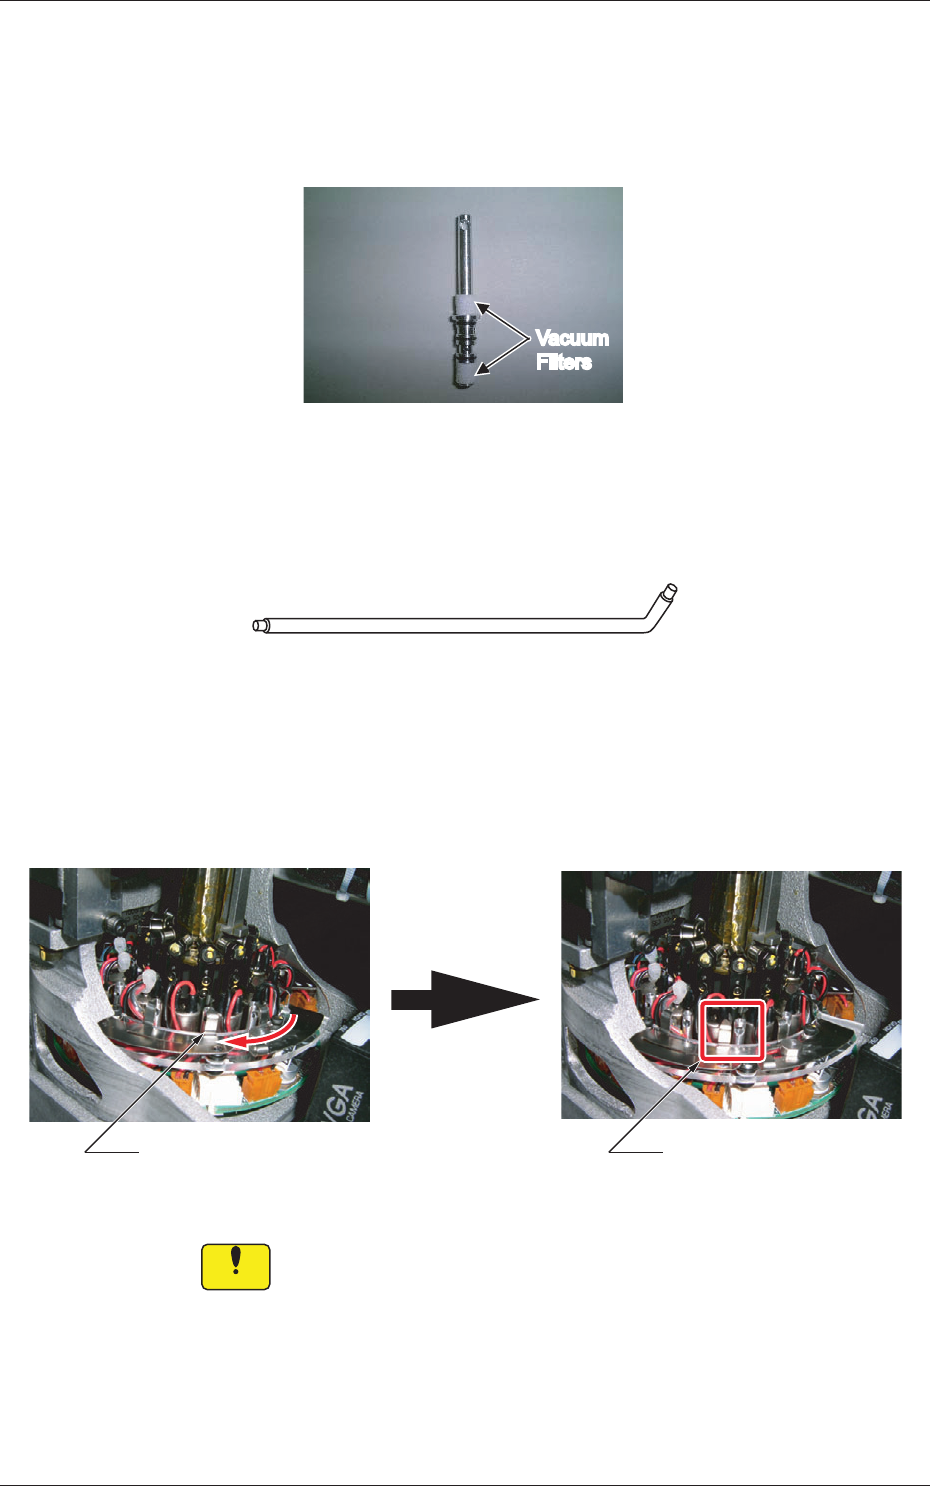
4.6 Replacement Procedure of Vacuum Filters
Time of Replacement
Replacethelterswithnewoneseverythreemonths.
Vacu um
Filters
Vacu um
Filters
Fig. 4A59 Filter Holder
Required Item
Filter Replacement Jig
Fig. 4A60 Filter Replacement Jig
Replacement Procedure
(1) Slidethelterfastenertotheleftandreleasethelockofthelter
holder.
Filter UnlockedFilter Locked
Fig. 4A61
Notice
Besuretoslidethelterfastenersothatitdoesnotinterferewiththe
wiring, etc.
0604-001
4.6 Replacement Procedure of Vacuum Filters

1-60-2
AKFEMT-ID
(2) Insertthelterreplacementjigintotheholeonthelterholderand
pull it up upward.
Hole on Filter Holder
Jig with pulled-out holder (filters)
Filter Replacement Jig
Fig. 4A62
(3) Replacethetwovacuumltersonthepulled-outholderwithnew
ones.
(4) Directthelargerholeon
thelterholderoutwardandinsertthe
holderwiththelterreplacementjig.
Be sure to push it deep enough until it stops (down to the lowest
limit).
Notice
The holder should not interfere with the wirings for valves, etc. In addition,
the wires should not be caught in the upper and lower areas of the top
block.
OK
NG
Filter Fastening Claw
<NG: Insufficient Insertion>
The upper surface of the
filter holder is higher than
that of the filter fastening
claw.
<OK: Sufficient Insertion>
The filter fastening claw is
higher than that of the filter
holder.
Fig. 4A63
0604-001
4.6 Replacement Procedure of Vacuum Filters
1-60-3
AKFEMT-ID
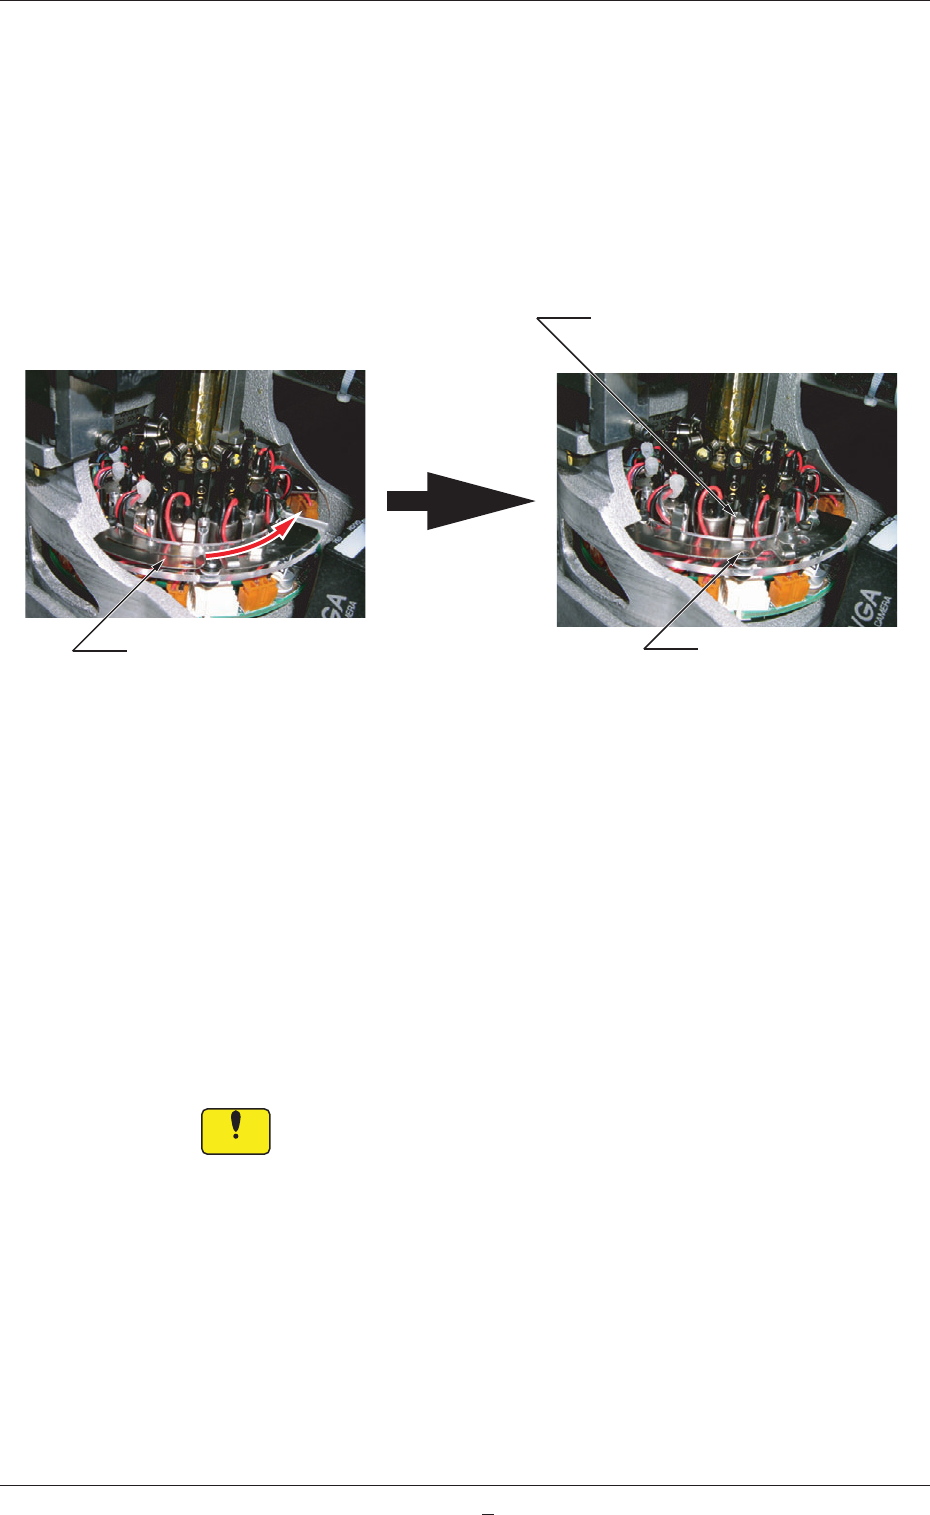
(5) Shakeitintherotationaldirectionandconrmthattheitdoesnot
rotate.Afterthat,pulloutthelterreplacementjigcarefullysoas
nottopulluptheinsertedltertogetherandstayaoat.
(6) Notethefollowingandslidethelterfastenertotherighttolock
thelterholder.
·
Conrmthatthelterfasteningclawislocatedattheupper
centerofthelterholder.
·
Conrmthat
theballplungerislocked.
Slide the filter fastener to the right.
Filter Unlocked Filter Locked
Locking Position of Filter
Fastening Claw
Ball Plunger Locked
Fig. 4A64
Whenthelterfasteningclawcannotbelockedafterbeingslid
becauseitinterfereswiththesidefaceofthelterholder,itcan
beassumedthataforeignsubstanceexistsintheholeorthelter
holderisnotinsertedsufcientlyfarintothehole.
Checkthelterholderthathasinterferedwiththesideface.Ifa
foreignsubstanceexistsinthehole,cleanthelterholdertoremove
the substance.
After the cleaning is completed and no foreign substance is found in
the hole, starting with Step (4).
Notice
Unlessthelterholderissetcorrectlyinplace,apickuperrorwilloccur
orthelterwillcomeoffandcauseaninterferencewithahead.Thehead
may also be damaged.
0604-001
4.6 Replacement Procedure of Vacuum Filters