TM4807.Long Board Partition Mount.pdf - 第21页
[T each] screen and move XY axis to the posit ion where the mark is displayed a t the center of vision monitor . 6. Choose any line, push "T each" button and set the coordinates. 7. Release board, move the boar…
Error
Number
Title Causes and measures
24601
Board Data Error
<Cause>
Local bad mark position is outside moving area.
Local bad mark No.: XXX
<Measures>
Change local bad mark position to movable area.
5 I/O address
In [Unit] – [I/O] screen, “STAGE-2 MAIN STOPPER HIGH END” is correspond to the exit
stopper high end sensor.
I/O address Type Contents I/O state
1 DETECT
N01008F7 CONV STAGE-2 MAIN STOPPER HIGH END
0
NOT
DETECT
6 Appendix
6.1 Setting method
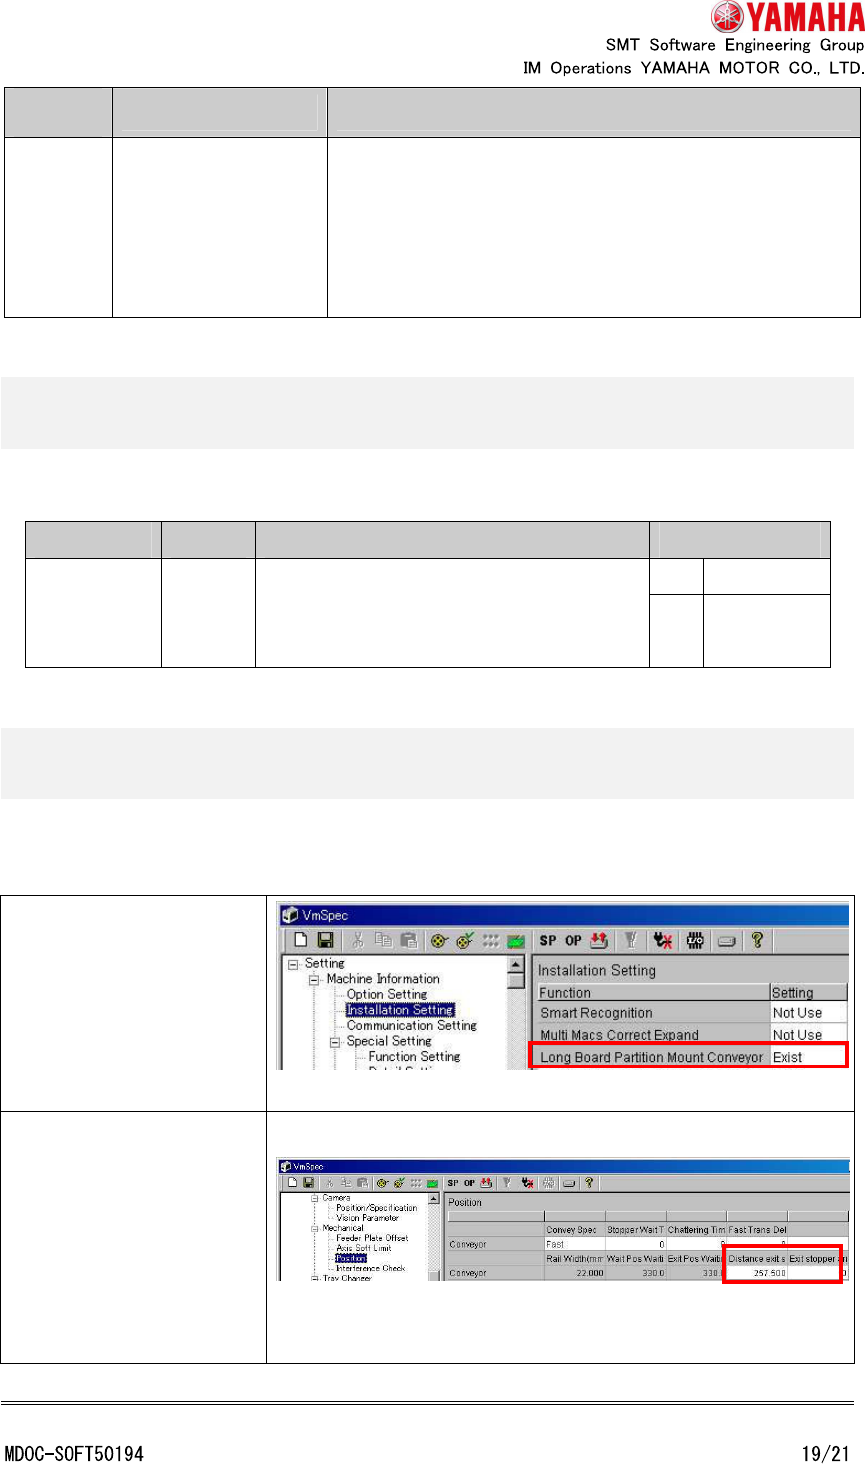
This function is enabled with the following setting.
Select [Machine] -
[Machine Information] -
[Installation Setting] and
set [Long Board Partition
Mount Conveyor] to
“Exist”.
Select [Machine] -
[Machine Data] -
[Mechanical] - [Position]
and set [Distance exit
stopper to main stopper]
and [Exit stopper arrival
add time].
* Check that [Machine] - [Installation Setting] - [Exit stopper] is “Exist”.
* Check that [Machine] - [Mechanical] - [Position] - [Fiducial All Recognition] is “Not Use”.
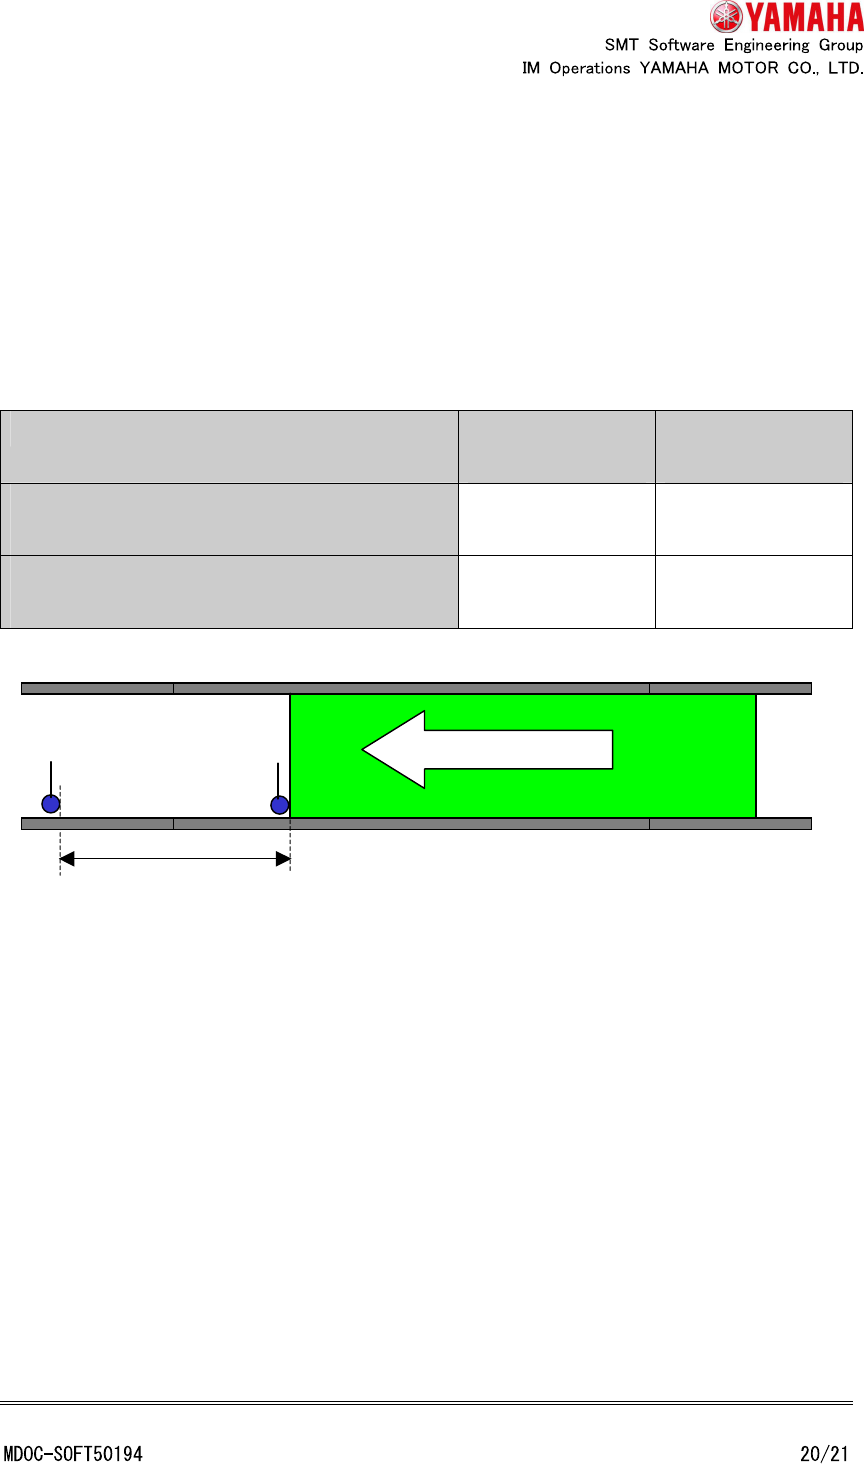
6.1.1 Distance exit stopper to main stopper [mm]
Input the distance from the exit stopper to the main stopper. (Input a positive number
regardless of conveyor direction)
The standard values are as follows. There is individual difference of several millimeters
every machine.
Conveyor direction
R->L
Conveyor direction
R->L
"LED package specs. standard conveyor
(without extension)"
About 257.5mm About 309.5mm
"LED package specs. standard conveyor (with
extension)"
About 562.0mm About 615.0mm
6.1.1.1 Measurement procedure of “Distance exit stopper to main stopper”
An example of the procedure to measure “Distance exit stopper to main stopper” is as
follows.
1. Prepare a long board (length 550mm or more).
2. Input the board size to [Board] - [Board] - [Board size X] and [Board size Y].
3. Tap [Unit] - [Conveyor] - [Width] button and change conveyor width.
4. Put the board to the main stopper position and fix it. (Tap [Unit] - [Convey] - [Push Up]
and [Board Clamp] button)
5. Decide a target mark on the board (About 550 - 700mm position from the board edge. It
has to be recognizable also at the exit stopper position). Open [Board] - [Fiducial] -
Distance exit stopper to main stopper
Conveyor direction
Main stopper
Exit
stopper
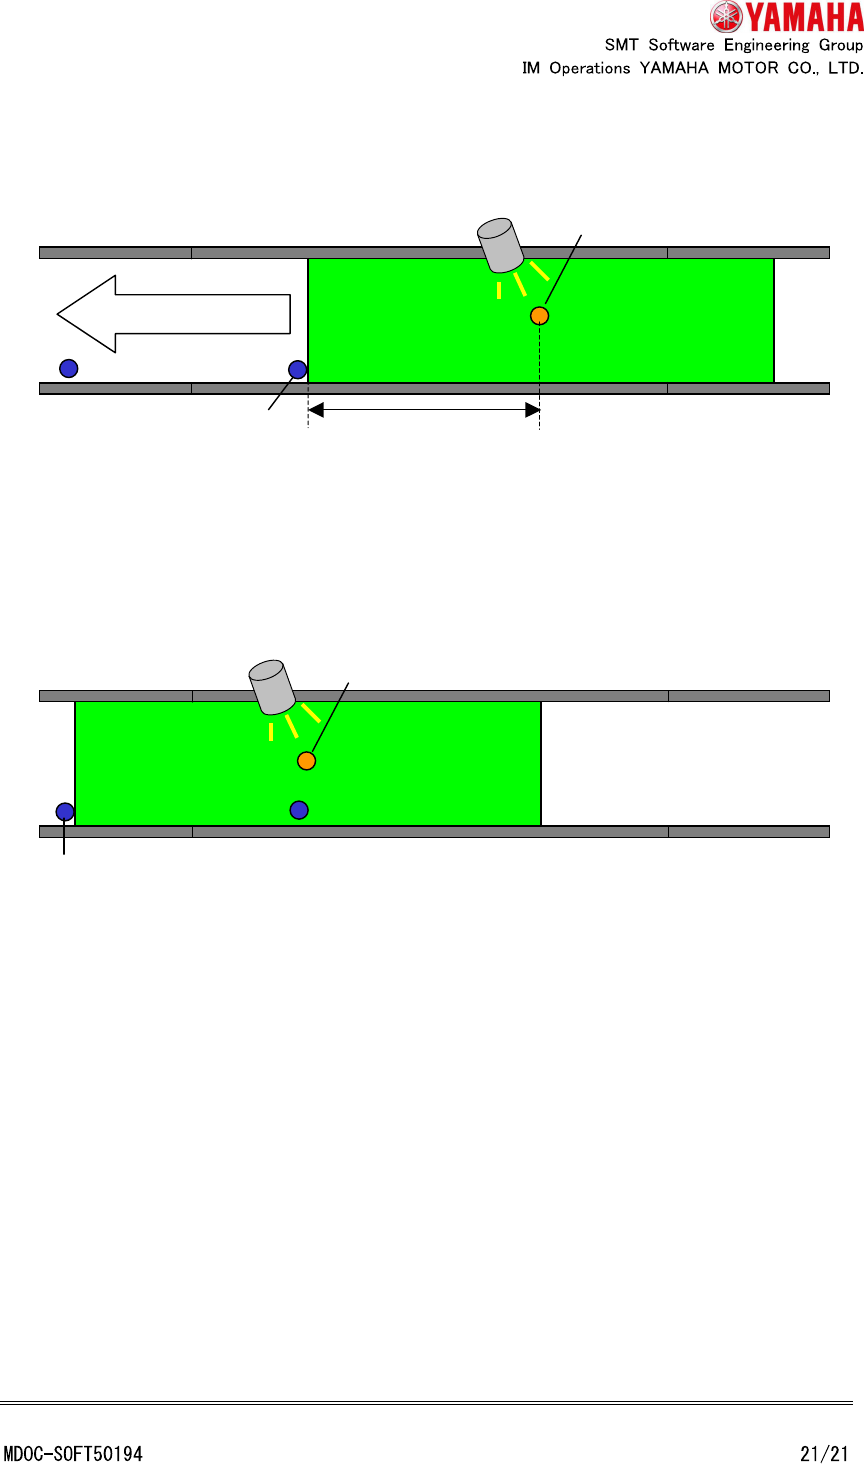
[Teach] screen and move XY axis to the position where the mark is displayed at the
center of vision monitor.
6. Choose any line, push "Teach" button and set the coordinates.
7. Release board, move the board to the exit stopper position and fix it.
8. Open [Board] - [Fiducial] - [Teach] screen, move XY axis to the position where the mark
(decided at step 5) is displayed at the center of vision monitor.
9. Choose any line, push "Teach" button and set the coordinates.
10. Calculate absolute value of difference of X coordinate recorded at step 6 and X
coordinate recorded at step 9. Set it to “Distance exit stopper to main stopper”.
6.1.2 Exit stopper arrival add time [msec]
This setting increases the waiting time before starting board fixation after board reacts to
the exit position sensor. Enlarge this value when board fixation is started before a board
arrives at the exit stopper position.
Input range is 0 ~ 9999 and initial value is 0.
Conveyor direction
Main stopper
Target mark
Camera
About 550 - 700mm
Exit stopper
Mark Camera