00198505-01_SM_SIPLACE_SmartFeeder_EN.pdf - 第26页
5 Diagnosis and Solutions 5.1 Assignment of Symptoms/Repairs 26 Service Manual SIPLACE SmartFeeder 4 - 104 mm X 11/2017 Rocker The rocker is bent. The plain tamp wheel for the rocker has jammed. The thread of the bearing…

5 Diagnosis and Solutions
5.1 Assignment of Symptoms/Repairs
Service Manual SIPLACE SmartFeeder 4 - 104 mm X 11/2017 25
5 Diagnosis and Solutions
Procedure
► First perform a sight check. For a description of how to do this, refer to the Job Guide "Inspec-
tion and Maintenance" (German [00196358‑xx], English [00196359‑xx].
Other languages available on request.
During the sight check, look to see whether the feeder modules are dirty or damaged. If ne-
cessary, the relevant feeder module may need to be cleaned or repaired.
For further information about the repairs needed, refer to 5.1 "Assignment of Symptoms/Re-
pairs" [}25].
► Then perform a functionality test to check the electronic function of the feeder module. For
this, use a X Feeder Test Station or the X Feeder Verification System (FVS).
For a description of this, refer to the Job Guide "X-FeederTestStation" (German
[00196352‑xx], English [00196353‑xx] or the user manual "SIPLACE X-Feeder Verification
System" [00198272-xx}.
► Use the ascertained errors (symptoms) to derive the necessary repairs from the following
table.
► After performing repairs, check whether they were successful. Perform a sight check and then
the tests with the X Feeder Test Stationor the X Feeder Verification System.
If symptoms or damage to the feeder modules is found, for which no repair instructions are in-
cluded in this Service Manual, we recommend that you have the feeder module repaired by the
manufacturer's repair service.
5.1 Assignment of Symptoms/Repairs
Symptoms Repairs
Tape drive
The front slider guide is damaged. Replace the front slider guide.
The pickup window is missing or damaged.
The pivotal point of the pickup window is loose.
Replace the pickup window
The splice sensor is missing or has a mechanical de-
fect.
Replace the splice sensor
The X Feeder Testbox reports an error during tape
operation and there is no component jammed.
The teeth of the sprocket wheel are deformed.
The centering pin is damaged.
Please send the feeder module to the
manufacturer for repair.
Foil disposal
The foil disposal drive is blocked or rough-running
(not dirty).
Replace the whole foil disposal unit.
The knurled tamp wheel on the foil disposal drive is
damaged.
Replace the knurled tamp wheel assem-
bly
The rocker is bent or defective.
The magnet/sensor for the rocker is missing.
Replace the foil rocker
The ratchet has broken.
The grooved pin for the ratchet is missing.
Replace the ratchet

5 Diagnosis and Solutions
5.1 Assignment of Symptoms/Repairs
26 Service Manual SIPLACE SmartFeeder 4 - 104 mm X 11/2017
Rocker
The rocker is bent.
The plain tamp wheel for the rocker has jammed.
The thread of the bearing shaft is worn.
Replace the rocker assembly
The plain tamp wheel for the rocker is worn or dam-
aged.
Replace the plain tamp wheel
The bearing shaft of the rocker is rough-running or
damaged.
The slit in the bearing shaft is damaged.
Replace the rocker bearing shaft.
Control panel
The display window, an LED lamp or a button is de-
fective.
The removal handle is defective or does not engage
properly.
Replace the operating panel assembly
Leaf spring
The leaf spring on the tape inlet is missing or bent. Replace the leaf spring
6 Repairs to SmartFeeder 4 mm X
6.1 Front sliding guide/sliding foil
Service Manual SIPLACE SmartFeeder 4 - 104 mm X 11/2017 27
6 Repairs to SmartFeeder 4 mm X
Feeder module Item no. Description
SmartFeeder 4mmX 00141368-xx SIPLACE SmartFeeder 4mm X
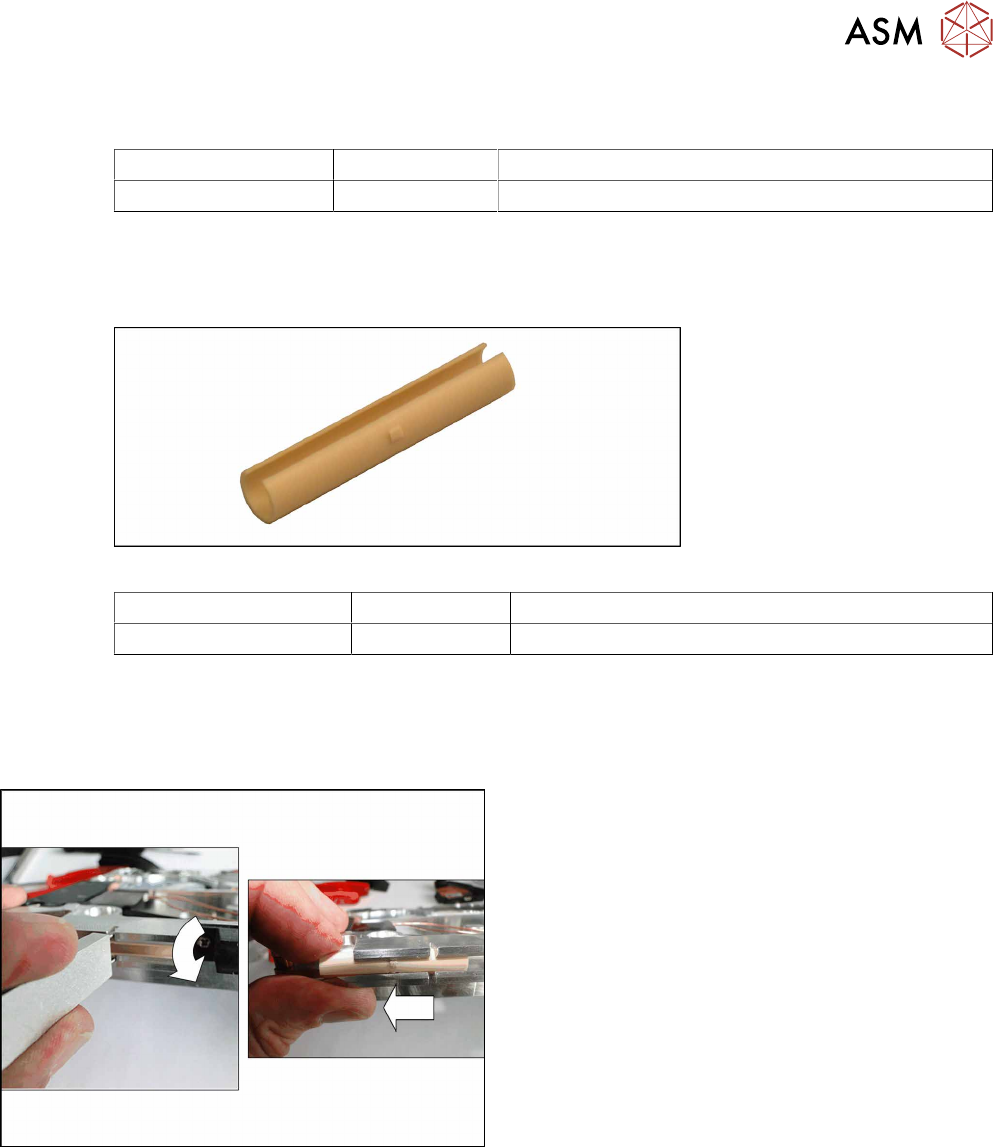
6.1 Front sliding guide/sliding foil
Required spare part
Fig.2: Sliding foil
Feeder module Item no. Designation
SmartFeeder 4mmX 03019604Sxx Sliding foil, X-feeder JUM-S-06LY
Required tools
●
Sliding foil remover [03075421-xx]
6.1.1 Removing the Sliding Foil
► Place the feeder module carefully down on its
side, onto a stable, level and clean surface.
► Place the sliding foil remover into the sliding
guide, as shown in the diagram.
► Lever the sliding foil out of the engaged position.
► Pull the sliding foil out of the sliding guide, to-
wards the front.