manual-biron-nano-handle-b-soldering-tool-jbc-0036842_ID-262259_EN.pdf - 第17页
S e alin g plu g Before replacing the sealing plug, disconnect the t ool from the st ation and ma ke sure th e dev ic e ha s co ole d dow n. Th e se ali ng p lug p reve nts un de si rab le f lu x vap or s or pa r ti cle …
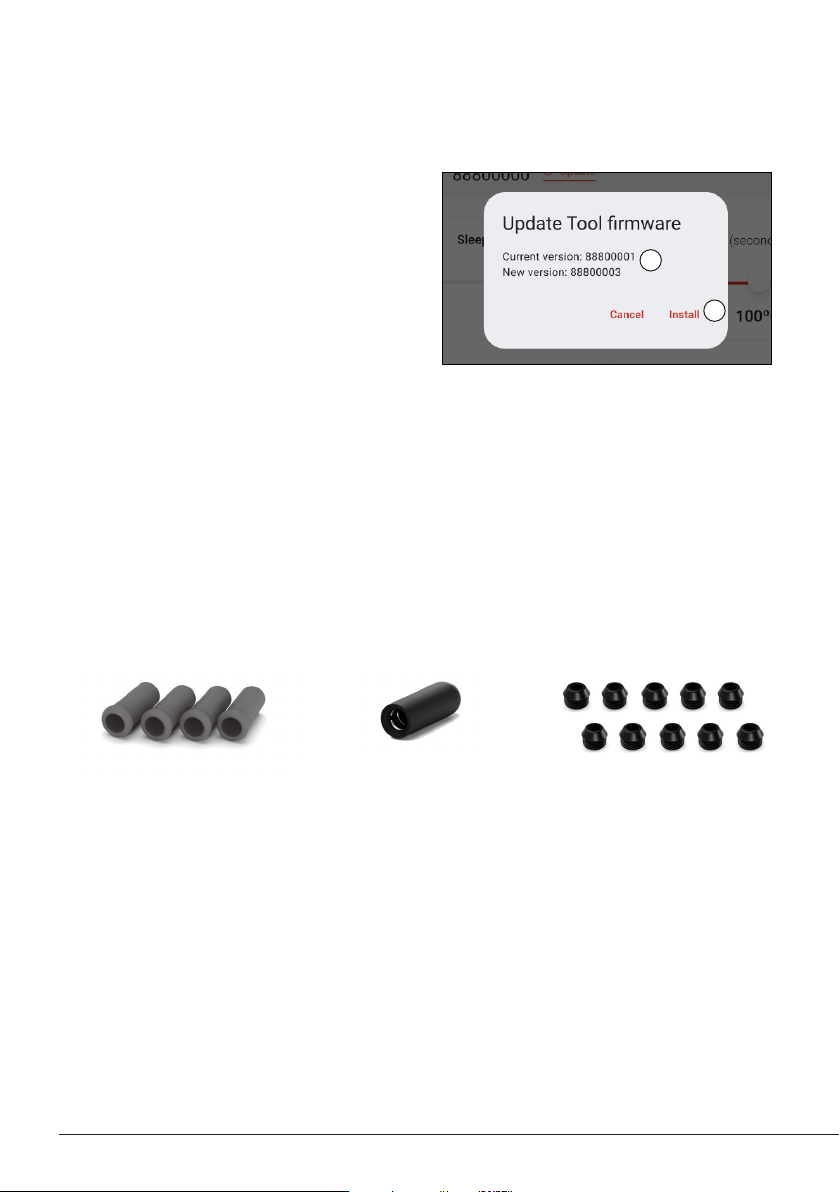
Replacement Parts for B.NANO Tools
B1510
Soft Foam Grips for B.IRON
Tools
Reference includes 4 grips
B1596
Safety Cap for B.IRON Tools
Reference includes 1 cap
OB5000
Sealing Plugs for B.NANO
Tools
Reference includes
10 sealing plugs
2
3
If the downloaded tool firmware update file
contains a more recent version than the one
already installed, the current and new version
are displayed (2). Tap “Install” to start the
update (3).
The update process takes about 10 minutes.
The B.IRON status lightband continuously
changes its color during the update process.
Once the update is complete, the pop-up
message “The tool version has been updated
correctly” appears on the screen.
If “No new version available” is displayed, no
update is possible or required.
Executing the Tool Firmware Update File (continuation)
16
Sealing
plug
Before replacing the sealing plug,
disconnect the tool from the station and
make sure the device has cooled down.
The sealing plug prevents undesirable flux vapors or particles from entering the tool and its usage is
highly recommended. If the sealing plug is not used, this can lead to incorrect cartridge contact and
may render the tool unusable.
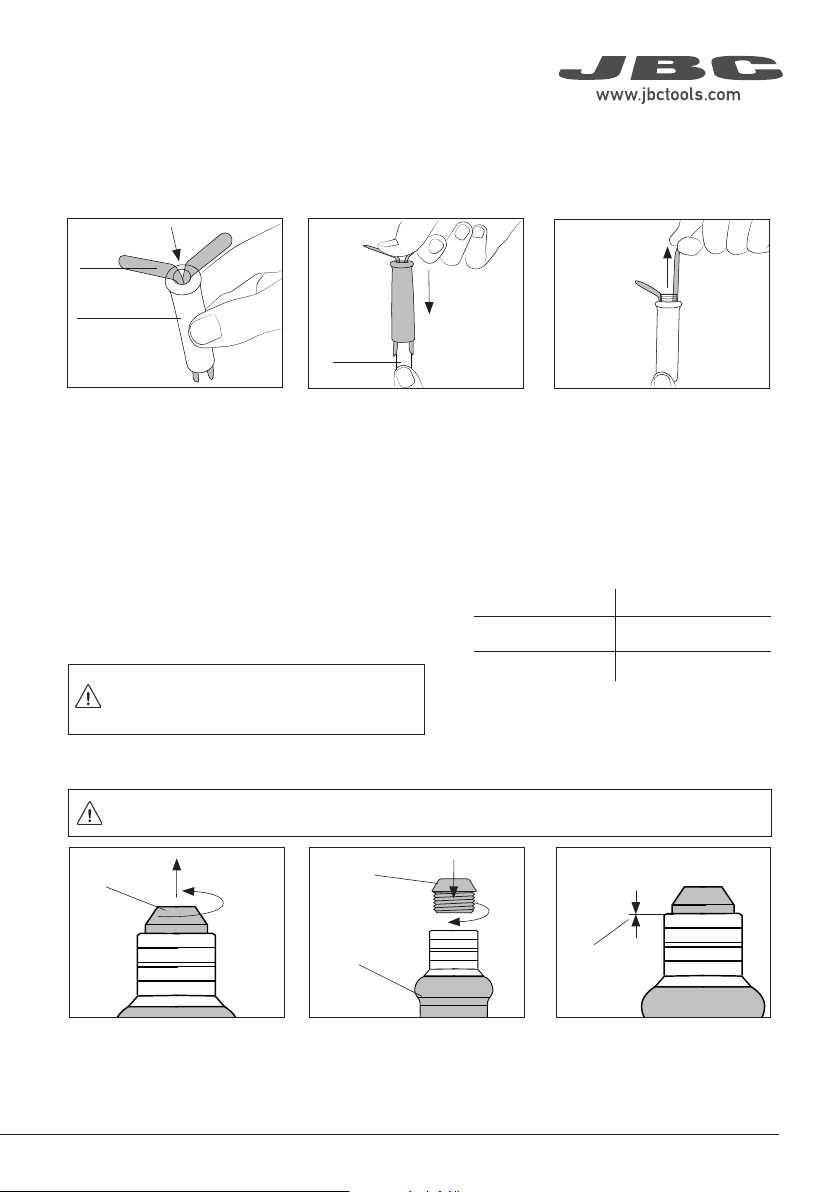
Push the sealing plug inside
the tool.
Note: The chamfered side
of the sealing plug has to be
positioned towards the tool.
Make sure the sealing plug is
placed correctly.
The edge of the sealing plug
must rest in the groove of the
tool bushing.
Introduce a small shaft or
screwdriver, not deeper than
8mm, lift and pull the sealing
plug. Never use a cartridge to
do this operation.
Tool
Chamfered
Side
* Each ref. comes with 10 sealing plugs
Replacing Sealing Plug for B.100 & B.500 Tools - OB4000 comes with 10 sealing plugs
Replacing Sealing Plug for B.NANO Tools - OB5000 comes with 10 sealing plugs
Edge inside
the groove
Tool
Chamfered
side
Sealing plug
in touch with
the bushing
Remove the worn sealing plug
by unscrewing it by hand.
Position the chamfered side
upwards and screw the new
sealing plug into the tool
bushing until it stops.
Make sure the sealing plug is
placed correctly.
The shoulder of the plug must
be in touch with the bushing.
View: inside
Sealing
Plug
Sealing Plugs
For B.NANO tools, the use of the sealing plug is mandatory. Without the use of the sealing
plug, the cartridges cannot be properly inserted.
Note: Check the condition of the plug periodically
and replace it as soon as wear or cracking is
detected.
Tool Sealing Plug Ref.
B.NANO OB5000*
B.100 and B.500 OB4000*
CD-Q:
OK
CD-Q:
OK
CD-Q:
OK
Make a lengthwise cut on the
worn grip. Be careful not to
damage the tool.
Remove the worn grip. Firmly slide the new grip onto
the tool until it locks into place.
Cutting Worn Grip Removing Worn Grip
Replacing Rubber Grips - B5051 includes 4 grips
Cutter
Assembling New Grips
Worn Grip
New Grip
Apply vaseline inside the
grip for easier fitting
Maintenance - B.IRON Tools
Replacing Soft Foam Grips - B1510 (B.100, B.NANO, B.500-A) / B5050 (B.500-B)
Insert the fitters into the new
grip.
Push the grip with the fitters
onto the tool.
To remove the fitters, hold the
grip and pull the fitters out. Use
pliers if necessary.
Fitter
New Grip
Hold this way
so the fi tters
can slide
Tool
Inserting Fitters Assembling Grips Removing Fitters
Sealing
plug
Before replacing the sealing plug,
disconnect the tool from the station and
make sure the device has cooled down.
The sealing plug prevents undesirable flux vapors or particles from entering the tool and its usage is
highly recommended. If the sealing plug is not used, this can lead to incorrect cartridge contact and
may render the tool unusable.
Push the sealing plug inside
the tool.
Note: The chamfered side
of the sealing plug has to be
positioned towards the tool.
Make sure the sealing plug is
placed correctly.
The edge of the sealing plug
must rest in the groove of the
tool bushing.
Introduce a small shaft or
screwdriver, not deeper than
8mm, lift and pull the sealing
plug. Never use a cartridge to
do this operation.
Tool
Chamfered
Side
* Each ref. comes with 10 sealing plugs
Replacing Sealing Plug for B.100 & B.500 Tools - OB4000 comes with 10 sealing plugs
Replacing Sealing Plug for B.NANO Tools - OB5000 comes with 10 sealing plugs
Edge inside
the groove
Tool
Chamfered
side
Sealing plug
in touch with
the bushing
Remove the worn sealing plug
by unscrewing it by hand.
Position the chamfered side
upwards and screw the new
sealing plug into the tool
bushing until it stops.
Make sure the sealing plug is
placed correctly.
The shoulder of the plug must
be in touch with the bushing.
View: inside
Sealing
Plug
Sealing Plugs
For B.NANO tools, the use of the sealing plug is mandatory. Without the use of the sealing
plug, the cartridges cannot be properly inserted.
Note: Check the condition of the plug periodically
and replace it as soon as wear or cracking is
detected.
Tool Sealing Plug Ref.
B.NANO OB5000*
B.100 and B.500 OB4000*
17
40 mm
50 mm
60 mm
80 mm
100 mm
130 mm
130 mm
para manuales - negro plano
200 mm
300 mm
Safety - Battery
- Caution: This product contains lithium-ion batteries. Mishandling or improper use may result in fire,
explosion, or personal injury.
- Always use the provided charger. Do not use damaged chargers or batteries.
- Never attempt to disassemble or modify the batteries or the product. Doing so may lead to electric
shock, fire, or damage to the product.
- In the event of damage, leakage, or overheating of the batteries, discontinue use immediately and
contact customer support or JBC technical service facility.
- Dispose of devices with batteries inside, responsibly according to regulations. They must be disposed
of in accordance with local regulations so that they can be recycled.
- Do not throw devices with batteries into household waste and do not dispose of them in fire or water.
It is imperative to follow safety guidelines to prevent electric shock, injury, fire
or explosion.
Safety
- Do not use the units for any purpose other than soldering or rework. Incorrect use may cause a fire.
- The power cord must be plugged into approved bases. When unplugging it, hold the plug, not the wire.
- Do not attempt to dismantle or open the housing of the tool as it may cause damage.
- Do not work on electrically live parts.
- The tool should be placed in the charging holder when not in use in order to charge the batteries.
- The soldering tip, the metal part of the tool and the charging holder may still be hot even when the
station is turned off.
- Do not leave the tool unattended when it is on.
- Avoid flux coming into contact with skin or eyes to prevent irritation.
- Be careful with the fumes produced when soldering.
- Keep your workplace clean and tidy. Wear appropriate protection glasses and gloves when working
to avoid personal harm.
- Utmost care must be taken with liquid tin waste, which can cause burns.
- This appliance can be used by children over the age of eight and also persons with reduced physical,
sensory or mental capabilities or lack of experience provided that they have been given adequate
supervision or instruction concerning the use of the appliance and understand the hazards involved.
Children must not play with the appliance.
- Maintenance must not be carried out by children unless supervised.
- Do not expose the portable display to high temperatures, humidity or dust. Avoid direct sunlight.
- Do not drop the portable display or the tool, as it may cause damage or malfunction.
- Do not disconnect your device when it is in fi le transfer mode.
- Do not use the portable display in places where wireless communications are restricted.
It is imperative to follow safety guidelines to prevent electric shock, injury, fire
or explosion.
18
Before carrying out maintenance, always extract the cartridge from the tool and disconnect the
charging base from the mains. Allow the equipment to cool down.
Maintenance - Station and Tools
- Use a damp cloth to clean the casing and the tool.
Alcohol can only be used to clean the metal parts.
- Periodically check that the metal parts of the tool
and charging holder are clean so that the charging
works properly.
- Keep the tip surface clean and tinned prior to
storage in order to avoid tip oxidation. Rusty
and dirty surfaces reduce heat transfer to the
solder joint.
- Do not use liquids such as alcohol, thinner or
benzene to clean the portable display.
- Repairs should only be performed by a JBC
authorized technical service.
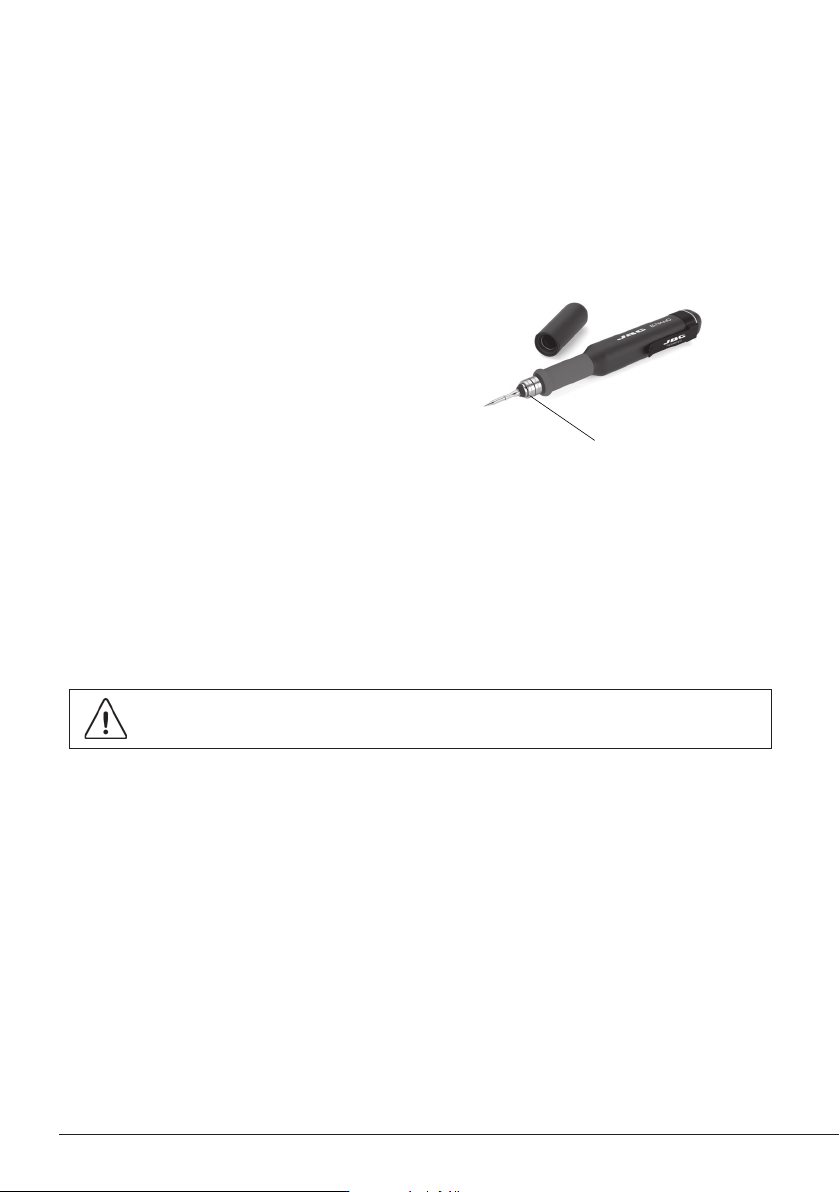
Clean the contact
surfaces regularly
to ensure that the
tool gets charged
correctly.
Clean the contact
surfaces regularly to
ensure that the tool gets
charged correctly