manual-biron-nano-handle-b-soldering-tool-jbc-0036842_ID-262259_EN.pdf - 第9页
A u t o Tu r n - O f f Th e tool tu rn s of f au tomat ica ll y in th ree d if fe re nt ca se s: a) Wh en th e tool (w ith ou t the too l ca p) is la id dow n an d rem ai ns co mp lete ly st ill i n Hib er nat ion M od e…
Stopping Data Display
When the tool is placed in the charging holder or when it enters Hibernation Mode, the data display
stops.
The display starts again automatically when the tool is lifted from the tool holder and the graph is
automatically displayed again at the point where the previous display stopped, leaving a small gap on
the graph between the last registered value and the new starting point.
Working with Two Tools
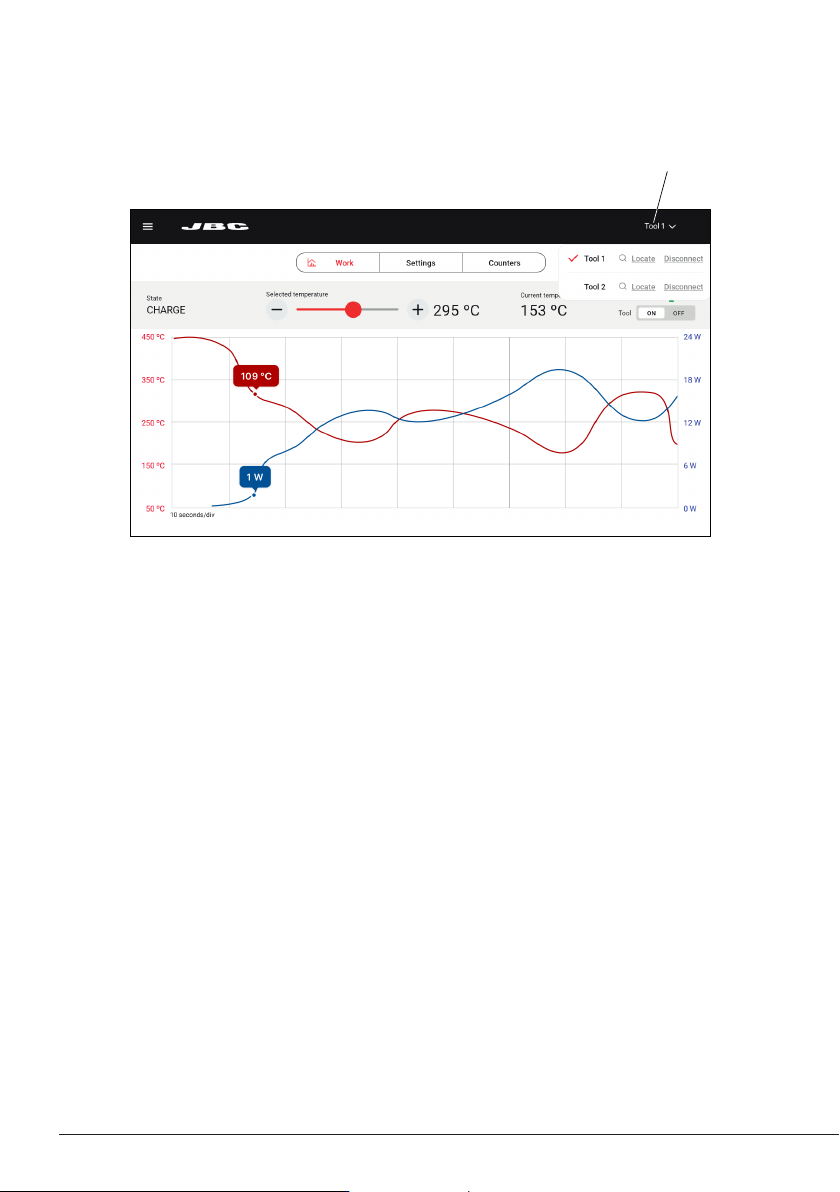
When working with two tools, to switch between the two graphs, tap on the tool selector (upper-right
corner of the display) and select the desired tool from the drop-down menu.
It is also possible to alternate both graphs by simply lifting one tool or the other from the tool holder.
The display will automatically show the graph and information of the tool in use.
Locate Tool Function
From the tool selector, it is also possible to use the Locate tool function, which illuminates the status
lightband of the tool for identification by flashing blue.
Active Tool and Tool Selector
Main Screen - Work
8
Auto Turn-Off
The tool turns off automatically in three different cases:
a) When the tool (without the tool cap) is laid down and remains completely still in Hibernation Mode
for 5 minutes.
b) When the tool (with the tool cap on) remains completely still in Hibernation Mode for 60 minutes.
c) When the tool is in the charger and the charging base is disconnected from the mains.
Tool Reactivation
After automatically shutting off, place the tool back in the charging holder to reactivate it.
Manual Turn Off/On
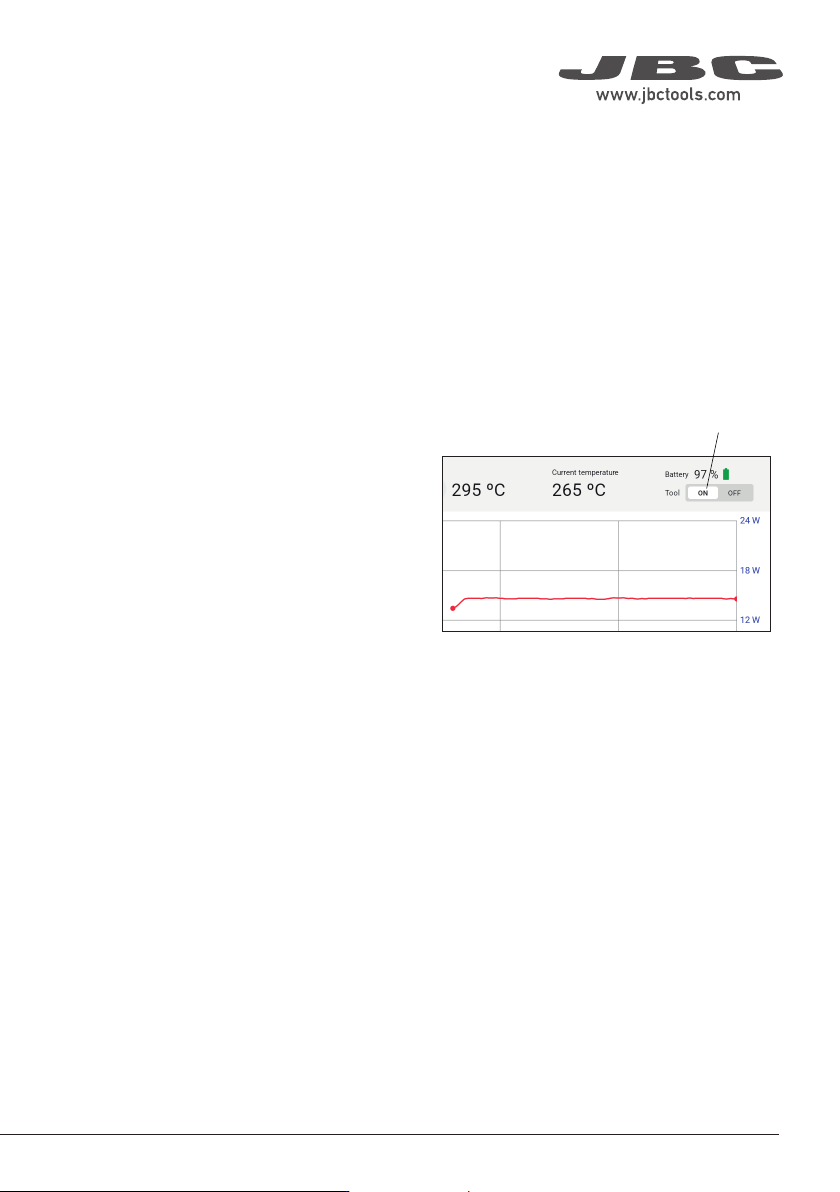
Besides the “automatic turn-off” feature, the
tool can also be manually turned off/on by
tapping the Tool On/Off button on the display.
Note: If the tool is turned off manually and
remains completely still for more than 5 minutes
or with its cap on for more than 60 minutes,
place it back in the charging holder to reactivate
it.
Tool On/Off Button
Main Screen - Work
9
40 mm
50 mm
60 mm
80 mm
100 mm
130 mm
130 mm
para manuales - negro plano
200 mm
300 mm

Main Screen - Work
Status
The tool can display different statuses:
Status Caused by Effect Solution
Work
Lift an operative tool from
the charging holder.
The cartridge heats up to
the selected temperature.
N/a
Charge
Place the tool in the
charging holder.
The cartridge cools down
to room temperature and
the battery charges.
N/a
Hibernation
Leave the tool completely
stationary out of the
charging holder for an
adjustable period of time (5
to 15 seconds).
The cartridge cools down
to room temperature.
N/a
Cover
Place the safety cap onto
the tool.
The cartridge cools down
to room temperature and
the status lightband turns
off. Communication with
the station is interrupted.
N/a
Connection lost
The connection between
the tool and the station has
been interrupted.
Possible reasons: the tool
has its safety cap on, the
tool has been inactive for 5
min., the tool is over 10 m
away from the station.
Tool-to-app information
exchange interrupted.
If the safety cap is on,
remove it. Place the
tool in the charging
holder if needed.
If the safety cap is not
on, place the tool in
the charging holder.
Off The tool is turned off.
Cartridge cools down to
room temperature.
Turn on the tool by
pressing the On/Off
button on the main
screen.
No cartridge
The tool does not have a
cartridge inserted or it is not
inserted correctly.
Inoperative tool.
Check that the
cartridge is inserted
correctly or insert a
cartridge.
Shortcircuit
Defective or unusable car-
tridge inserted.
Inoperative tool. Replace the cartridge.
Low batt
Battery of the tool nearly
depleted.
The tool will turn off
soon.
Charge the tool
by placing it in the
charging holder.
10