manual-biron-nano-handle-b-soldering-tool-jbc-0036842_ID-262259_EN.pdf - 第7页
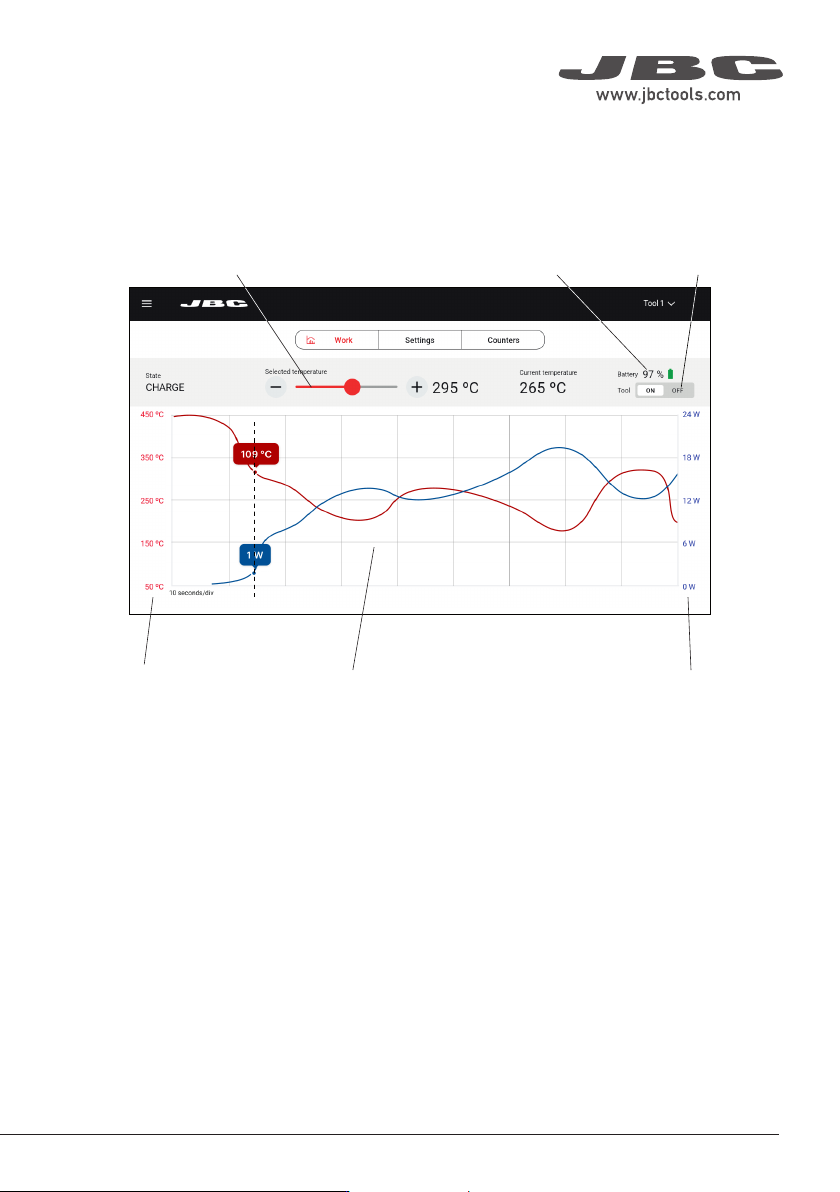
Main Screen - Wo r k The Work tab on the main scr een shows a graph of the tip temperature and power supplied to the tip updated in real time. It allows modifying the tool working temperatur e, checking the battery charg…
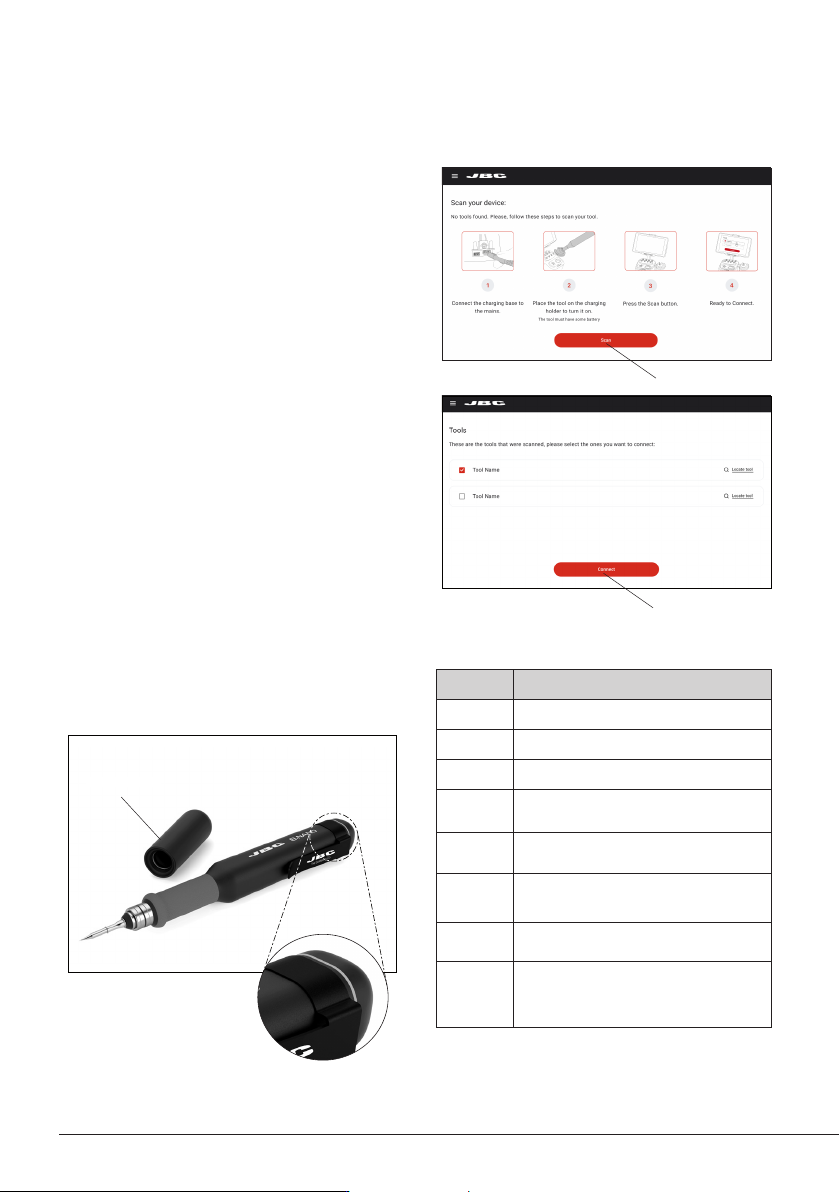
Safety Cap
Status Lightband Detail
Status Lightband
Color Tool Status
Green More than 50% charged
Orange Between 20% and 50% charged
Red Less than 20% charged
Flashing
green
Charging
(more than 50% charged)
Flashing
orange
Charging
(between 20% and 50% charged)
Flashing
red
Charging
(less than 20% charged)
No color
Safety cap on the tool
and/or power off
Flashing
blue
Locate Tool function activated
1. Make sure that the charging base is connected
to the mains.
2. Place the tool on the charging holder to turn
it on. Note: Charge the tool completely before
using it for the first time. A full charge takes:
-30min for B.100
-60min for B.500
-30min for B.NANO
-45 min for B.TWEEZERS
3. Press the Scan button. The tool must have
some battery to appear on the scan.
4. Select the tool or tools you want to connect to
the station and press the Connect button.
If your tool does not appear on the list, check that
it has some battery (see Status Lightband section)
and that it is on, and press the Scan button again.
The status lightband on the tool indicates its
status (see table on the right).
Tool Connection
Scan Button
Connect Button
6
Main Screen - Work
The Work tab on the main screen shows a graph of the tip temperature and power supplied to the tip
updated in real time. It allows modifying the tool working temperature, checking the battery charge level
and turning the tool in use on and off.
Temperature
and Power Graph
Temperature Slider Battery Charge Level
Temperature
Scale
Power
Scale
Graph and Automatic Data Display
The graphs of temperature and supplied power start automatically as soon as the tool is lifted from
the charging base.
The temperature/power values can be checked at a certain point of the graph by tapping on the
desired position on the display screen.
The graph can be moved to the left and right by swiping the touch screen sideways with one finger.
Working Temperature Modifi cation
The working temperature can be modifi ed using the temperature slider or the buttons on its sides.
Tool On/Off Button
7
40 mm
50 mm
60 mm
80 mm
100 mm
130 mm
130 mm
para manuales - negro plano
200 mm
300 mm
Stopping Data Display
When the tool is placed in the charging holder or when it enters Hibernation Mode, the data display
stops.
The display starts again automatically when the tool is lifted from the tool holder and the graph is
automatically displayed again at the point where the previous display stopped, leaving a small gap on
the graph between the last registered value and the new starting point.
Working with Two Tools
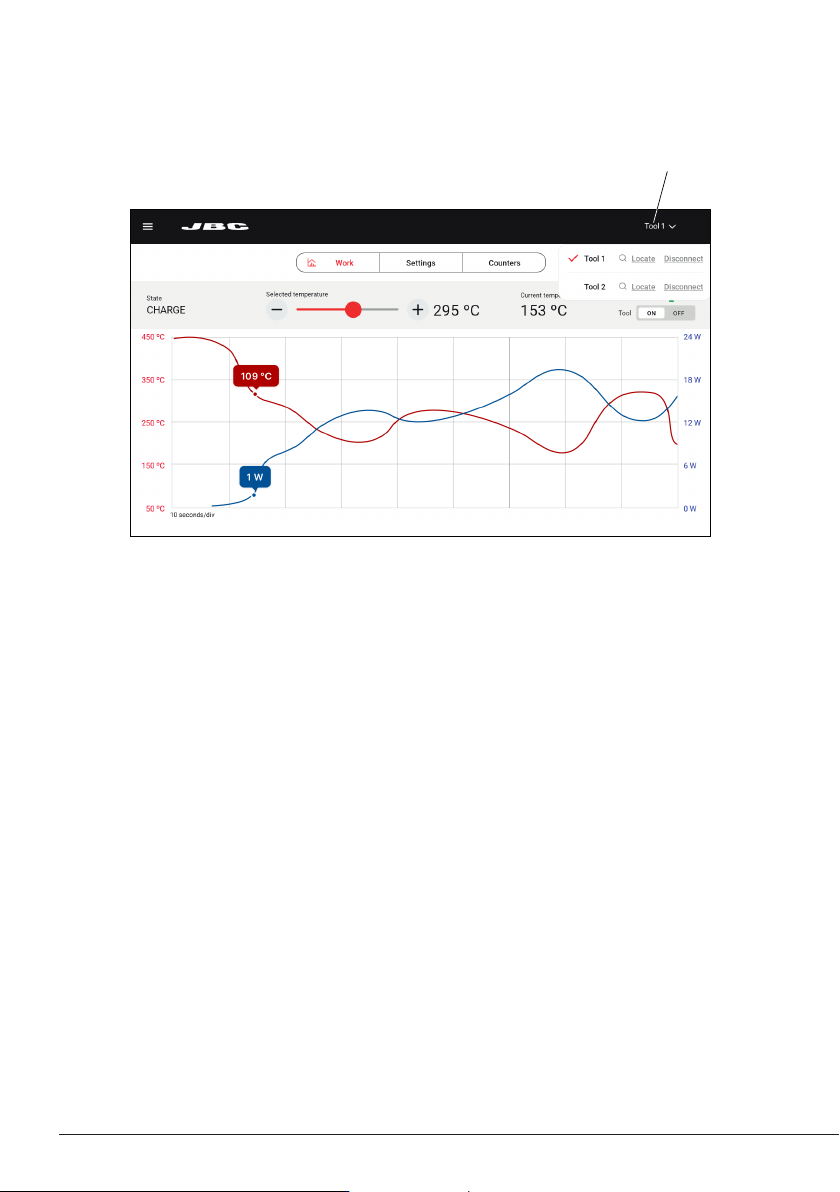
When working with two tools, to switch between the two graphs, tap on the tool selector (upper-right
corner of the display) and select the desired tool from the drop-down menu.
It is also possible to alternate both graphs by simply lifting one tool or the other from the tool holder.
The display will automatically show the graph and information of the tool in use.
Locate Tool Function
From the tool selector, it is also possible to use the Locate tool function, which illuminates the status
lightband of the tool for identification by flashing blue.
Active Tool and Tool Selector
Main Screen - Work
8