i3070-Software-Installation.pdf.pdf - 第11页
i3070 Software Installation 11 Completing the sof tware insta llation Ta s k Steps The installation wizard pr ocedure is now completed. Continue with the following tasks. 1 If installing on a testhead controller, set the…
10 i3070 Software Installation
7 Check license files for
Test Development Workstation
(node-locked)
(Licenses will be installed on the
workstation together with the
i3070 software.)
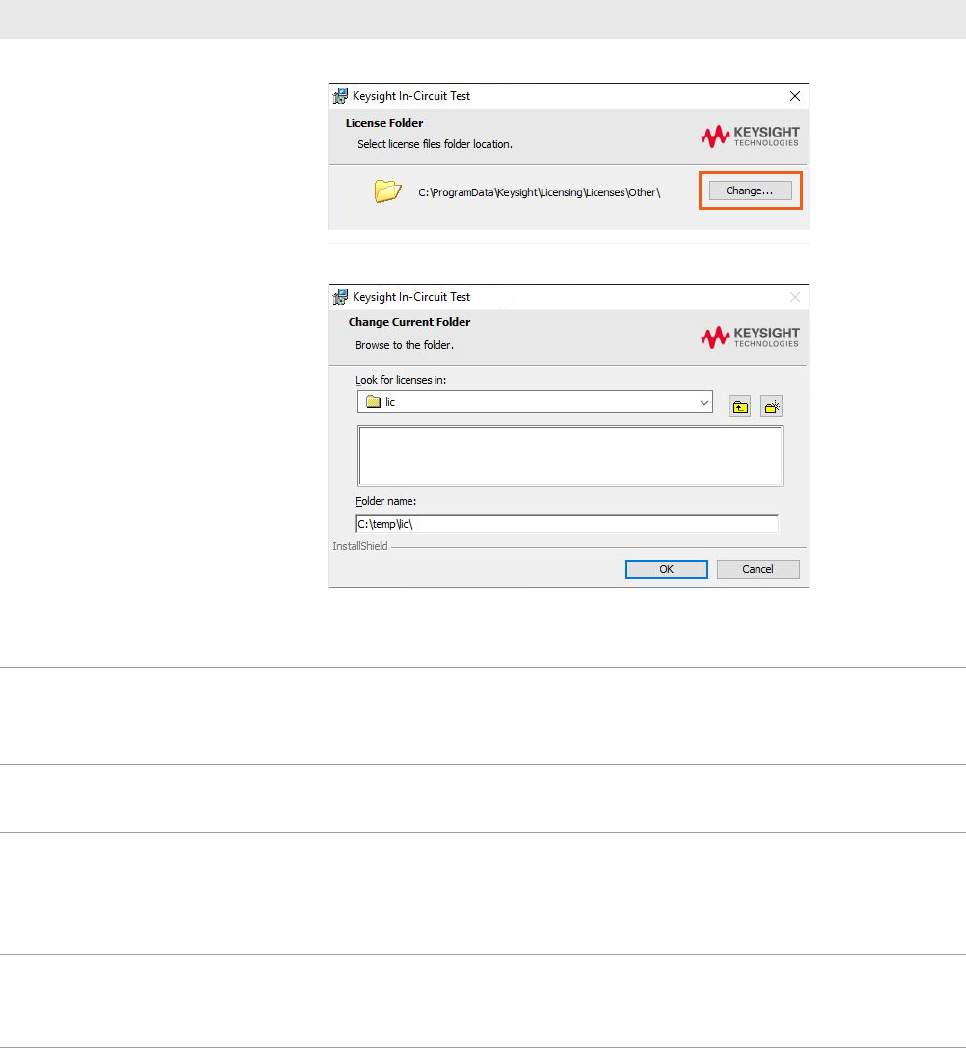
a In the License Folder dialog box, click Change.
b Select the temporary folder where you saved your license files and click OK.
c The installer lists the licenses found in the selected folder. Click Next.
d Click Yes to confirm you are installing on a test development workstation.
8 Confirm installation: The installer displays the third party applications to be installed.
a Click Install to begin installation.
b If prompted, click Install or Next to continue installation.
9 Finish installation: a When installation is completed, click Finish.
b Then click OK to reboot the computer.
10 Perform XVision optimization: After Windows restarts, the XVision Optimizer window appears.
a Click Yes to start the optimization process. It will take a few minutes to complete.
b Repeat the optimization process for each user account. (The XVision Optimizer
window will appear when each user logs on.)
11 If errors or other messages
appear:
• If Quick Log Converter prompts for a missing template, ignore it.
• If prompted to install a new version of Keysight IO Libraries, do not do so. Select
Skip this version and Quit.
Installing the software (continued)
Task Steps
i3070 Software Installation 11
Completing the software installation
Task Steps
The installation wizard procedure is now completed. Continue with the following tasks.
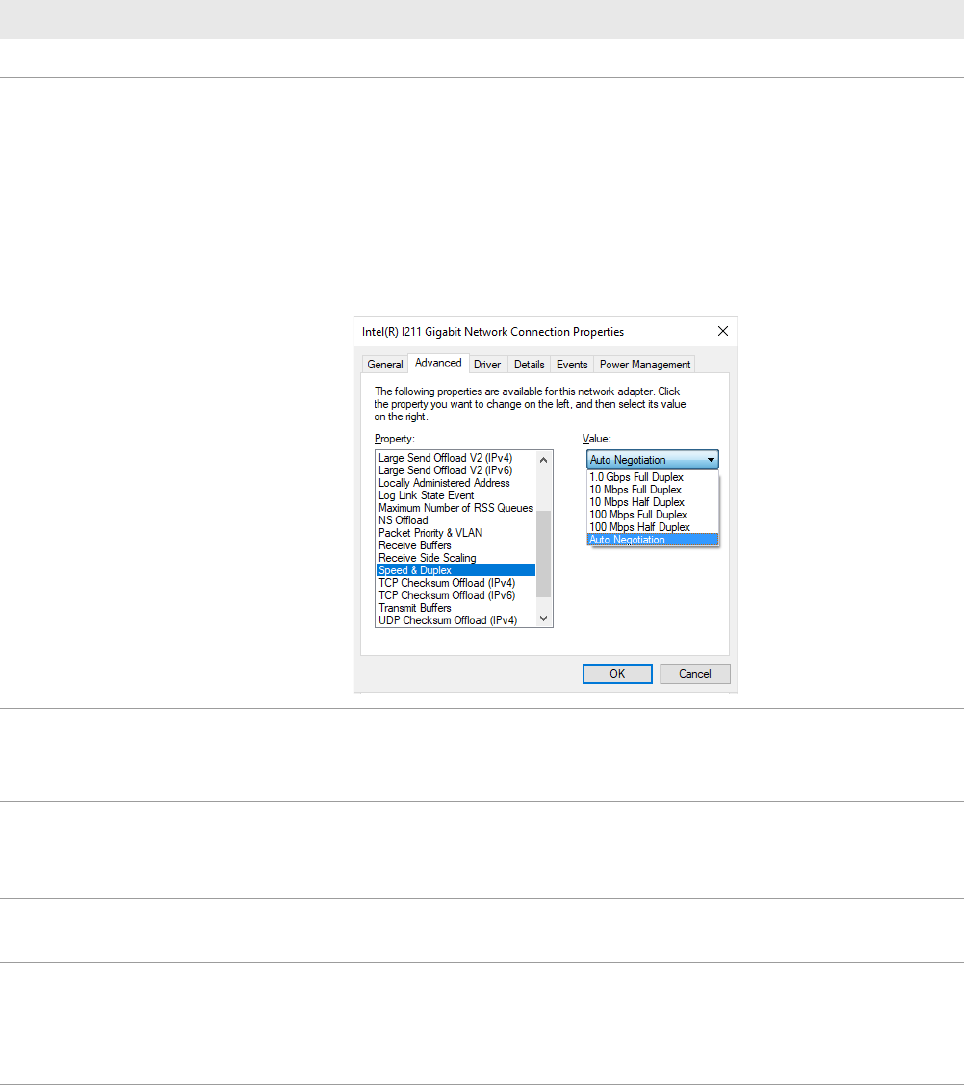
1 If installing on a testhead controller,
set the recommended Speed &
Duplex on Testhead LAN to prevent
lost heartbeat failure:
a Right-click on the Testhead LAN icon in the Taskbar and select Status.
b In the Testhead LAN Status dialog box, click Properties.
c In the Testhead LAN Properties dialog box, click Configure.
d In the network adapter’s Properties dialog box, click the Advanced tab.
e Select Speed & Duplex and change its value according to the Module
Control Card in use.
ControlXTPB – Auto Negotiation
ControlXTPA – 100 Mb, half duplex
2 Check startup type for BOOTP
Turbo:
a Open Control Panel and click Administrative Tools > Services.
b In the service list, look for BOOTP Turbo and ensure that the Startup Type is
Automatic.
3 Set power options to never turn off
the hard disks and monitor:
a Open Control Panel and click Power Options.
b Click Change plan settings for the power plan in use.
c Set all options to Never and click Save changes.
4 Check for software patches: Go to www.keysight.com/find/i3070patches to check for any software patches
and install them.
5 Copy needed files: a Open a KornShell window.
b Execute
setupEnv.ksh. (This will copy four files to the $HOME folder.
This step creates the user account and home env.)
c Close the KornShell window.

12 i3070 Software Installation
6 Complete the license installation: • To install the node-locked licenses on a testhead controller or test
development workstation, see Installing node-locked licenses on page 13.
• To allow access to optional feature licenses (which are floating licenses), see
Setting up client machines to use floating licenses on page 16.
7 To run the i3070 software when
Windows Firewall is enabled
(optional):
To allow the i3070 software to run when Windows Firewall is enabled, go to the
C:\I3070_ICT\util folder, right-click CreateFirewallRule.bat and select Run as
administrator.
The script creates inbound rules for the required ports and TCP/IP addresses.
• Default ports enabled: 1337, 3071, 9090, 5672, 31883, 40100, 40102,
50100, 50102, 7030.
• Default IP addresses enabled: 10.3.112.1 to 10.3.112.255, 0.0.0.0,
192.168.1.1, 255.255.255.255.
Completing the software installation (continued)
Task Steps