OM-1455-004_w.pdf - 第41页
1-10 Tg1576-ID-SO 3.1 Installation Procedure for Single-transfer T ray Feeder C A U T I O N When the single-transfer tray feeder is set to or removed from the cart, or the tray feeder itself is moved, two persons should …
1-9
Tg1576-ID-SO
3. Handling of Single-transfer Tray Feeder
Notice
Before installing a single-transfer tray feeder on the bank feeder
change cart, note the following.
· Lock the caster brakes (2 places) of the bank feeder change cart.
· If the
single-transfer tray feeder is seated aoat, vacuum
nozzles or the machine (GXH series) will be damaged, causing
pickup errors.
Be sure to install the single-transfer tray feeder correctly.
CAUTION
·
Be sure to hold the handle to move the bank feeder change cart.
·
While attaching the handle slides, be sure to prevent your
ngers from getting jammed.
·
Be careful not to hit your foot against the cart while moving the
bank feeder change cart.
·
Try to wear a pair of shoes that can protect your toes and have
slip- and puncture-resistance soles (thickness: 10 mm or more)
while working.
0708-002
1-10
Tg1576-ID-SO
3.1 Installation Procedure for Single-transfer Tray Feeder
CAUTION
When the single-transfer tray feeder is set to or removed from the
cart, or the tray feeder itself is moved, two persons should hold
the specied handle and take the greatest care not to drop it onto
anybody's foot.
Notice
(a) If the single-transfer tray feeder is seated aoat, the
machine (GXH series) may be damaged or pickup errors
will be caused.
Be sure to install the unit correctly on the feeder base.
(b) Remove the single-transfer tray feeder not to be used and
put it on the dedicated temporary holding stand.
Procedure
(1) Before installing a single-transfer tray feeder, conrm that no foreign
substances (dirt or dust) are found on the feeder base located on the
upper area of the cart.
(2) Hold the specied handle by two persons. Then, set the tray feeder on
the location specied for the Fdr. No.
Notice
Do not select a wrong feeder No. position. Otherwise, some
components may be trapped in the drum (rotational disk) area.
(3) Hold the specied handle and insert the front end of the single-transfer
tray feeder so that it is set on the feeder base rails. After that, press it
forward to conrm that it has been securely set.
Notice
Be sure to install the single-transfer tray feeder securely on the
rails of the feeder base.
(4) Hold the handle and insert it from the front slowly and securely. At that
time, make sure that the connector for the single-transfer tray feeder has
been connected securely.
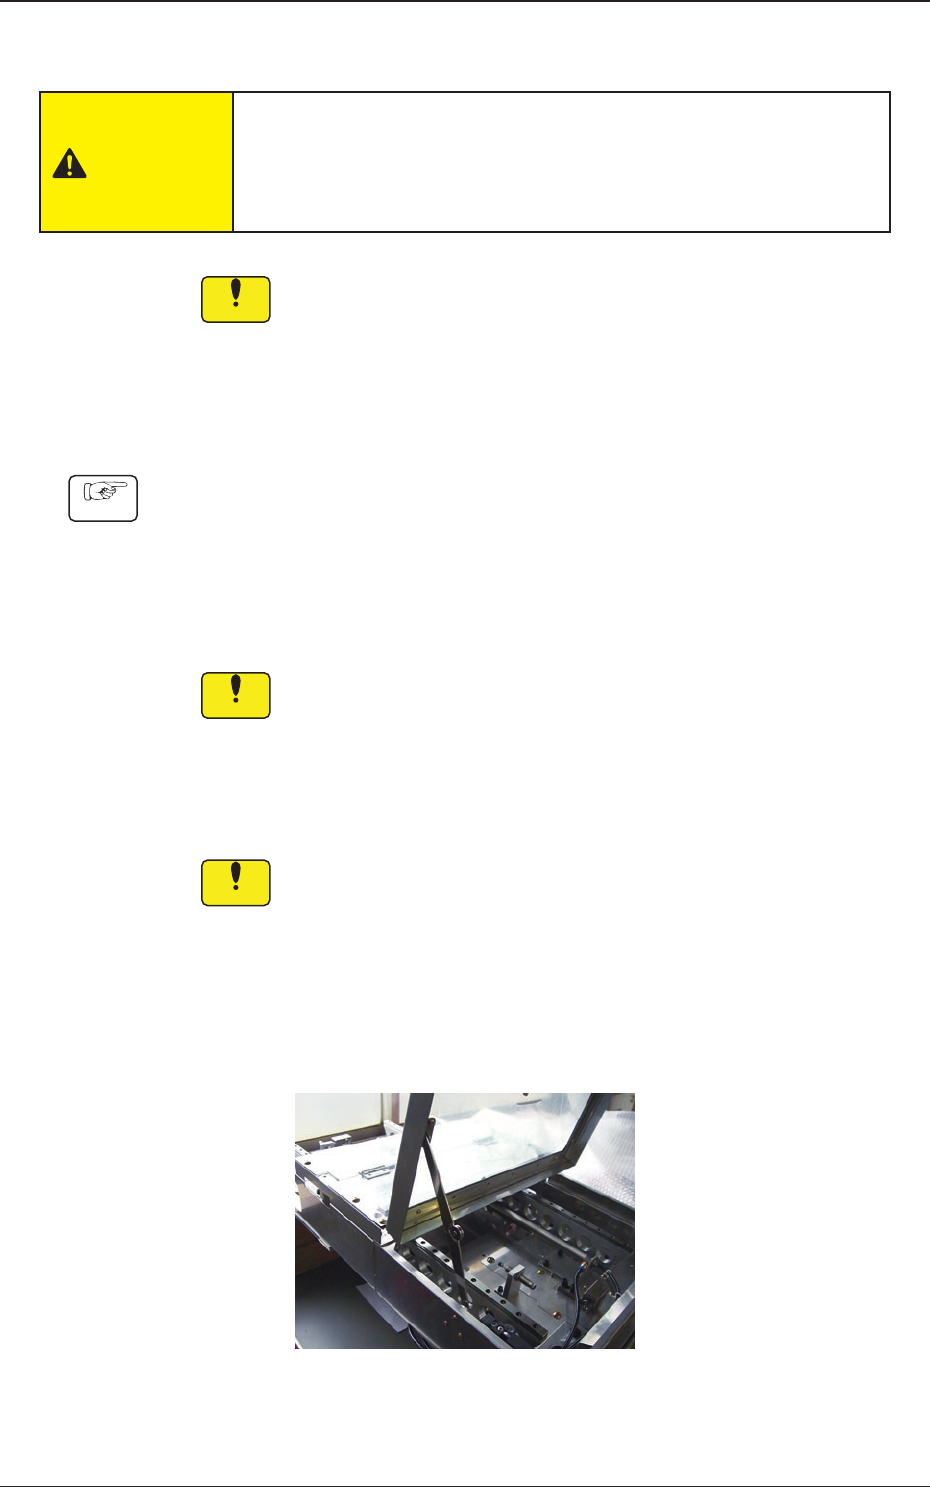
(5) Attach the valve (option) for air supply.
Fig. A1
0708-002
1-11
Tg1576-ID-SO
3.2 Uninstallation Procedure for Single-transfer Tray
Feeder
CAUTION
Do not drop any single-transfer tray feeder during the attachment or
detachment. Otherwise, a foot injury will result or some feeders may be
damaged.
Carefully handle each unit one by one and do not drop any.
Procedure
(1) Remove the feeder package replacement cart from the main machine
and lock the caster brake (two locations).
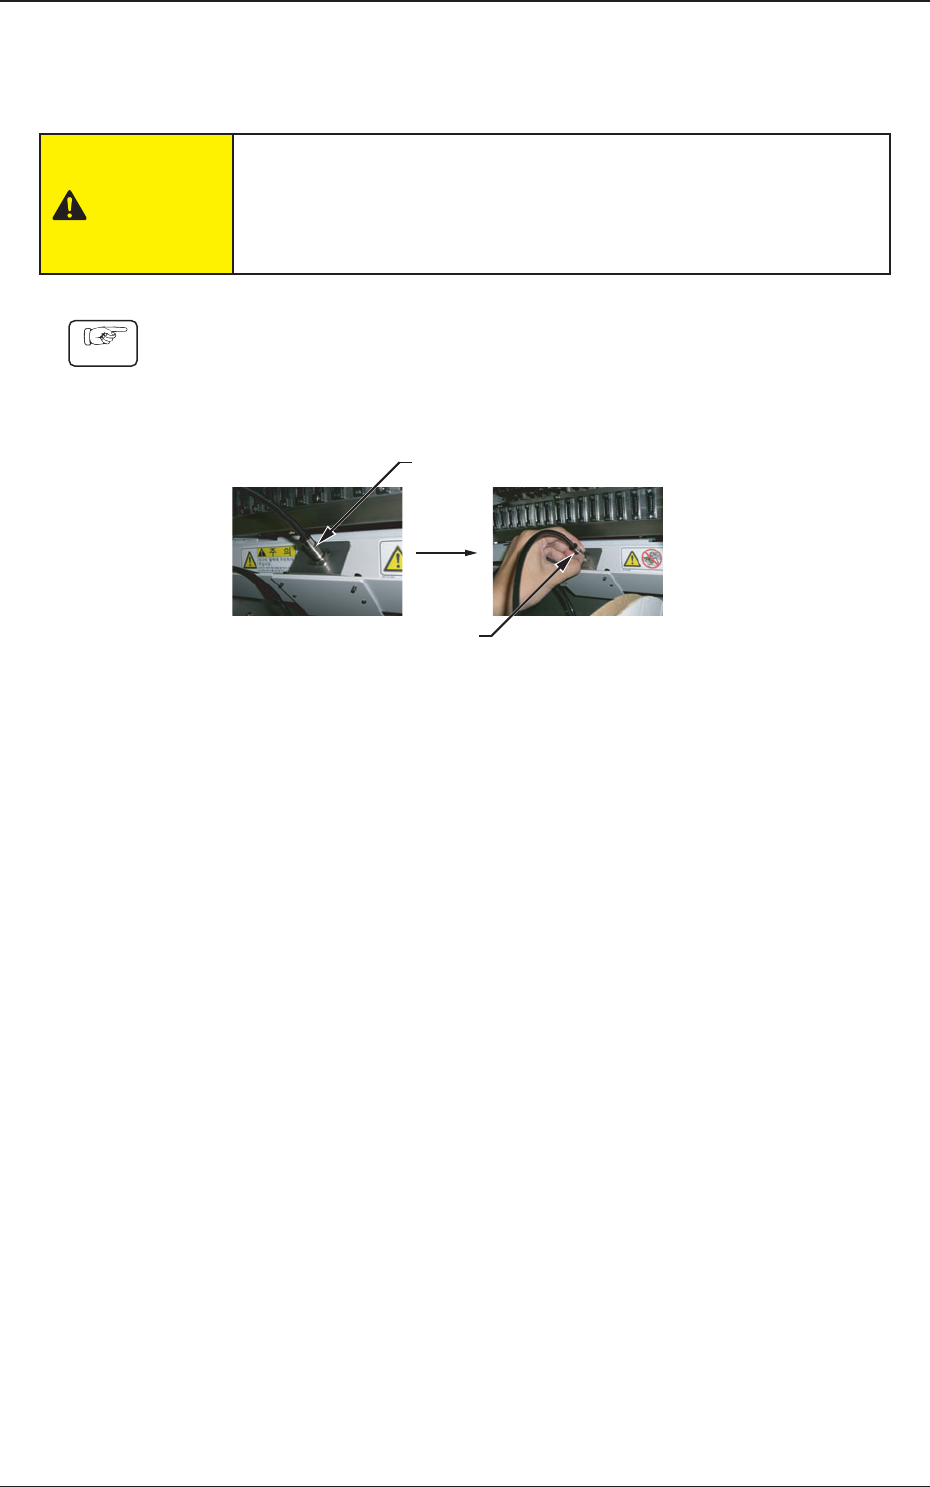
(2) Remove the valve (option) for air supply.
Pull out while pushing it in
Fixed Valve Section
Fig. A2
(3) Slowly bring forward the single-transfer tray feeder.
0708-002