Maintenance Schedule保养计划.pdf - 第9页
Page 18 Vision XP+ V AC / XP + / XP / XS 2 Mainte nance 2.4 Proces s Cham b er Service Instructions V ersion 1.3 2.4.4 Cleaning the Guide Rails for the Sheet Metal Covers The guide r ails for the sheet metal cover are l …

Vision XP+ VAC / XP+ / XP / XS Page 17
2 Maintenance
2.4 Process Chamber
Service Instructions
Version 1.3
2.4.3 Cleaning of coated nozzle fields (option)
Water-based medium or adhesive:
Solvent-based adhesives and oil-containing media:
Fig. 2-4 Cleaning of coated nozzle fields
Consumable:
• soft brush
Procedure:
1. Cleaning should be done with
warm water or soapsuds, but
the soapsuds has to be rinsed
with a lot of water subsequently.
Note!
Please use as auxiliary means for
mechanical removal a soft brush
and just a little pressure.
Fig. 2-5 Cleaning of coated nozzle fields
Consumable:
• soft brush
• acetone or isopropyl
Procedure:
1. Cleaning should be done with
Acetone or Isopropyl. Please
use soft brush and only just a
little pressure.
Note!
Cleaned surfaces have to be rinsed
with water subsequently to restore
the original characteristics.
Note!
Never use high-pressure cleaner as the water-repellent characteristics of
the coating will be damaged through this.
Page 18 Vision XP+ VAC / XP+ / XP / XS
2 Maintenance
2.4 Process Chamber
Service Instructions
Version 1.3
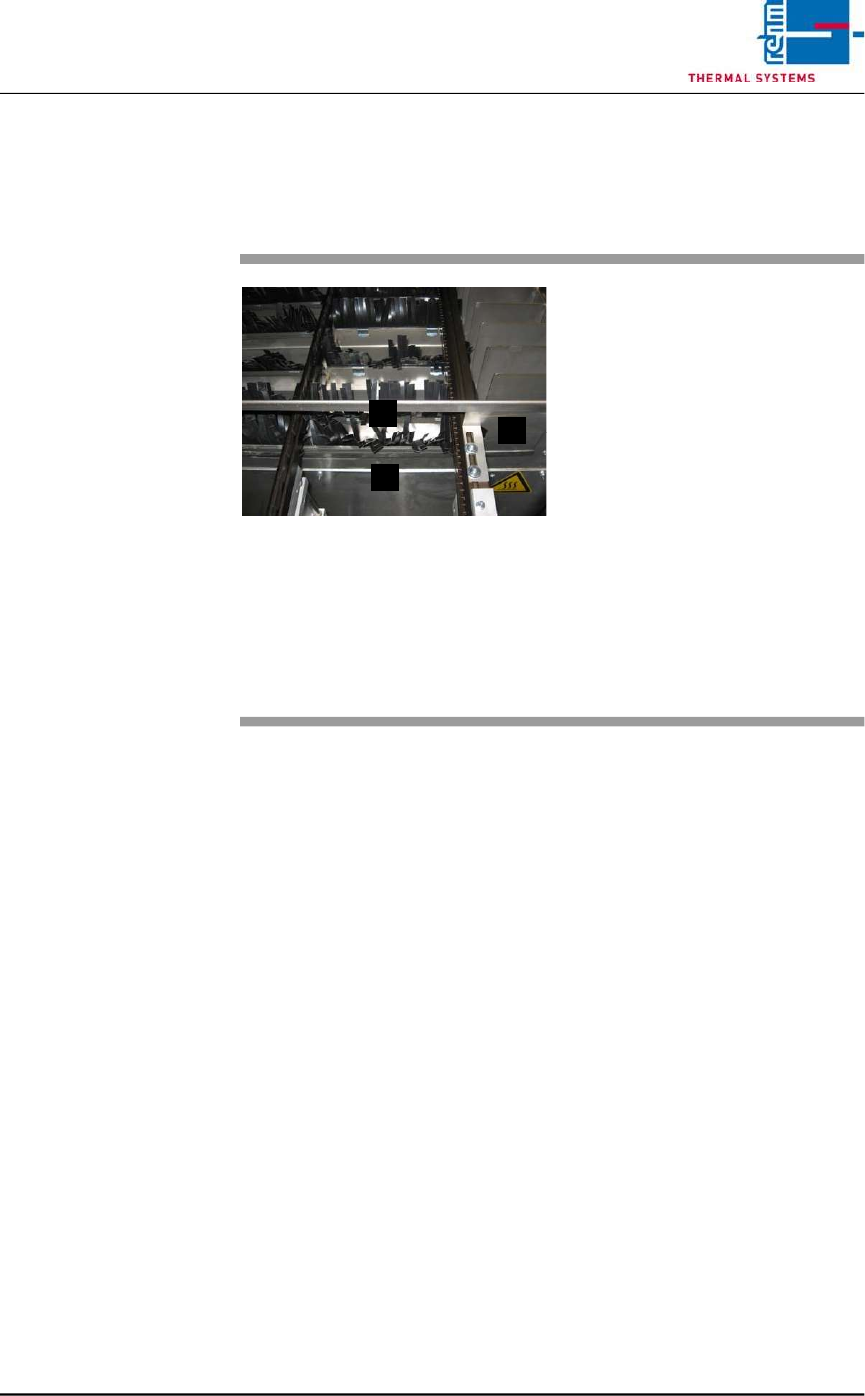
2.4.4 Cleaning the Guide Rails for the Sheet Metal Covers
The guide rails for the sheet metal cover are located at the inlet and the out-
let.
Fig. 2-6 Cleaning the Guide Rails
Consumable materials:
• Oven cleaner
• Rags
Procedure:
1. Raise the process chamber as
far as it will go. Set width
adjustment to the maximum
value and move the center
support to the middle.
2. Unscrew the sheet metal cover
(A) and pull it out.
3. Clean the groove in the top (B)
and bottom (C) guide rails with
a screwdriver, rags and oven
cleaner.
A
B
C
Vision XP+ VAC / XP+ / XP / XS Page 19
2 Maintenance
2.4 Process Chamber
Service Instructions
Version 1.3
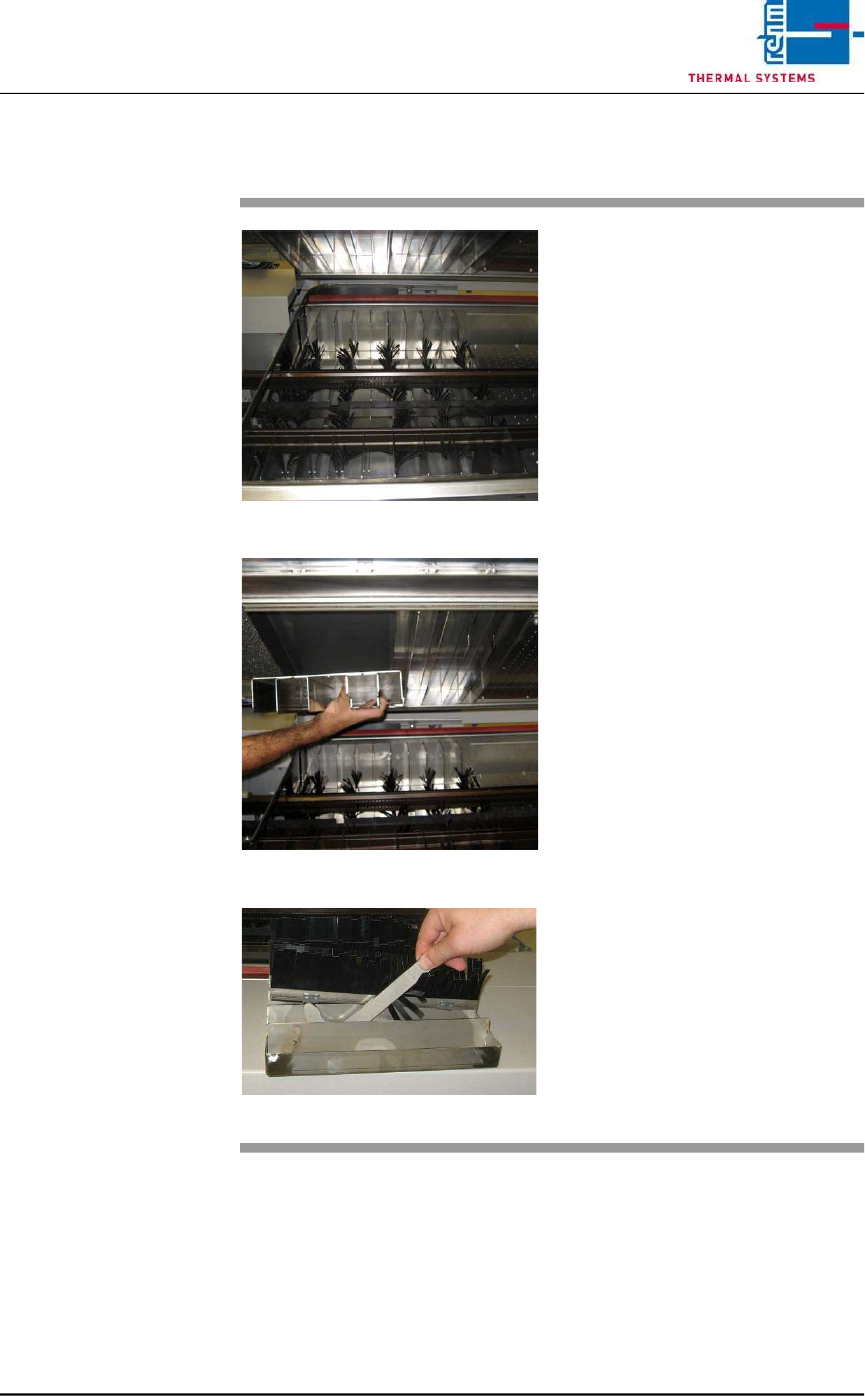
2.4.5 Cleaning the Curtains
Fig. 2-7 Bottom Curtains
Fig. 2-8 Top curtains (2-part)
Fig. 2-9 Push the clips up with prying tool
Consumable materials:
• Oven cleaner
• Rags
• Prying tool
Procedure:
1. Raise the process chamber.
2. Lift the curtains out of the
system along with the mounting
bracket.
3. Clean all curtains, the mounting
bracket and the interior of the
process chamber with oven
cleaner and a rag.
If the curtains are excessively dam-
aged they must be replaced.
Procedure:
1. Push up the clips at the left and
right-hand sides of the
mounting rail with the prying
tool.
2. Remove the old curtain.
3. Insert the new curtain.
4. Replace the clips.