TS577R-UserGuide.pdf - 第7页
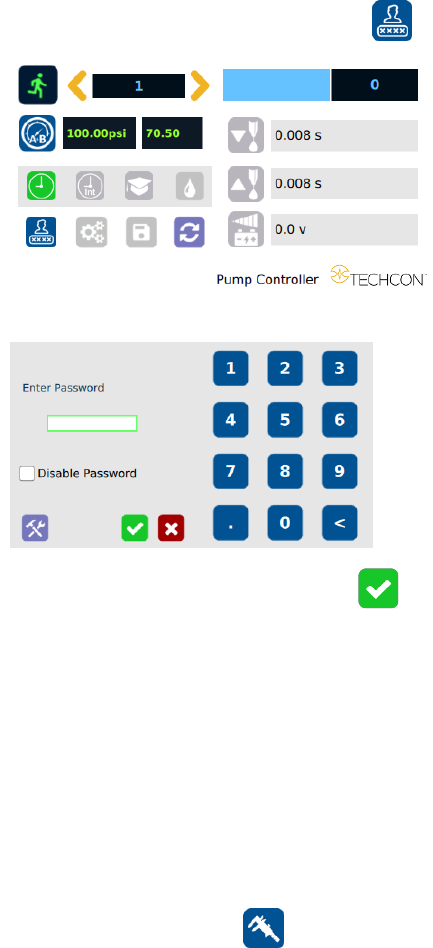
7 5.1.1 Login 1. To uch the Login icon to enter the login screen 2. En ter “0000” in Password window 3. To uch the Check Mark icon to save and exit 5.1.2 Pressure Calibration Note: Pressure calibration must be performed …
6
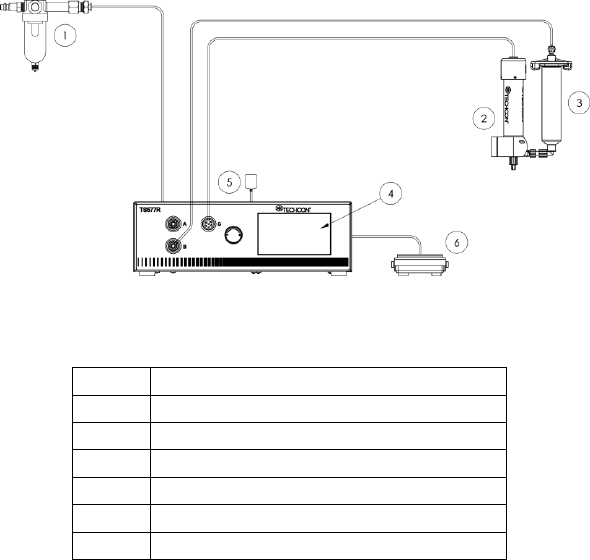
5. TO CONTROL AUGER VALVE
CAUTION: A 5-micron filter (TSD800-6) must be installed with the unit to ensure proper
air filtration.
Figure 2.0
5.1 Connecting the Unit: (Refer to Figure 1.0 and 2.0)
1. Connect the power cord, foot switch to the back of the unit.
2. Connect Valve air hose to Port B
3. Touch the Power switch to turn on the unit.
Items
Description
1
Air Filter
2
Valve (not included)
3
Syringe of material (not included)
4
Display
5
Power Adapter
6
Foot Switch
7
5.1.1 Login
1. Touch the Login icon to enter the login screen
2. Enter “0000” in Password window
3. Touch the Check Mark icon to save and exit
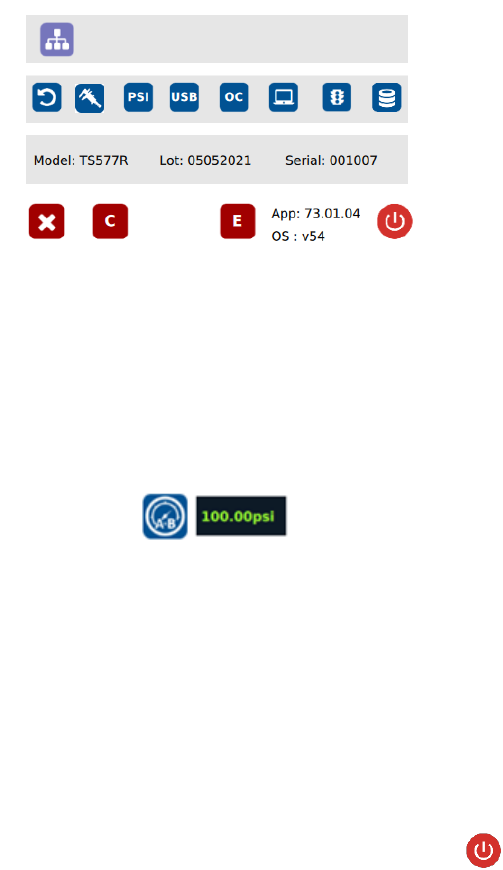
5.1.2 Pressure Calibration
Note: Pressure calibration must be performed when the unit is activated for
the first time.
1. Using a pressure gauge, verify that the input pressure line is delivering
approximately 100 psi
Note: If input pressure is not 100 psi, calibration will result in a
mismatch between the display pressure and the actual pressure on output
port A.B
2. Once you have verified input pressure, touch the Calibration icon
to enter calibration screen.
8
3. Turn pressure adjustment knob counterclockwise until the wheel can no
longer be turned.
4. Touch the 0 icon to set the pressure to 0
5. Turn pressure adjustment knob clockwise until display output pressure is
100 psi
6. Touch the 100 icon to set the pressure to 100
Warning: Do not turn knob all the way clockwise. 100 psi upper bound should
be set as soon as display output pressure goes from 99 to 100 psi. Continuing
to turn knob clockwise despite pressure on display already being set at
100psi will result in incorrect output pressure readings if the 100 icon were to
be pressed at that time.
Note: The digital values shown at “0” and “100” icons are for reference only.
The actual calibrated values will be different
7. Touch the Reboot icon to save the settings and reboot the system
8. Wait until the system completes the rebooting sequence and the home
screen is displayed
The unit’s pneumatic system is now calibrated and ready to operate