M4serviceManual_e.pdf - 第50页
3 Mechanical Section 3-20 NOTE: Since the scan camera’s mirror is the surface deposition type and easily ge ts scratched, special care should be paid to it when cleaning. Furtherm ore, organic solvent such as liqui d cle…

3 Mechanical Section
3-19
Camera
Mirror and lens of camera
If the surface of half mirror/lens/lens filter of fixed camera or mirror/ lens of scan camera is dirty by grease
or dirt, and if any obstacles such as dropped components or deposits are remained on those parts, wrong
recognition problem or recognition error may be caused. Check mirror and lens every day and clean them
if dirty. Be sure to keep them always clean without any obstacles or deposits.
NOTE: Clean the proper part for each camera type. (See the chart below. O: Should be cleaned, X: No need to be
cleaned)The configuration of equipped camera type is different depending on the machine model or
optional specification.
Fixed Camera(M4e/M4s) Use of liquid cleaner
Scan
Camera
FC05 FC03 FC02
Industrial
alcohol
Lens cleaner
(Note 1)
Half mirror X O O X OK OK (Note 2)
lens O O O X OK OK
Lens filter X X X O OK OK
mirror O X X X OK OK
Note 1: It is contained in the Lens Cleaner Set, one of the standard accessories attached with a mounter.
Note 2: Apply it only on the top surface of the half mirror.
■ Lens Cleaner Set
Part Name
Part No. Remark
LENS CLEANER SET LG0-M89A4-00X Lens Cleaner Set
Cleaning of Scan Camera
Remove dirt/dust in a gentle way from the lens and mirror of the scan camera, blowing air with a blower
brush or wiping with a dry thing like a cotton swab. Avoid applying your finger pressure directly to the lens
and mirror through the use of such things as tissues. For stubborn and sticky dirt such as grease, which
cannot be cleaned away by air blow or wiping with dry cotton swab, wipe it off with a moistened cotton
swab with little amount of liquid cleaner, and finally with dry one to remove the liquid cleaner and dirt
completely. Do not apply the liquid cleaner directly on the lens and mirror.
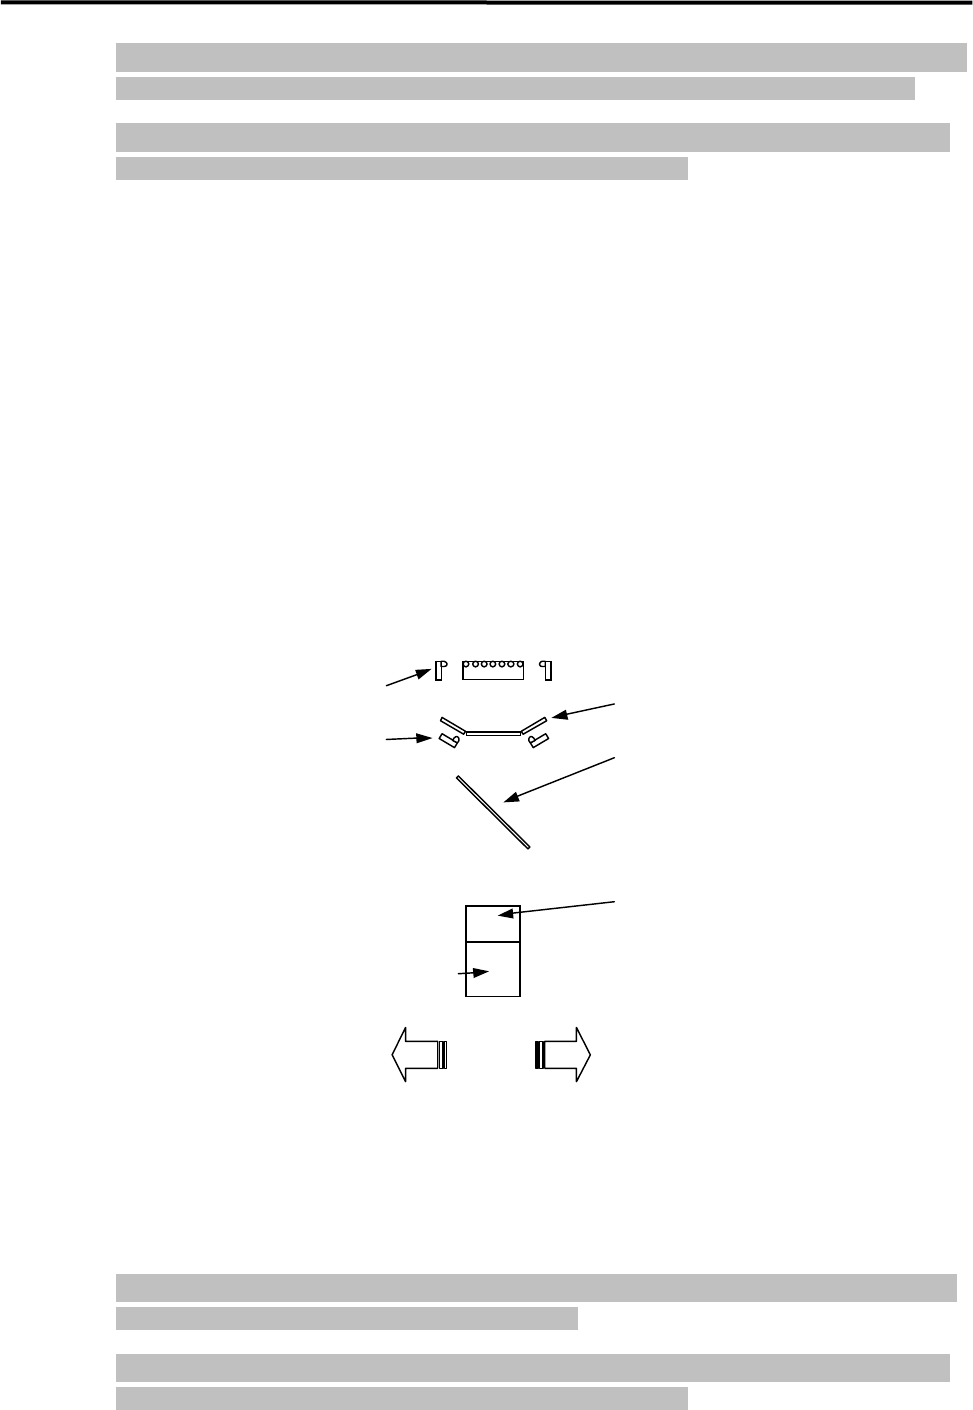
Mirror
LED lighting
LED lighting
Scan camera body
Lens
Cross-sectional view of scan camera
3 Mechanical Section
3-20
NOTE: Since the scan camera’s mirror is the surface deposition type and easily gets scratched, special care should
be paid to it when cleaning. Furthermore, organic solvent such as liquid cleaner should not be used.
NOTE: Be careful not to touch your finger or cotton swab directly to the LED lighting. The careless touch may
change the optical axis of lighting, causing vision recognition problem.
Cleaning of Fixed camera (M4e/M4s)
Remove dirt/dropped obstacles (components or deposits) in a gentle way from the half mirror/lens /lens
filter of the fixed camera, blowing air with a blower brush or wiping with a dry thing like a cotton swab.
Avoid applying your finger pressure directly to the lens and mirror through the use of such things as tissues.
For stubborn and sticky dirt such as grease, which cannot be cleaned away by air blow or wiping with dry
cotton swab, wipe it off with a moistened cotton swab with little amount of liquid cleaner, and finally with
dry one to remove the liquid cleaner and dirt completely. Do not apply the liquid cleaner directly on the half
mirror/lens/lens filter.
Half mirror (Note)
Diffuser plate
Fixed camera body
Lens
Lens filter (Note)
LED lighting
LED lighting
Mounter front side
Mounter rear side
Cross-sectional view of fixed camera
NOTE: Depending on the fixed camera type, half mirror or lens filter may not be equipped.
NOTE: Since the half mirror easily gets scratched, special care should be paid to it when cleaning. Furthermore,
organic solvent such as liquid cleaner should not be used.
NOTE: Be careful not to touch your finger or cotton swab directly to the LED lighting. The careless touch may
change the optical axis of lighting, causing vision recognition problem.
3 Mechanical Section
3-21
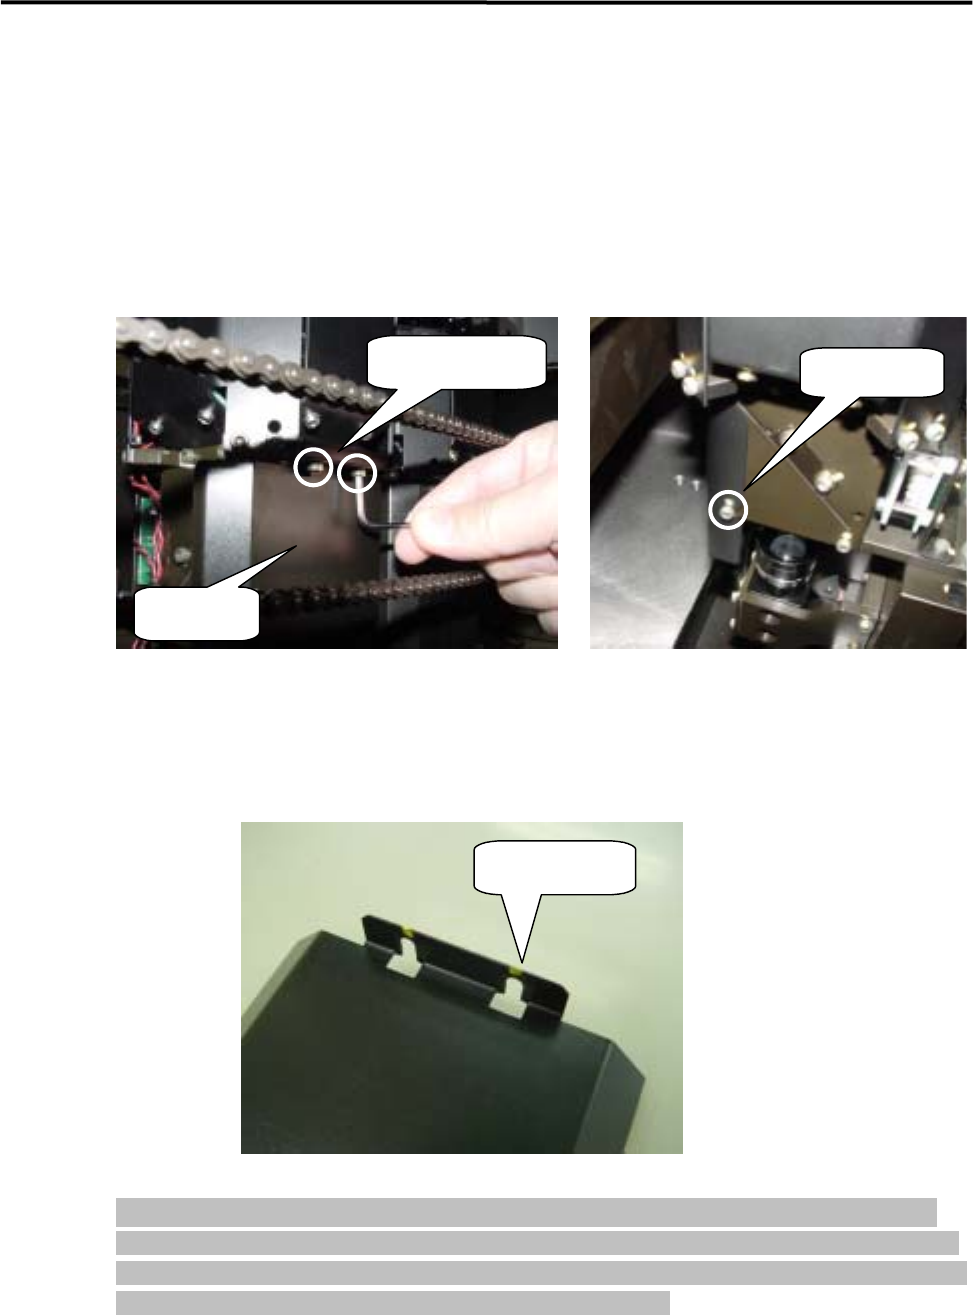
■ Remove the front cover of fixed camera
When two fixed cameras are set next to next, it would be difficult to clean the lens and lens filter because of
no clearance between the two cameras. In such case, remove the front cover beforehand as followings.
ACTION:
① Loosen the four setscrews (hexagonal screw M3 x 6) fixing on the front cover. (You do not have to
remove the screws here.)
Two Hex. screws
Front cover
Hex. screw
② Pull the front cover to your side, and remove it.
③ When attaching the front cover, put it onto the lighting box of fixed camera so that the two slots on the
top and two slots on the side of the cover match with the setscrews, and tighten the setscrews to fix.
Slot for setscrew
NOTE: When attaching the front cover, set it at right position securely. If the set position is not proper or the
setscrews are not tightened enough, the cover may come off during operation, causing serious accidents.
Furthermore, if the cover is set in inclined way against the lighting box of fixed camera, vision recognition
may not be performed properly by effect of room lighting condition.