00196624-04_Service Manual WPC5_6_EN_01-2019.pdf - 第108页
Service Manua l WPC5 / WPC6 Page 3-108 3.7.17 Sensor 16 N SM mo dul e (WPC6) – Safety Sensor for the Hand Guard Spare Part • Safety sensor hand guard [03056990- xx] Preparations Loosening t he belt tension ➢ Loosen the…
Service Manual WPC5 / WPC6
Page 3-107
See also….
@3.5.2 Replacing the Load Axis Drive Motor [
➙
3-34]
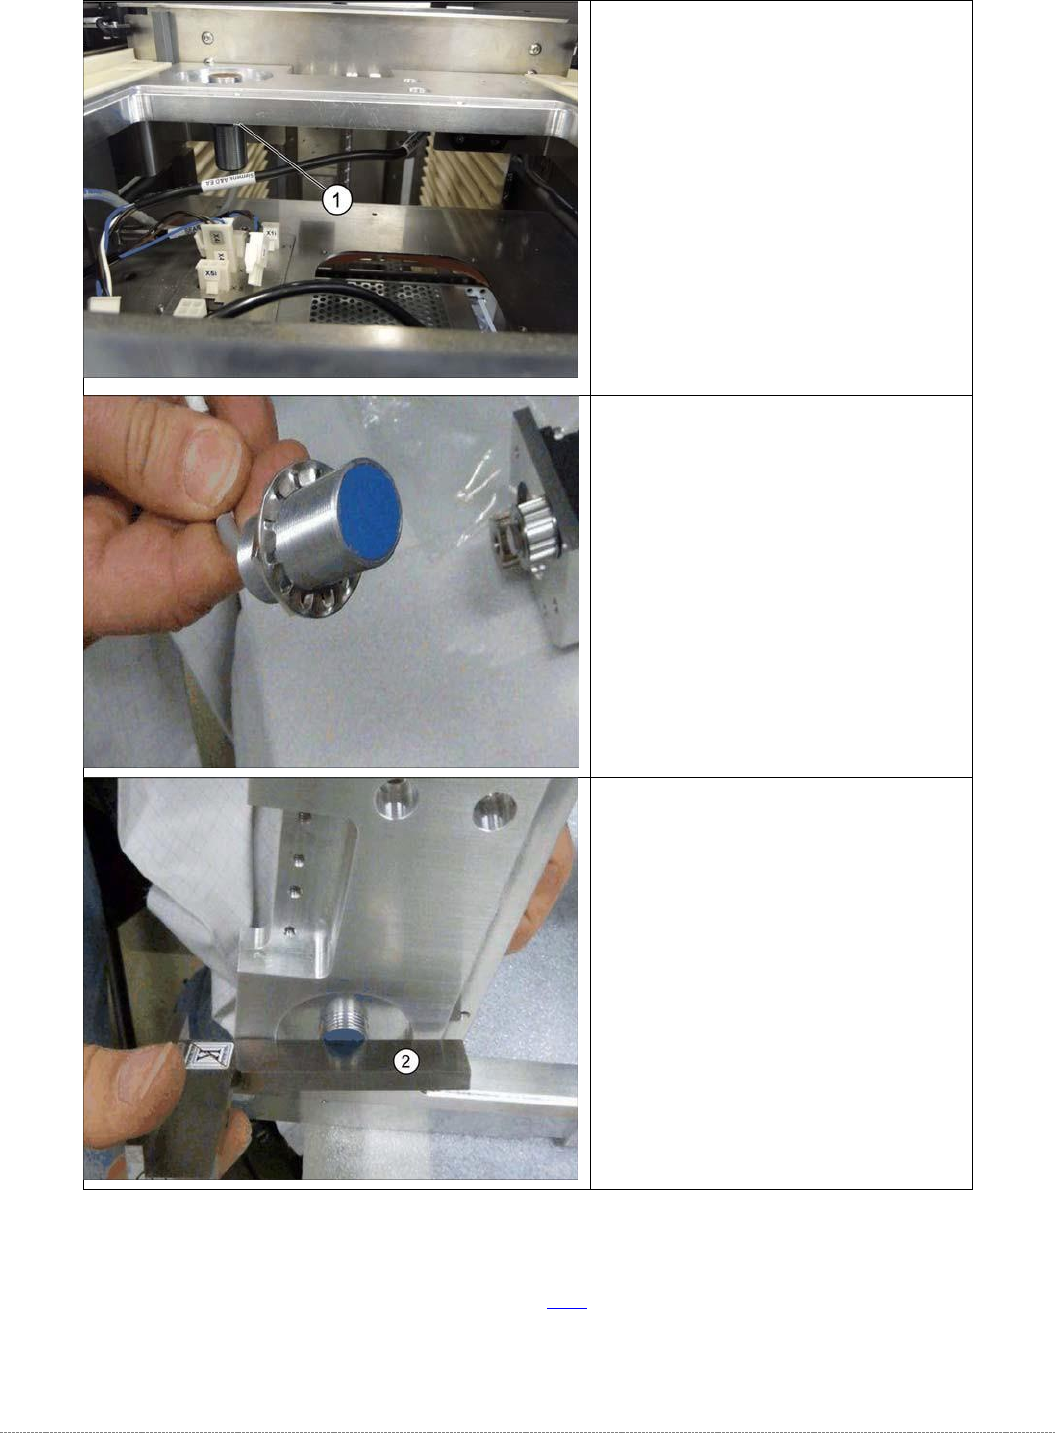
➢ Loosen the counternut fastening
the sensor on the underside of the
base plate and unscrew the sensor
(1).
➢
Screw the new sensor into the table
plate.
➢ The sensor should protrude
between 0.2 mm and 0.5 mm
above the table plate. Check this
with a straight edge (2).
➢ Use a counternut to fix the sensor
on the underside (1).
➢ Reconnect connector X5 to the
circuit board.
Service Manual WPC5 / WPC6
Page 3-108
3.7.17 Sensor 16 NSM module (WPC6) – Safety Sensor for the Hand Guard
Spare Part
• Safety sensor hand guard [03056990-xx]
Preparations
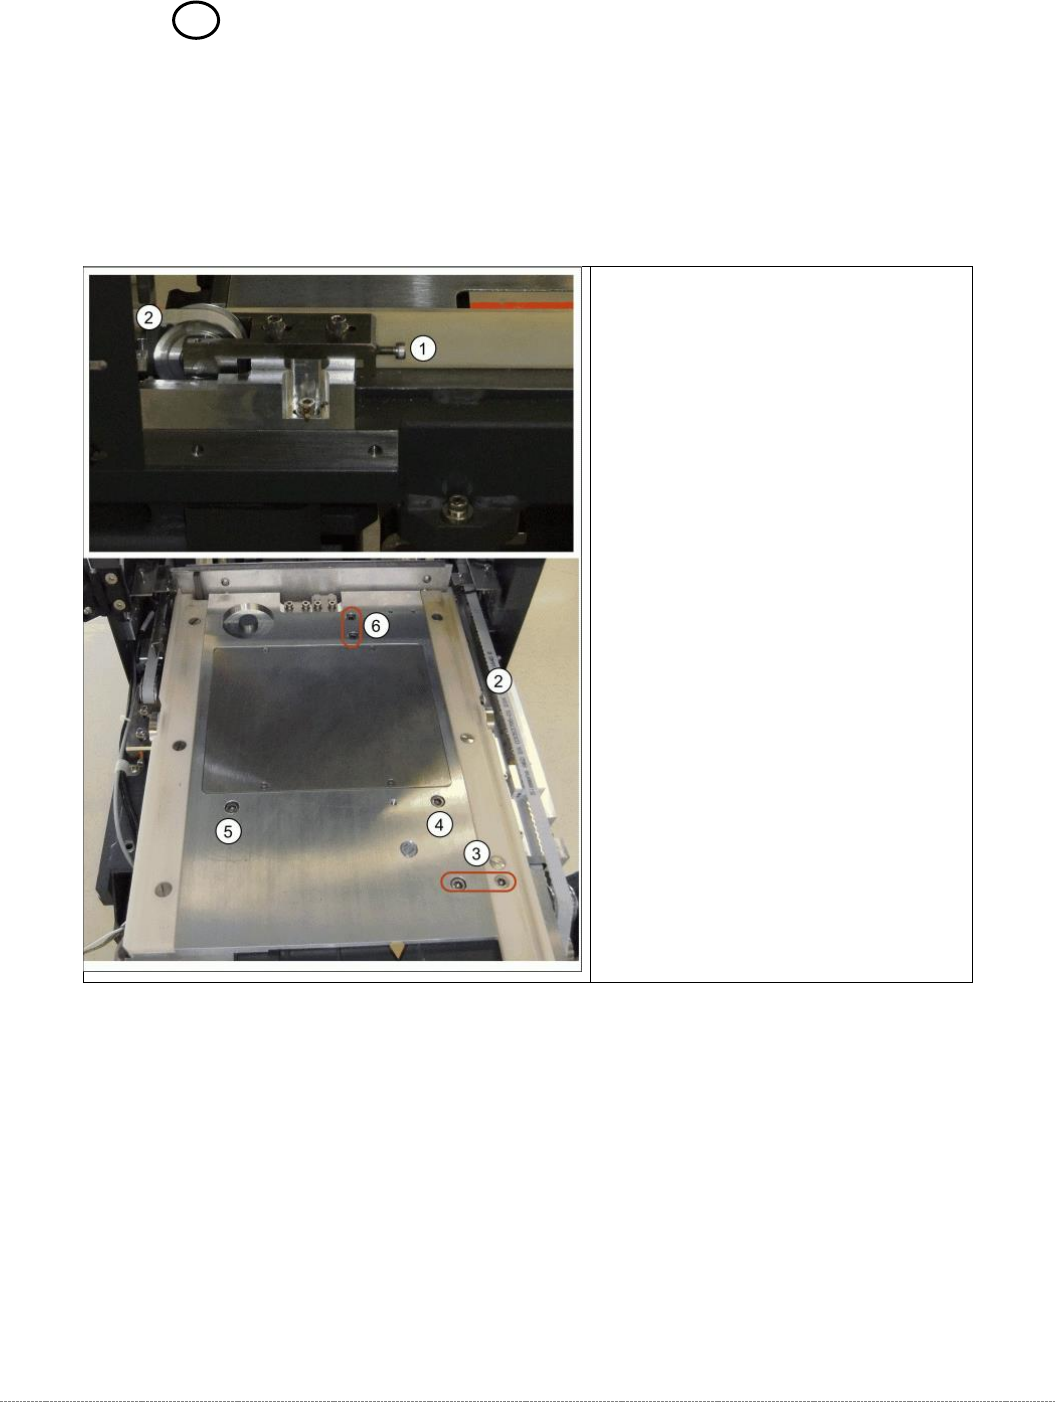
Loosening the belt tension
➢ Loosen the tension of the load axis
drive belt (2) at the tensioning
screw behind the tower (1).
Removing the base plate
➢ Loosen the screws fixing the motor
to the base plate at (3).
➢ Lift off the base plate and turn it
over.
Service Manual WPC5 / WPC6
Page 3-109
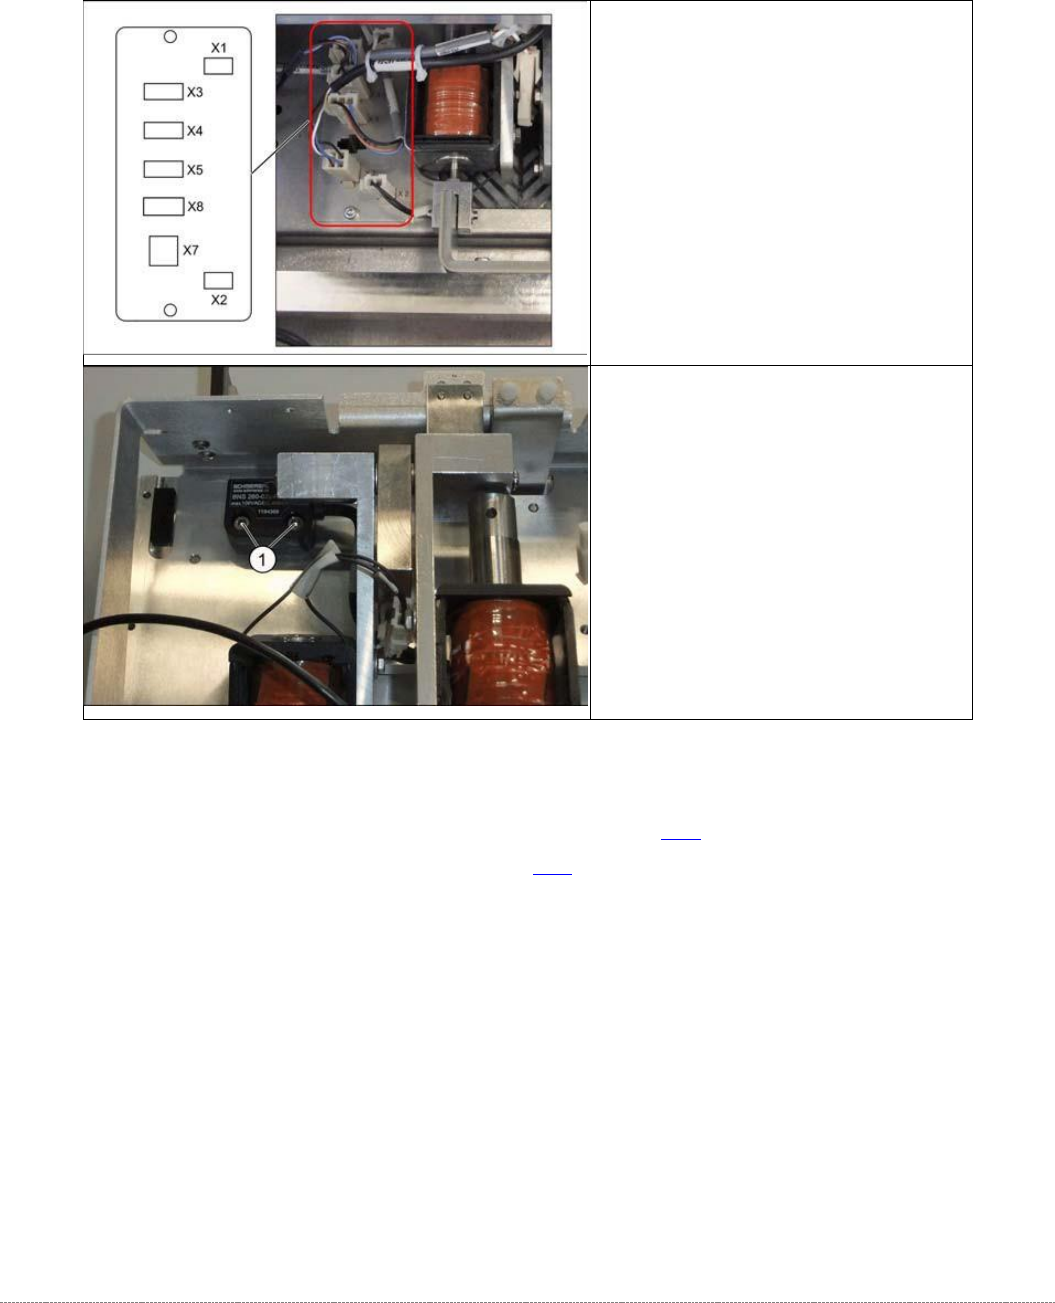
Removal / Installation
The sensor for the safety flap when open is located on the underside of the base plate.
See also….
@
3.5.1.4
Loosen the Tension of the Load Axis Drive Belt [➙ 3-33]
@
3.5.6
Setting the Load Axis Belt Tension [
➙
3-43]
➢ Disconnect connector X7 for the
safety flap when open from the
circuit board.
➢ Remove the two screws fastening
the sensor (1).
➢ Insert the new sensor and fix into
place with the two screws.
➢ Reconnect connector X7 to the
circuit board.