PC150-Manual-REV-A-2.pdf - 第22页
PC150 Valve Manual Revision A / Jan uary 202 2 Page 22 of 26 Techn ic al S pe cifi catio n s Weight Approxi mately 550mg (1 .2 lbs) Material inle ts 1/8” NP T Air P or ts M5 X 0. 8 - 6H O pe rating Air Pre ss ure 60 – 10…
PC150 Valve Manual
Revision A / January 2022
Page 21 of 26
Spare Parts
Spare Parts
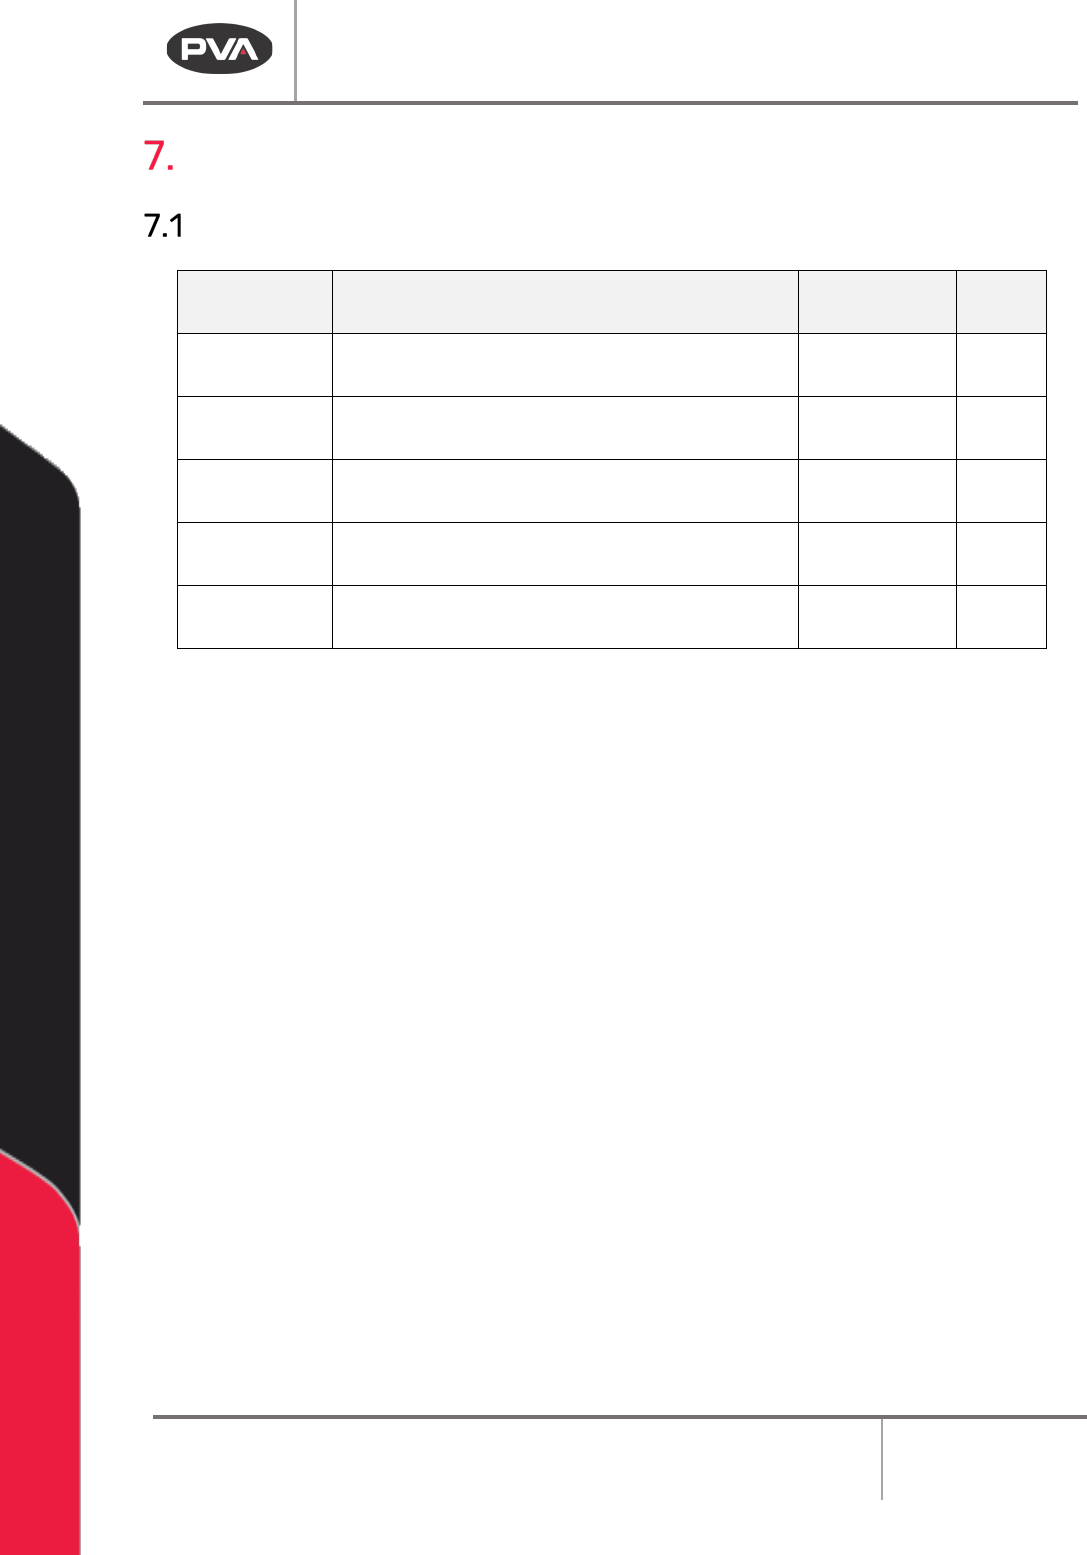
Item Description Part Number Qty
1 O-Ring, 011, Kalrez VLV-011K 4
2 O-Ring, 006, Kalrez VLV-006K 4
3 O-Ring, 006, Buna VLV-006B 2
4 O-Ring, 117, Buna VLV-117B 2
5 Sealing Washer, M5 93786A100 1
Contact PVA for additional information or to order replacement parts.
PC150 Valve Manual
Revision A / January 2022
Page 22 of 26
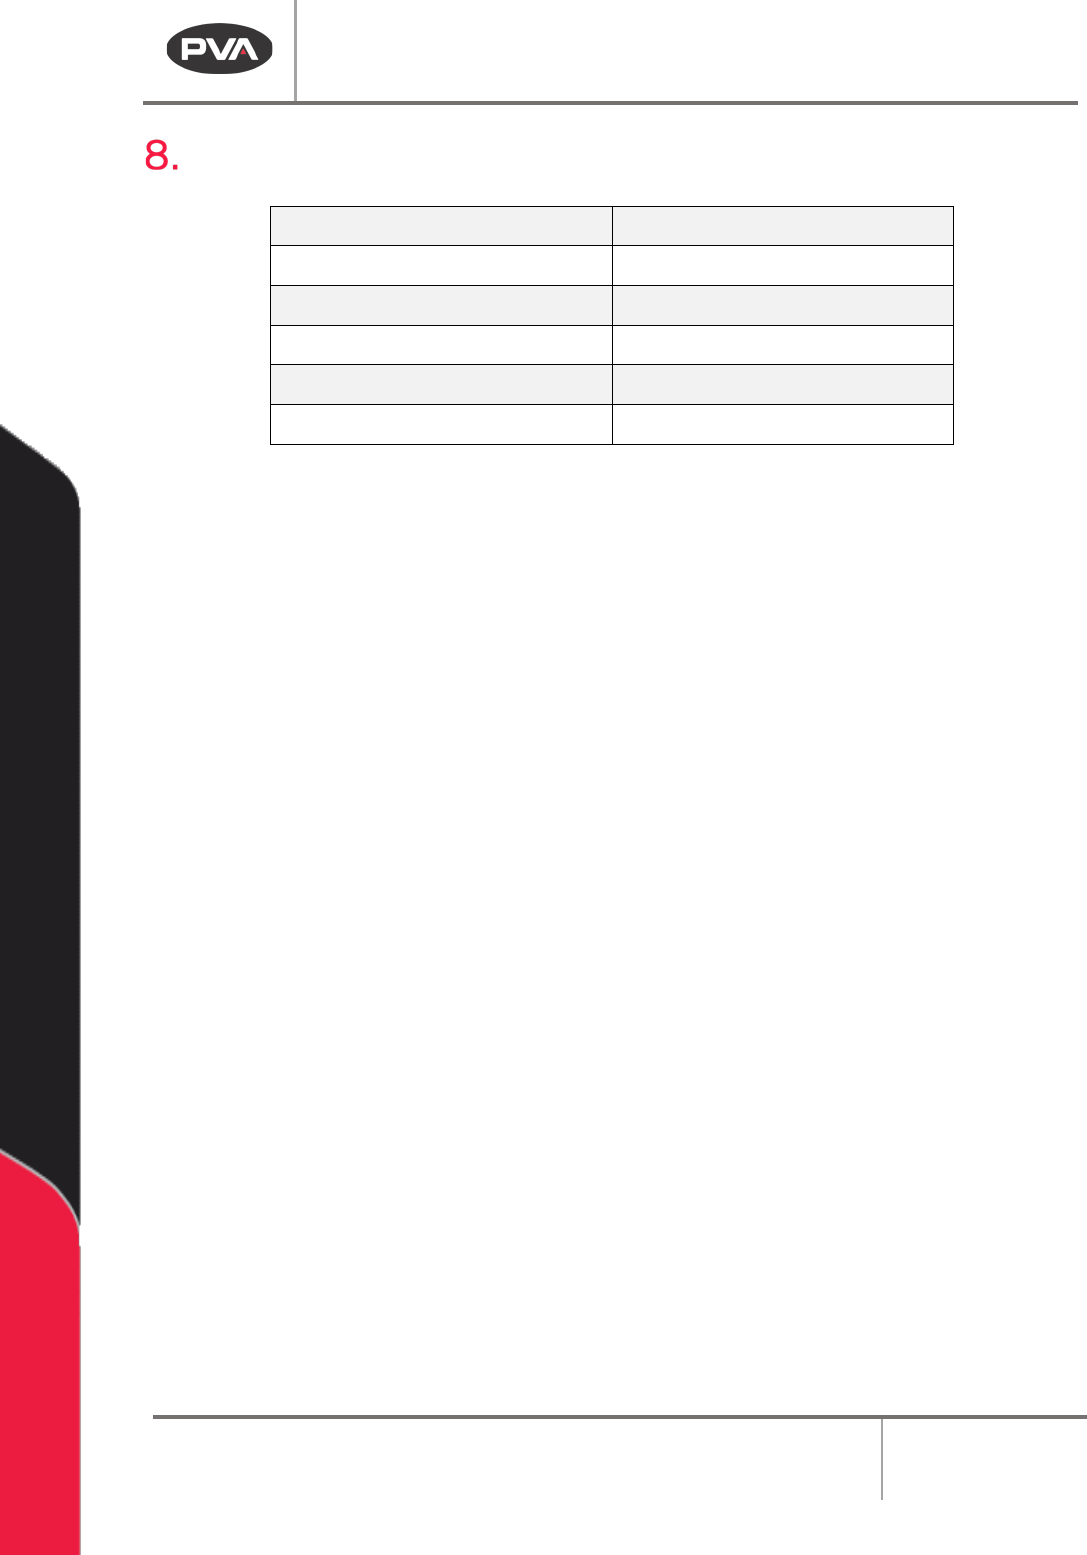
Technical Specifications
Weight
Approximately 550mg (1.2 lbs)
Material inlets
1/8” NPT
Air Ports
M5 X 0.8-6H
Operating Air Pressure
60 – 100 psi
Maximum Fluid Pressure
1500 psi
Viscosity Range
1 cps – Paste (unfilled)
Figure 24: PC150 Technical Specifications

PC150 Valve Manual
Revision A / January 2022
Page 23 of 26
Troubleshooting
Troubleshooting
Problem
Possible Cause Corrective Action
Valve Does Not
Cycle
• Air pressure to air section
is too low
• Stroke adjustment screw
is fully engaged
• Material is cured in the
valve
• Increase the air pressure to 60-
100 psi
• Turn stroke adjustment screw
counter-clockwise to increase
snuff back
• Disassemble and clean valve
Material Leaks
From Static
Mixer
• Snuff back is set too low
• Fluid seals are worn
• Air trapped in the valve or
static mixer
• Turn stroke adjustment screw
counter-clockwise to increase
snuff back
• Replace o-rings
• Bleed valve until air is removed
Air Bubbles In
Fluid
• Valve is not correctly bled
• Problem with fluid delivery
system
• Bleed the valve until the air is
removed
• Diagnose and repair
No Flow From
Valve
• Manifold is blocked
• Air cylinder does not
operate
• Static mixer is plugged
• Problem with material
supply
• Examine and clean manifold
• Increase operating air pressure to
80 psi. Inspect valve for cured
material
• Replace static mixer
• Examine material supply to the
valve
Valve Drips
Continuously
After Shutoff
• Snuff back is set too low
• Fluids seals are damaged
or worn
• Valve rods are defective or
worn
• Turn stroke adjustment screw
counterclockwise to increase
snuff back.
• Examine and replace O-ring seals
• Examine and replace valve rods