PC150-Manual-REV-A-2.pdf - 第24页
PC150 Valve Manual Revision A / Jan uary 202 2 Page 24 of 26 Valve D rips For a Short Time Af ter Shutoff • Air is trapped in the manifold • Air is trapped in the sta tic mixe r • Bleed the valve un til the air is remov …

PC150 Valve Manual
Revision A / January 2022
Page 23 of 26
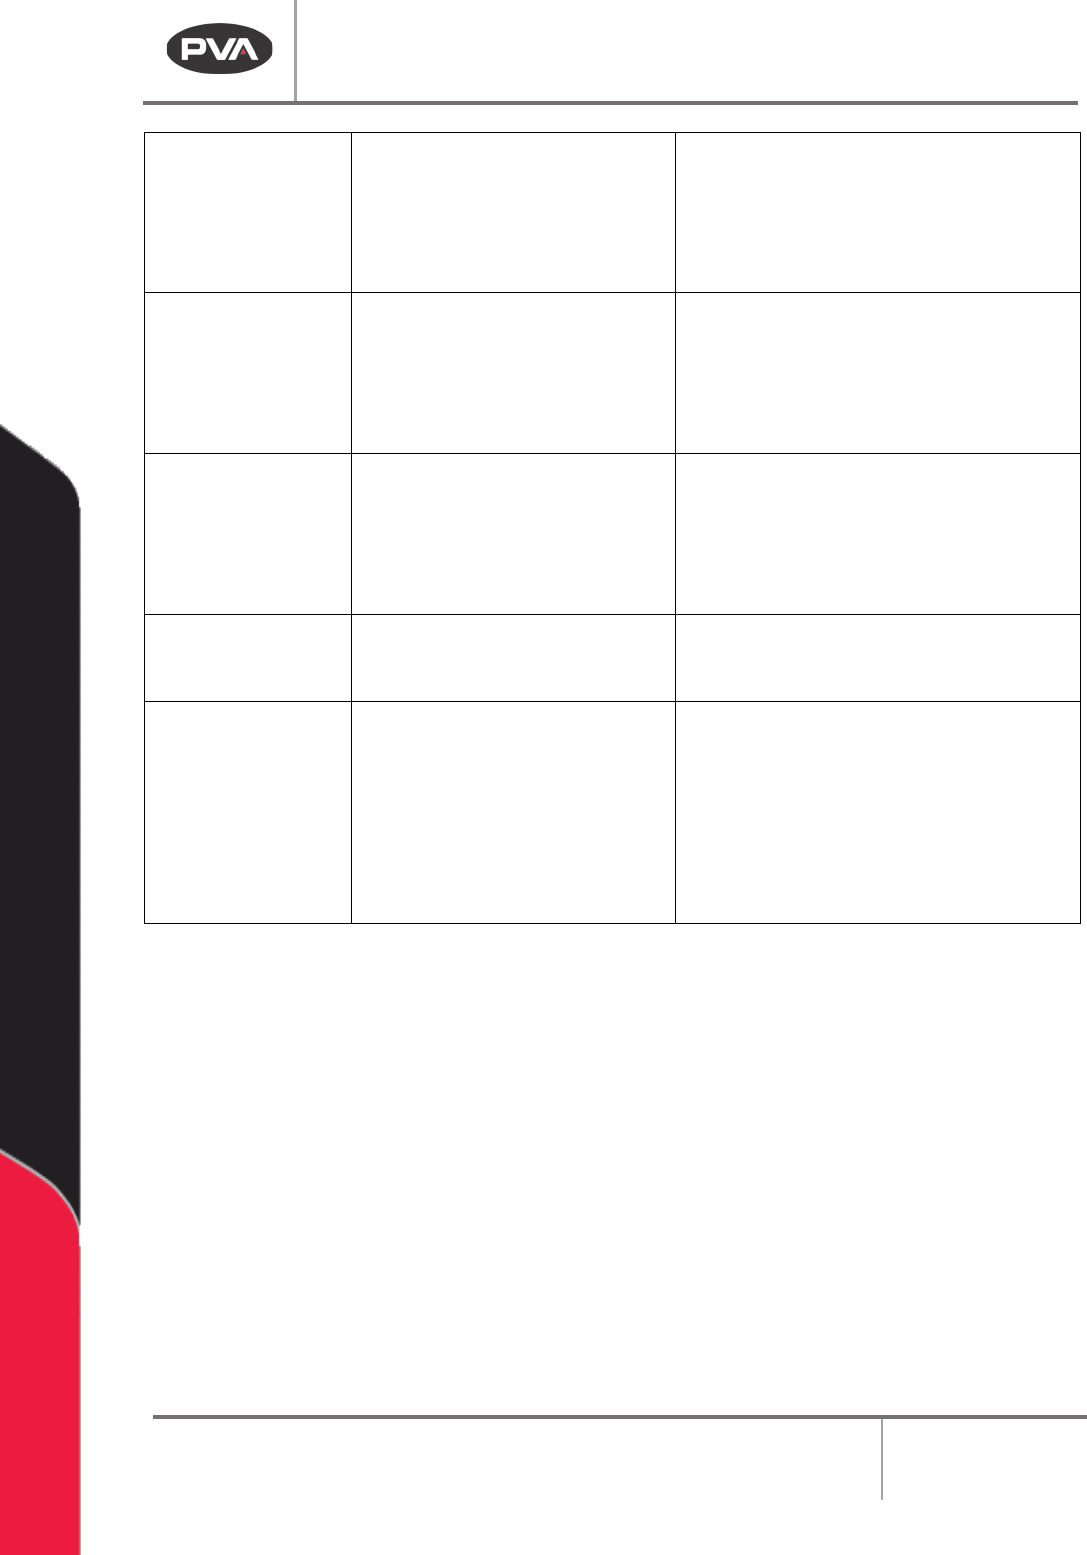
Troubleshooting
Troubleshooting
Problem
Possible Cause Corrective Action
Valve Does Not
Cycle
• Air pressure to air section
is too low
• Stroke adjustment screw
is fully engaged
• Material is cured in the
valve
• Increase the air pressure to 60-
100 psi
• Turn stroke adjustment screw
counter-clockwise to increase
snuff back
• Disassemble and clean valve
Material Leaks
From Static
Mixer
• Snuff back is set too low
• Fluid seals are worn
• Air trapped in the valve or
static mixer
• Turn stroke adjustment screw
counter-clockwise to increase
snuff back
• Replace o-rings
• Bleed valve until air is removed
Air Bubbles In
Fluid
• Valve is not correctly bled
• Problem with fluid delivery
system
• Bleed the valve until the air is
removed
• Diagnose and repair
No Flow From
Valve
• Manifold is blocked
• Air cylinder does not
operate
• Static mixer is plugged
• Problem with material
supply
• Examine and clean manifold
• Increase operating air pressure to
80 psi. Inspect valve for cured
material
• Replace static mixer
• Examine material supply to the
valve
Valve Drips
Continuously
After Shutoff
• Snuff back is set too low
• Fluids seals are damaged
or worn
• Valve rods are defective or
worn
• Turn stroke adjustment screw
counterclockwise to increase
snuff back.
• Examine and replace O-ring seals
• Examine and replace valve rods
PC150 Valve Manual
Revision A / January 2022
Page 24 of 26
Valve Drips For a
Short Time After
Shutoff
• Air is trapped in the
manifold
• Air is trapped in the static
mixer
• Bleed the valve until the air is
removed
• Bleed the valve until the air is
removed
Cross-
Contamination
In Manifold
Nozzle
• Snuff back is set too high
• System material supply
not correctly bled of air
• Turn stroke adjustment screw
clockwise to decrease snuff back
• Bleed material supply system until
the air is removed
Seals Fail
Rapidly
• Seals are not compatible
with material
• Material has abrasive
fillers
• Contact PVA for seal options
• Contact PVA for seal options
Valve Has Air
Leak
• Jam nut is loose • Tighten jam nut against stroke
adjustment sealing washer
Material Does
Not Cure
• Mix ratio is incorrect
• Material not sufficiently
mixed
• Do ratio checks at manifold and
adjust metering system as
necessary
• Use a static mixer with sufficient
mixing elements – consult
material manufacturer or PVA
Figure 25: Troubleshooting Guide
PC150 Valve Manual
Revision A / January 2022
Page 25 of 26
PVA Warranty Policy
PVA warrants the enclosed product against defects in material or workmanship on all
components for one year from the date of shipment.
The warranty does not extend to components damaged due to misuse, negligence, or
installation and operation that are not in accordance with the recommended factory
instructions. Unauthorized repair or modification of the enclosed product, and/or the use of
spare parts not directly obtained from PVA (or from factory authorized dealers) will void all
warranties.
All PVA warranties extend only to the original purchaser. Third party warranty claims will not
be honored at any time.
Prior to returning a product for a warranty claim, a return authorization must be obtained
from PVA’s Technical Support department. Authorization will be issued either via the
telephone, facsimile, or in writing upon your request.
To qualify as a valid warranty claim, the defective product must be returned to the factory
during the warranty period. Upon return, PVA will repair (or replace) all components found
to be defective in material or workmanship.
(Retain this for your records)
Product Information:
PRODUCT: ______________________________
SERIAL NUMBER: ______________________________
DATE OF PURCHASE: ______________________________