sj6 uitra.pdf - 第13页
-10- 1 6 4 2 3 7 5 8 9 Control Center Overvie w 1 Wi-Fi Switch: T ap to turn Wi-Fi On / Off. 2 Voice Control Swit ch: T ap to turn the voice control function on or off. 3 Indicator Light Switch: T ap to turn indicator li…
-9-
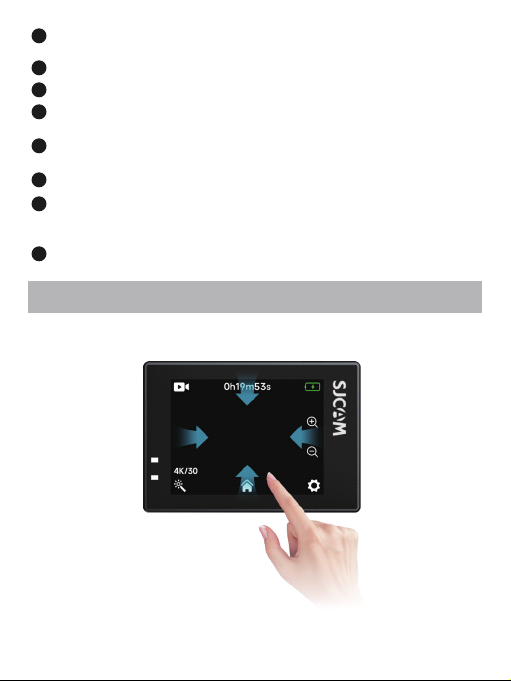
The SJ6 Ultra's main screen is a touchscreen. Perform operations by tapping or sliding
on the screen.
Touchscreen Operations
Remaining Storage Capacity: Shows the remaining number of photos or recording
time available on the microSD card.
1
2
Shooting Mode Info: Displays the current shooting mode.
3
Shooting Specification: Shows the current image/video resolution.
6
System Settings: Tap the icon to configure camera system parameters.
8
Battery Level: Displays the current remaining battery power.
Mode Parameter Settings: Tap the icon to set parameters for the current shooting
mode.
4
Shooting Mode: Tap the icon to select and switch between different shooting
modes.
5
Press and hold “+” to zoom in, and hold “−” to zoom out.
Note: For Digital Zoom to function, Image Stabilization (IS) and Distortion
Correction must be turned off, and the View Angle must be set to "Wide".
7
Swipe down from the top edge: Opens the Control Center.
Swipe inward from the left or right edge: Switches between Photo/Video mode.
Swipe up from the bottom edge: Selects shooting mode.
-10-
1
6
4
2
3
7
5
89
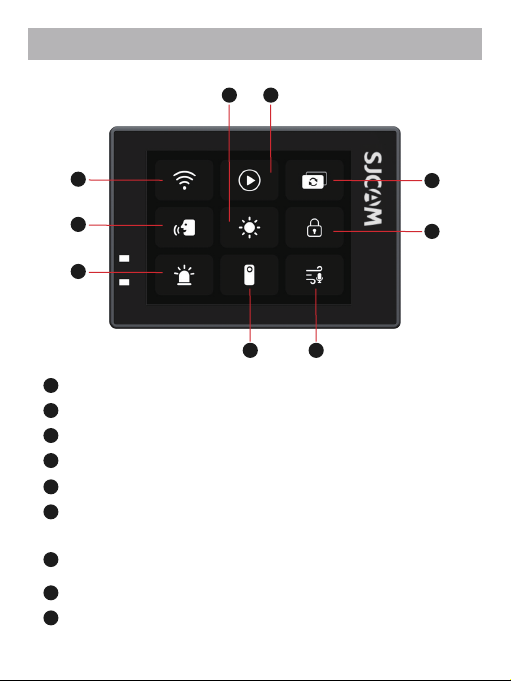
Control Center Overview
1
Wi-Fi Switch: Tap to turn Wi-Fi On / Off.
2
Voice Control Switch: Tap to turn the voice control function on or off.
3
Indicator Light Switch: Tap to turn indicator lights On / Off.
4
Image Stabilization (IS): Tap the icon to enter the IS mode selection page.
5
Audio Noise Reduction: Tap to enable audio noise reduction.
8
Playback: Tap to view recorded videos/photos.
7
Screen Switch: Tap to switch to the secondary screen display.(* To switch
back to the main screen, press and hold the Recording button.)
9
Brightness Adjustment: Tap to open the brightness adjustment module,
slide to adjust screen brightness.
6
Screen Saver: Tap to lock the screen.(*Tap the screen to wake it up after
locking.*Screen lock only turns off the display; the camera can still record
video or take photos normally.)
-11-
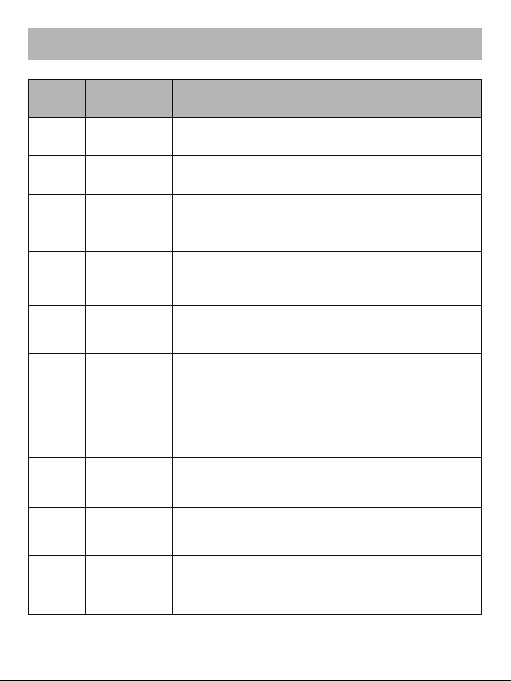
Shooting Modes
2
3
4
5
7
8
9
6
Video
Time Lapse
Photo
Regular photography
Driving Mode
Time Lapse
Video
The camera will continuously take photos after a
countdown when the record button is pressed. Press
the button again to stop.
Connect the camera to a live streaming APP for RTMP
push streaming.
Takes photos at fixed intervals and combines them into
a single video file, condensing slow processes (e.g.,
cloud movement, flower blooming) into a short video.
Slow
Motion
Records video at 2X/4X/8X high frame rates, generating
video that plays back at normal speed.
During the video recording process, the camera will
automatically save one photo every "1" second.
In Car Mode, the camera powers on and starts
recording automatically when power is connected; it
powers off and saves the video when power is
disconnected.
*After power disconnection, the camera continues
recording for about 7-8 seconds before automatically
shutting down.
Photo
After pressing the shutter button, the camera will
capture multiple photos in succession based on your
custom settings.
Burst Photo
Live
Broadcast
Grabs
from Video
Regular Recording
ModesNO.
Function Description
1