192866 Issue 4 - Reel to Reel Manual LoRes.pdf - 第32页
USER SETUP 2.8 Reel to Reel Manual Chapter Issue 3, August 14 53. T o ensure that the correct fiducial has been aligned, ensure that the centre of the product aligns with the reference mark on th e front board clamp. 54.…
USER
SETUP
Chapter Issue 3, August 14 Reel to Reel Manual 2.7
38. Move the product reel to align the product to the centre of the tooling and
board clamps. Ensure that the image on the product reel is slightly to the
left as the product reel can only be jogged towards the outroad.
39. Insert the screen into the machine.
40. Close the front cover.
41. Press the System button.
42. Select Back.
43. Select Load Screen.
44. Select Setup Product.
45. Select Reel to Reel.
46. Ensure that Index Length is set to the correct length for the product.
47. Ensure that Product Length is set to the correct length for the product.
48. Ensure that Feeder Speed and Feeder Acceleration are correct according
to the job sepcification sheet.
49. Ensure that Backoff Length is correct for the product.
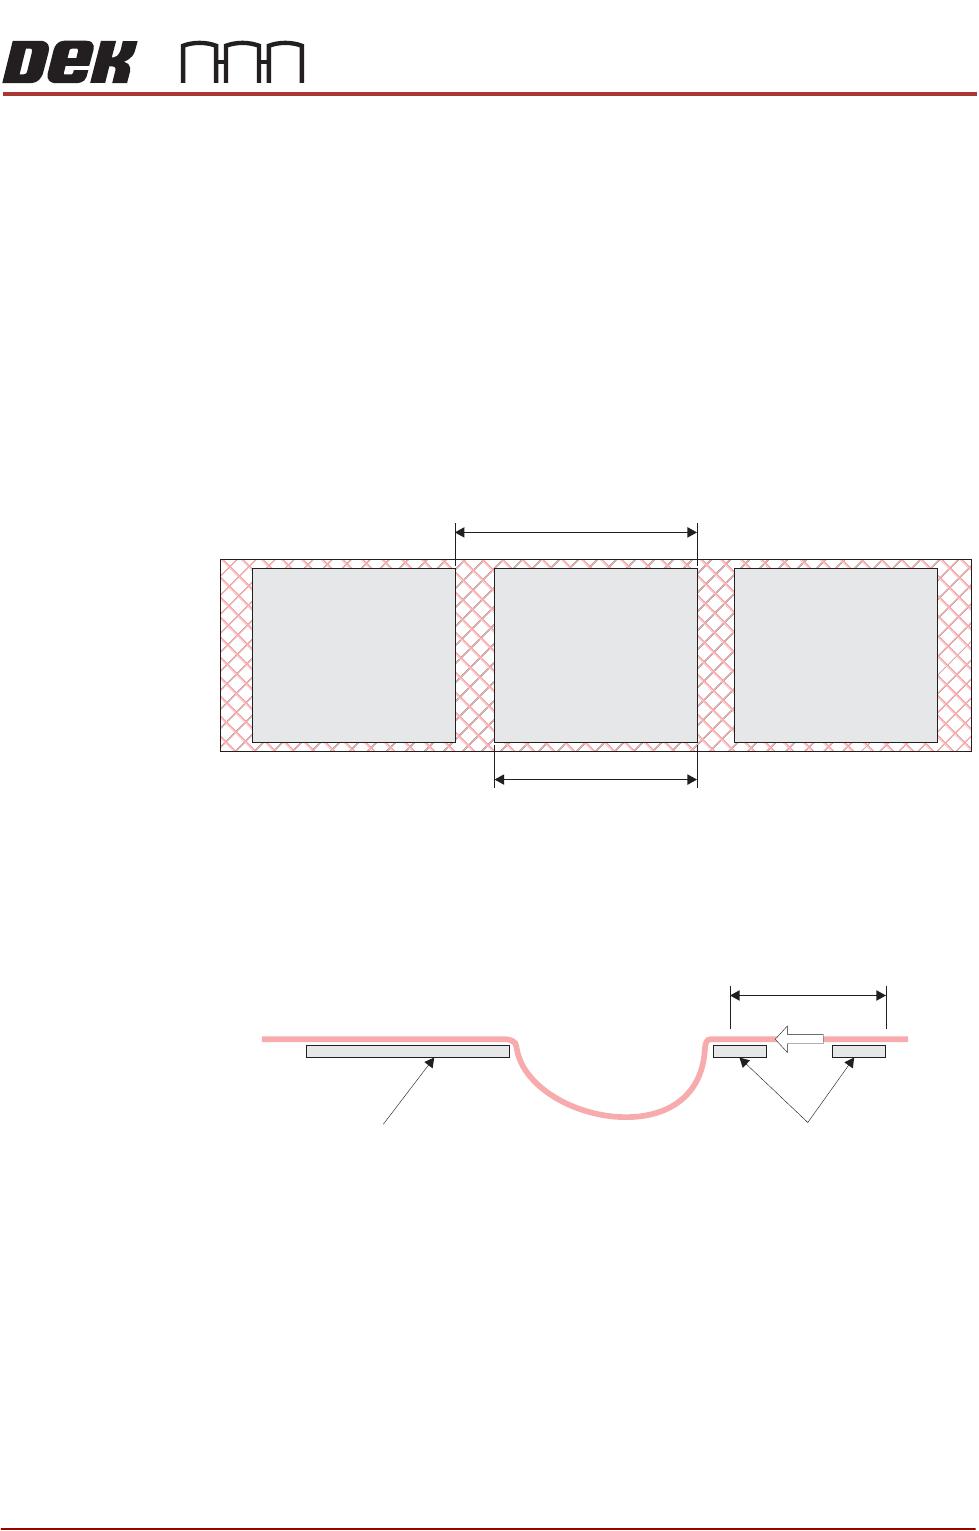
NOTE
The backoff length creates a loop of product reel that has print material on
it. The loop prevents this from coming into contact with the screen.
50. Select Move to Fiducial Board 1.
51. If the fiducial is not in the centre of the view screen, select Jog Feeder.
52. Press the right hand jog button to move the product reel until the fiducial
comes in to the centre of the view screen.
NOTE
The product reel can only be jogged towards the outroad conveyor. To
reverse, select Board Clamps and pull the product reel back manually.
Index Length
Product Length
Backoff Length
Tooling Outroad Clamps
USER
SETUP
2.8 Reel to Reel Manual Chapter Issue 3, August 14
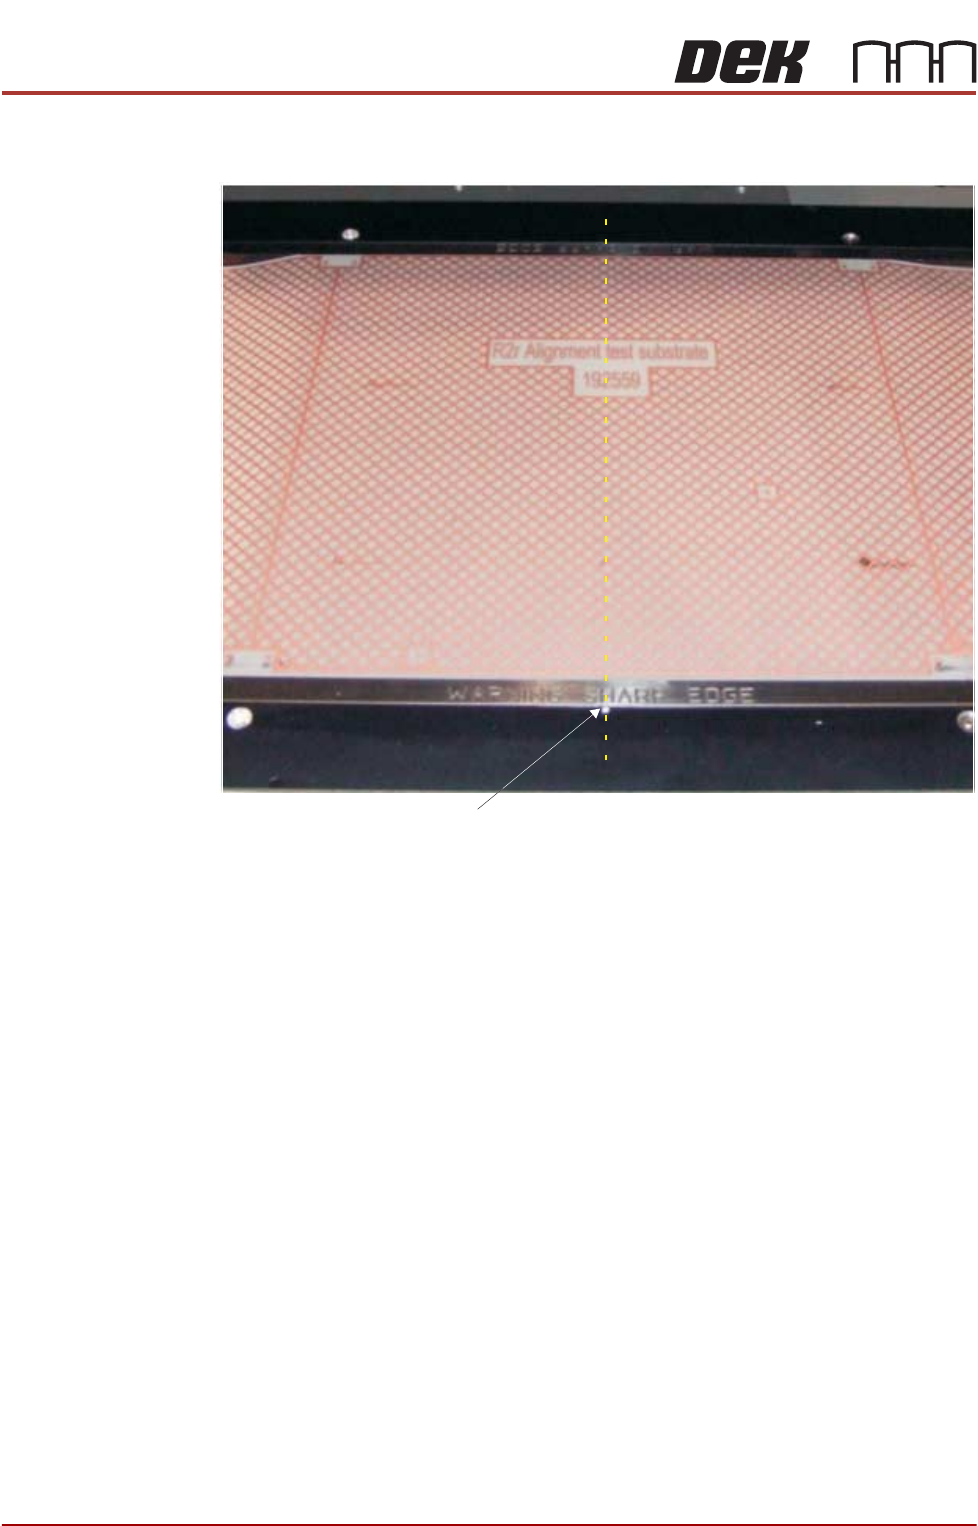
53. To ensure that the correct fiducial has been aligned, ensure that the centre
of the product aligns with the reference mark on the front board clamp.
54. Select Exit.
55. Select Move to Fiducial Board 2 to ensure that fiducial 2 is centred in the
view screen.
56. Select Back.
57. Ensure that the parameters on this page are correct for the product.
58. Select Fiducials.
59. Select Fiducial Setup.
60. Select Fiducials Board 1.
61. Using Camera Up/Down/Right/Left, move the camera until the fiducial is in
the centre of the blue box.
62. Select Auto Learn.
63. Select Continue.
64. Select Fiducials Screen 1.
65. Using Camera Up/Down/Right/Left, move the camera until the fiducial is in
the centre of the blue box.
66. Select Auto Learn.
67. Select Continue.
68. Select Fiducials Board 2.
View on the Tooling Area of the Machine
Board Clamp Reference Mark

USER
SETUP
Chapter Issue 3, August 14 Reel to Reel Manual 2.9
69. Using Camera Up/Down/Right/Left, move the camera until the fiducial is in
the centre of the blue box.
70. Select Auto Learn.
71. Select Continue.
72. Select Fiducials Screen 2.
73. Using Camera Up/Down/Right/Left, move the camera until the fiducial is in
the centre of the blue box.
74. Select Auto Learn.
75. Select Continue.
76. Select Exit.
77. The printer performs a rough alignment followed by a fiducial sweep align-
ment.
78. Select Back.
79. Select Save.
80. Select Back.
81. The printer is ready to print.