DT_ELMC-V3-EN_REV-B.1_L.pdf - 第34页
ELECTROVA P ® E LMC 34 3.10 OPTION: Tran s for mer connection
ELECTROVAP® ELMC
33
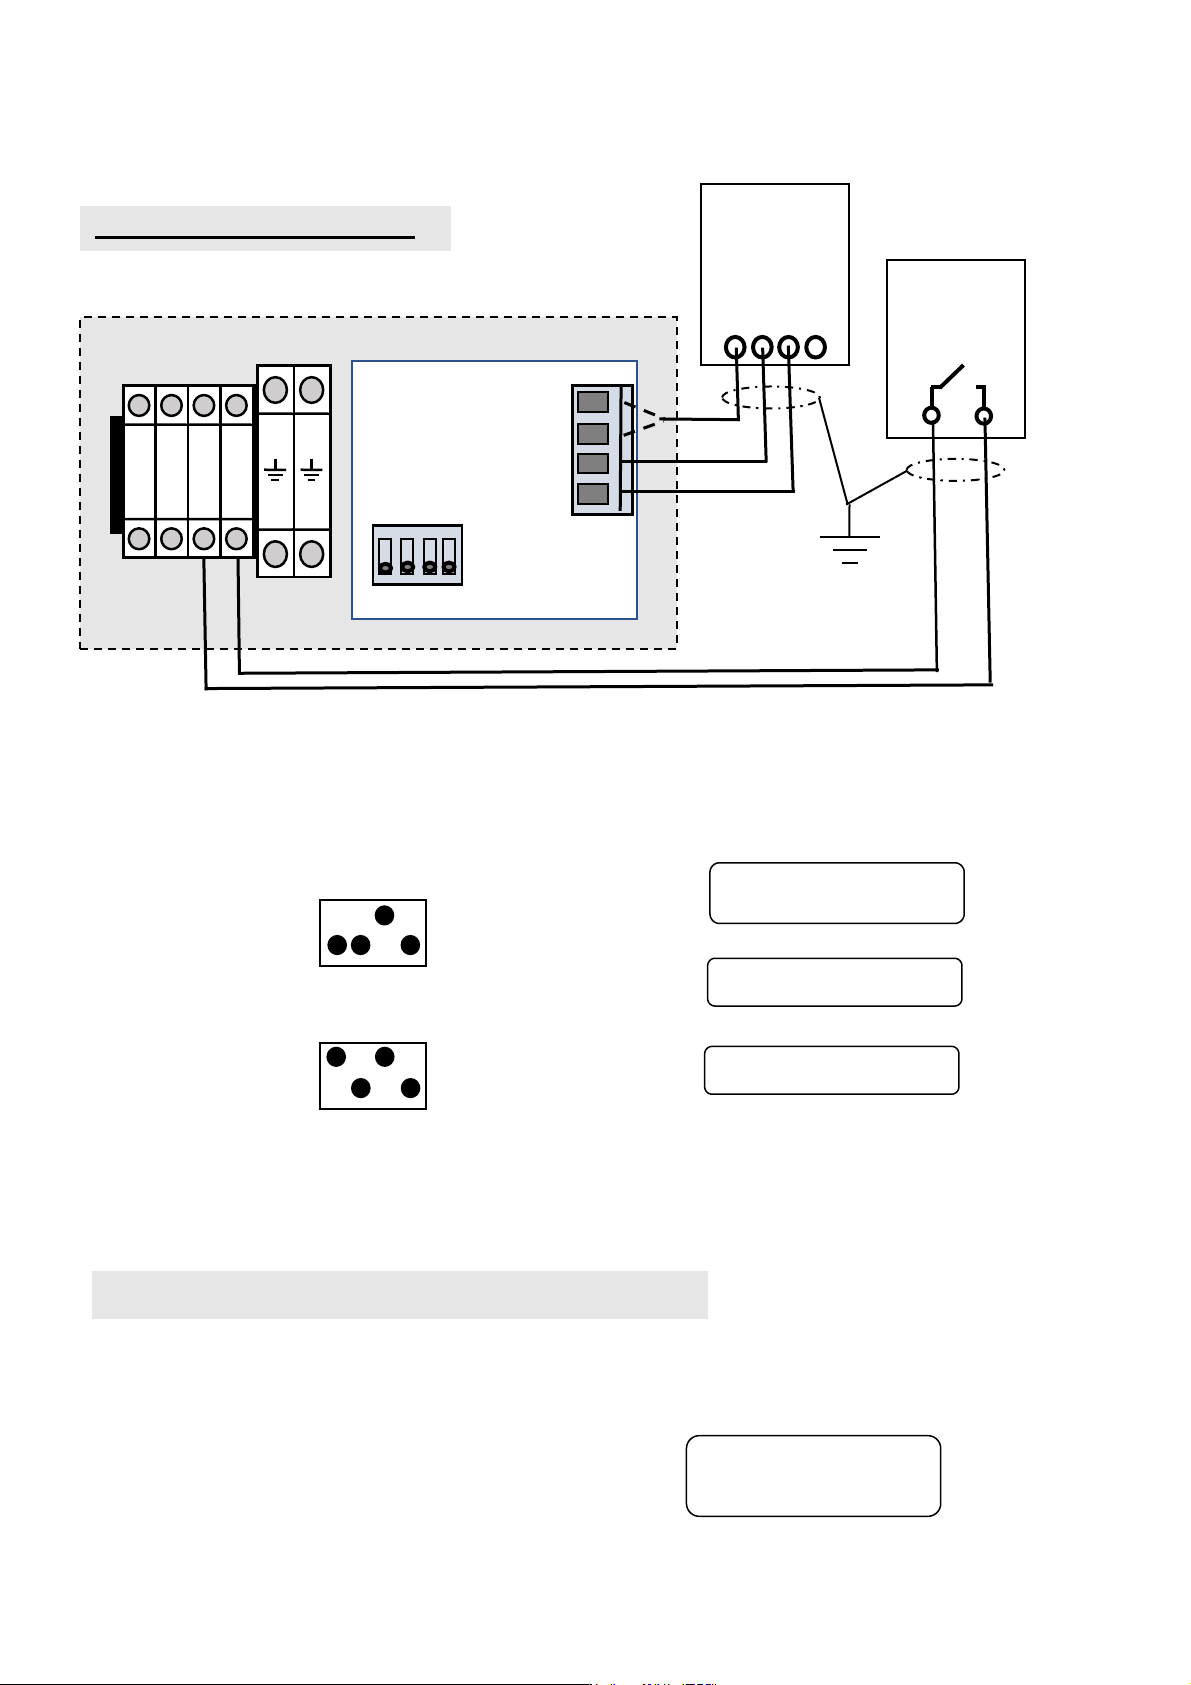
HUMIDITY SENSOR CONTROL
ELMC
3
4
1
2
Main board
33
18
19
20
X05
0
On
Off
SW2
+24Vdc
+15Vdc
High Limit
Switch
Safety
V+
Humidity
sensor
1 2 3 4
GND
rH
SW2 Dip switch setting to do on main board
CTRL SIGNAL TYPE
Control signal type setting in humidifier menu
0 - 10V SENSOR
x
XXXX
1 2 3 4
On
0-10V
CONTROL
1 2 3 4
On
0-5V
CONTROL
CTRL SIGNAL TYPE
DIGITAL CONTROL
x
XXXX
0 - 5V SENSOR
x
XXXX
Control signal type setting in humidifier menu
WITH DIGITAL CONTROL (Modbus - BACnet)
ELECTROVAP® ELMC
34
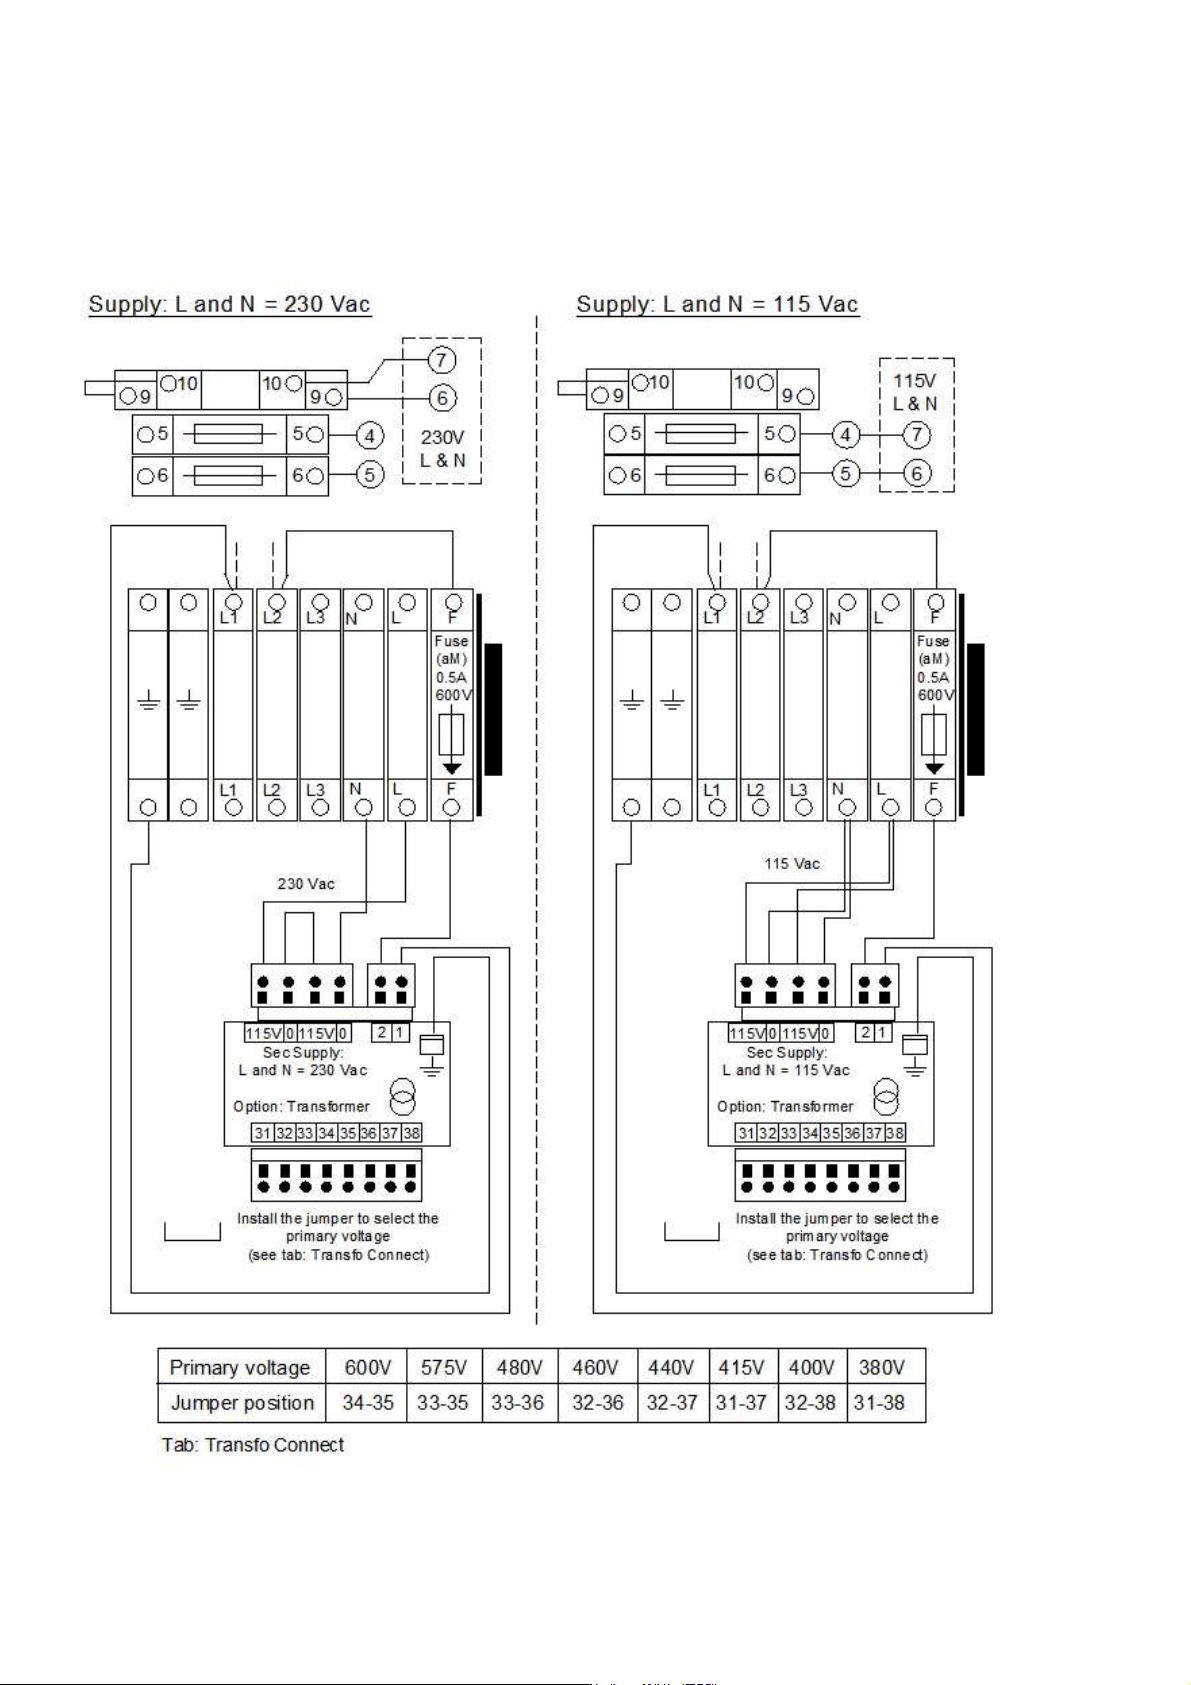
3.10 OPTION: Transformer connection
ELECTROVAP® ELMC
35
4 COMMISSIONING
Before operation, please check that your installation complies with the
manufacturer's technical recommendations. Check all power cables electrical
connections. Remove the blocking blue foam ring from the tank.
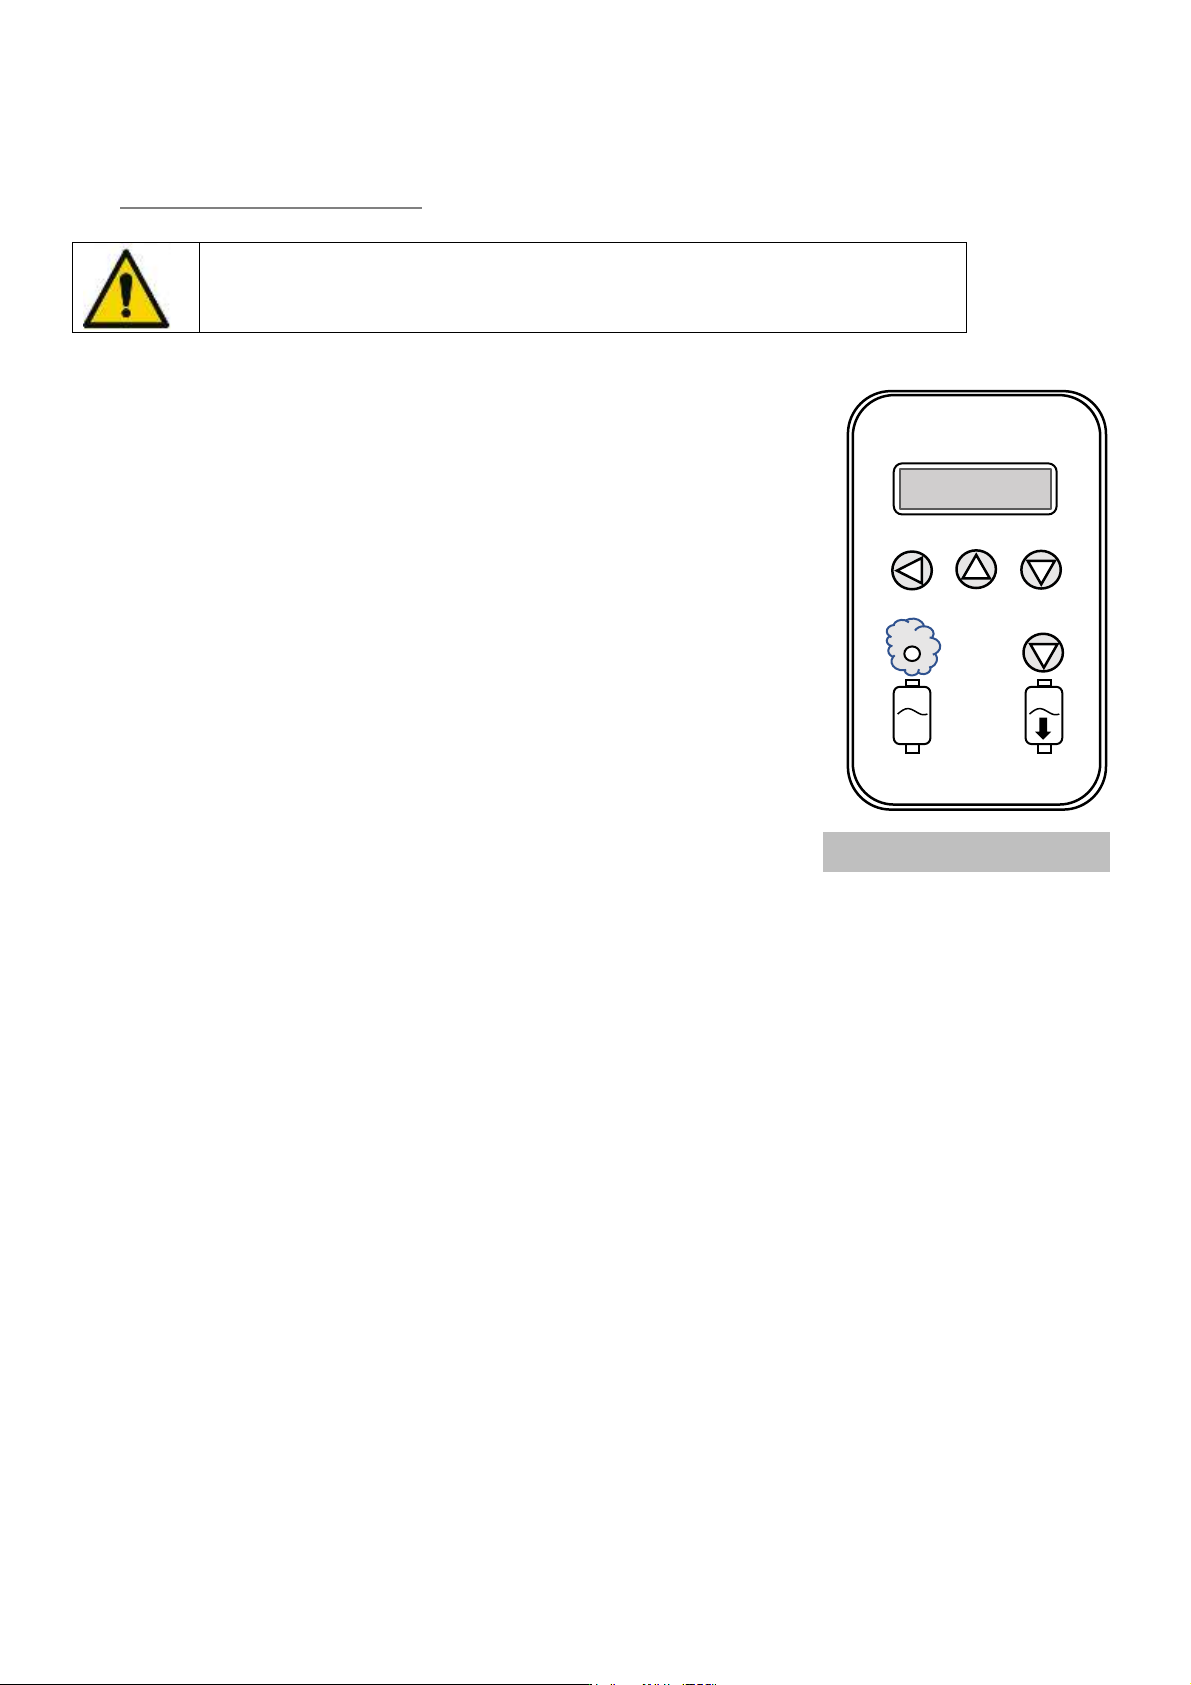
Marker 1: Validation & change menu button
Marker 2: Upward button
Marker 3: Downward button
Marker 4: Manual drain button for maintenance
Marker 5: LED = Steam production indication
• Open the main water supply valve.
• Switch on the main power supply (power and control voltages).
• Switch on the unit switch.
• If the unit asks you for a commissioning code, note the serial number on the
nameplate and contact your agent to obtain this code.
• Enter your three-digit code by doing this:
Press one of the keys 1, 2, 3 and the display will show you 0XX, with the flashing zero to eventually change it by
pressing 2 or 3.
Once arrived at your digit, validate it by pressing key 1 and your second digit flashes. Repeat the previous two
operations to show the last two digits.
Very important: do not forget to validate the last digit.
• Enter water quality in the displayed menu.
• The device is ready to respond any production request.
• During steam production, the LED (5) lights up.
5
1
2
3
4
Fig. 4 Humidifier display