00196351-06_UM_ACT_DE_EN.pdf - 第136页
ACT - Accurac y Check Tool / User Manual 09/2015 Edition 46 4.2.3 Inserting the Plate ► Insert the glass plat e with the incident l ight plate (blac k metal plate) underneath it in the input section. NOTICE The measuring…
ACT - Accuracy Check Tool / User Manual 09/2015 Edition
45
4.2.2 Setting Up Components in a WPC/MTC
► Move the tray changer into the refill position.
► Remove an empty plate (waffle pack tray carrier) from the tower.
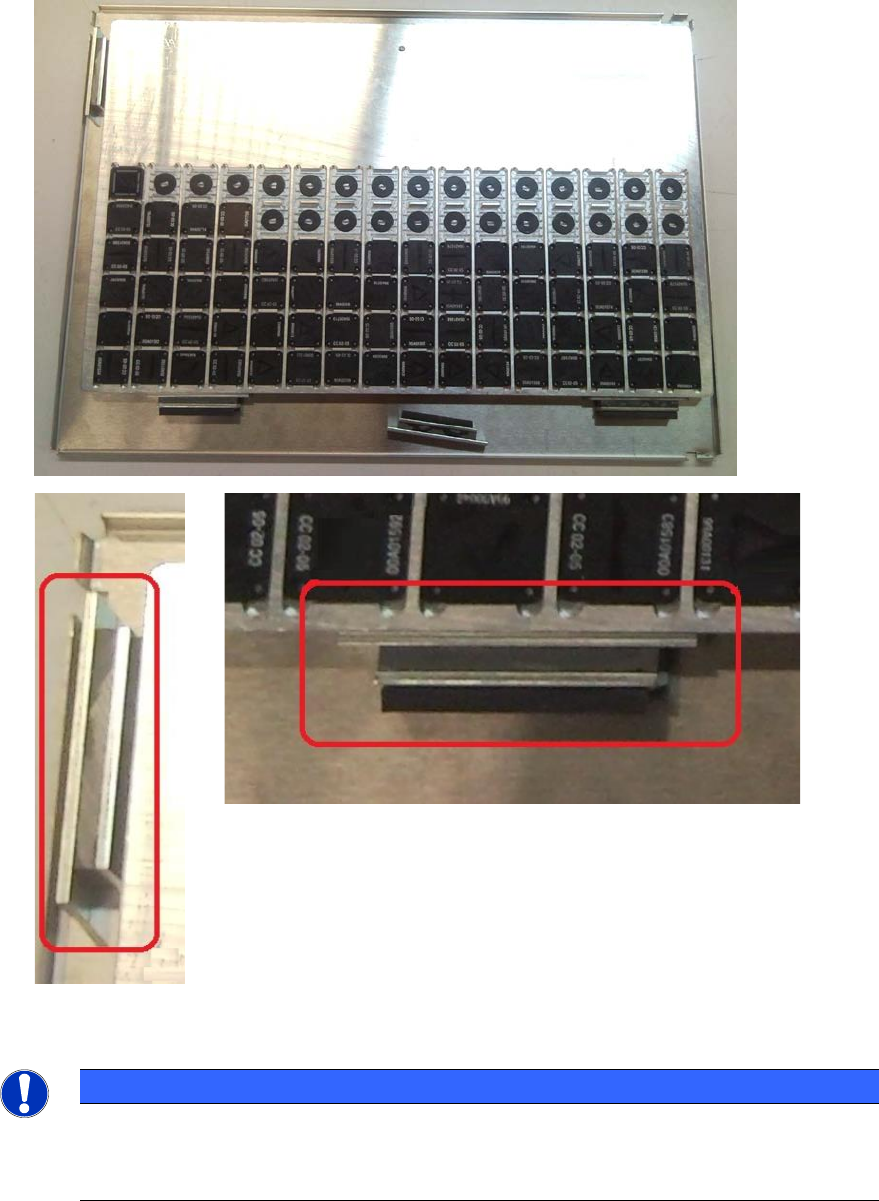
► Fasten the tray on the plate as displayed below.
► Push the plate into the corresponding level according to the specified setup.
Figure 4-19: Fastening tray on plate
NOTICE
The tray has a cutout at the bottom of the long side.
► Therefore, use the magnets for fastening the tray so that the high plate side of the
magnet faces the tray and not the rubber side.
ACT - Accuracy Check Tool / User Manual 09/2015 Edition
46
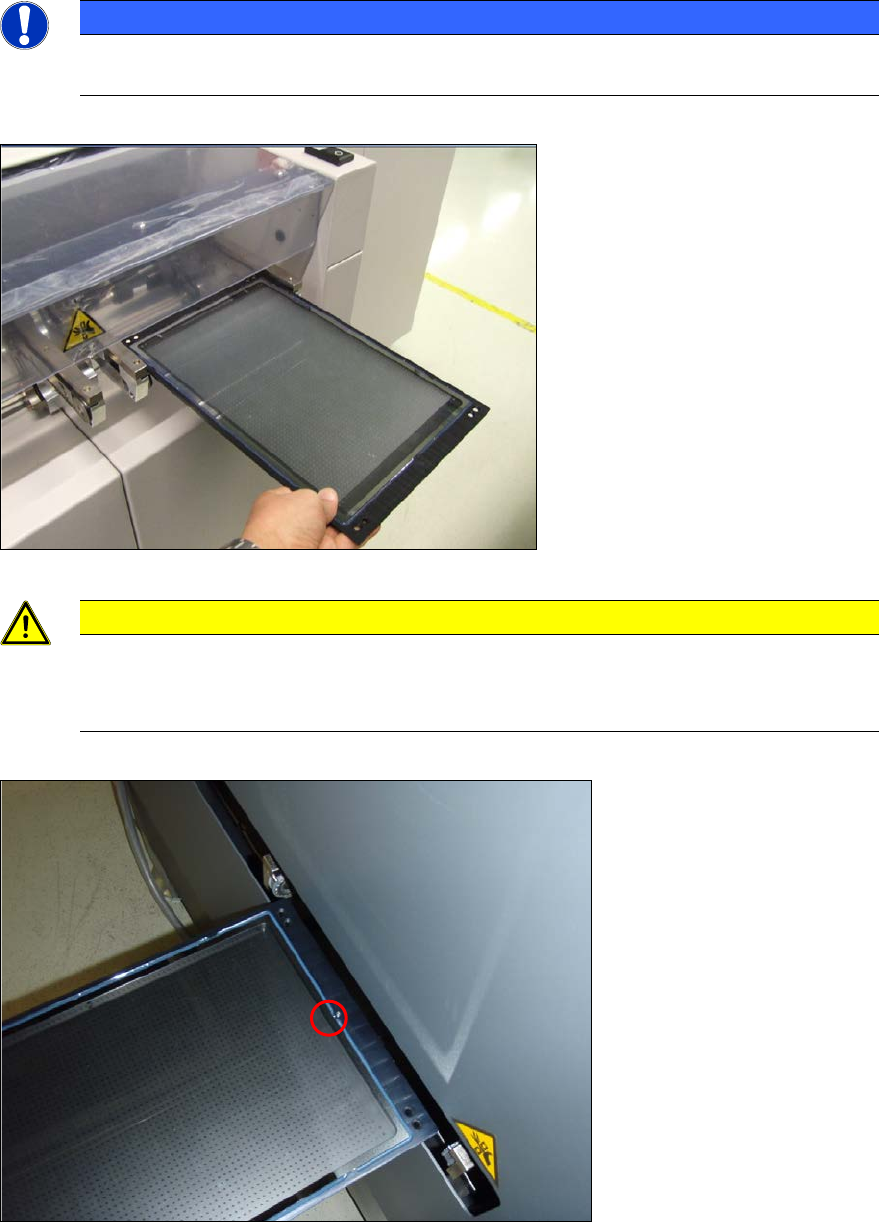
4.2.3 Inserting the Plate
► Insert the glass plate with the incident light plate (black metal plate) underneath it in the input
section.
NOTICE
The measuring plate needs to be inserted so that the arrows marked on the plate show
in the transport direction.
Figure 4-20: Placing the measuring plate in the conveyor (example SIPLACE X4)
CAUTION
Caution for SX4 and DX4 machines:
The measuring plate needs to be inserted so that the arrows marked on the plate show
against the transport direction on the SX4 and DX4 machines.
Figure 4-21: Placing the measuring plate in the SX4 / DX4 conveyor with the calibration structure (ink spot forward)
ACT - Accuracy Check Tool / User Manual 09/2015 Edition
47
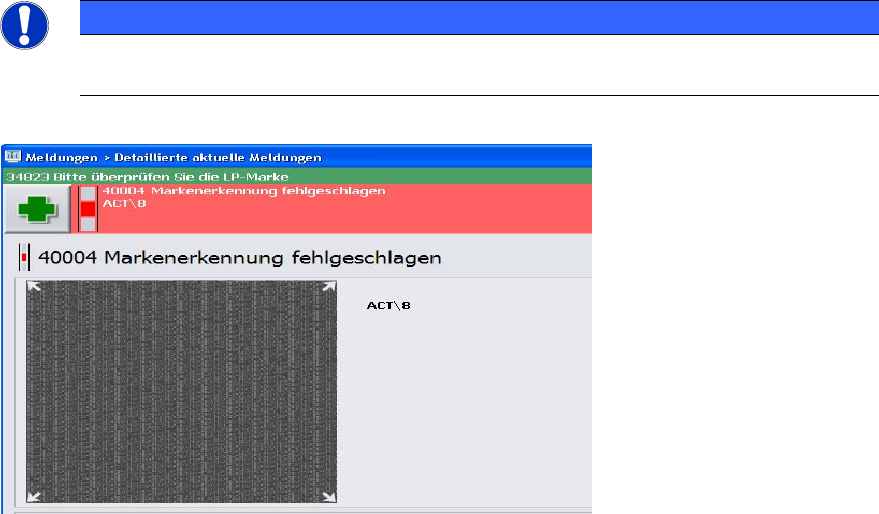
NOTICE
► Check the orientation of the inserted plate if you see the following error message
(ACT cross cannot be measured).
Figure 4-22: Error message caused by faultily inserted plate; example SW 705