MPM_UP2000_HIE印刷机_.pdf - 第28页
5-HR90-7000-011 Page 28 of 51 12 . 印刷机設置 • 首先決定刮刀裝入的順序 . • 帶最遠的螺絲的刮刀始終第一個裝入 . • 后刮刀將從机器的后面印向前面 , 這稱為 前至后印刷 . 為了完成這個動作 , 刮 刀必須以正确的方向插入 . • 當后刮已被固定 , 插入前刮 . 如下圖 . 后刮 前刮 注意后刮面朝向印网的 后面 注意前刮面朝向印网的 前面

5-HR90-7000-011 Page
27
of 51
12 . 印刷机設置
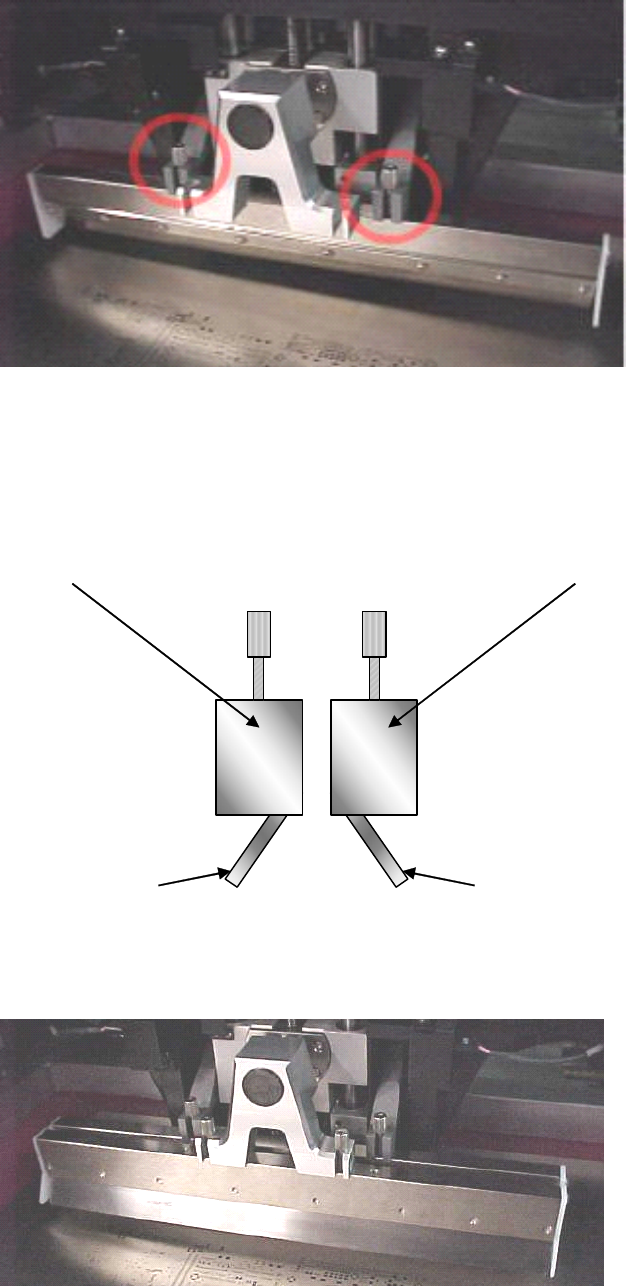
• 現在必須裝上刮刀 .
• 打開頂蓋 .
• 記下印刷頭的位置 :
• 記下刮刀的构造 :
• 第一支及第二支刮刀不同的螺絲位要特別注意 .
• 刮刀固定在印刷頭上 .
• 注意印刷頭有供刮刀裝入的開槽 .
1
1
1
1
2
2
2
2
5-HR90-7000-011 Page
28
of 51
12 . 印刷机設置
• 首先決定刮刀裝入的順序 .
• 帶最遠的螺絲的刮刀始終第一個裝入 .
• 后刮刀將從机器的后面印向前面 , 這稱為 前至后印刷 . 為了完成這個動作 , 刮
刀必須以正确的方向插入 .
• 當后刮已被固定 , 插入前刮 . 如下圖 .
后刮前刮
注意后刮面朝向印网的
后面
注意前刮面朝向印网的
前面
5-HR90-7000-011 Page
29
of 51
12 . 印刷机設置
• 下一步确定刮刀与印网的相對位置 .
• 為此我們要執行兩步操作 .
•
•
•
• 印网高度
•
•
•
• 刮刀高度
• 首先 , 我們必須執行印网高度設定 .
• 印网高度
• 此操作將決定 Z 形架帶著 PCB 移動到与印网的下面接触的位置的距离 .
• 放入正确的 PCB ( 也就是將要印的 ) 在正确的位置 .
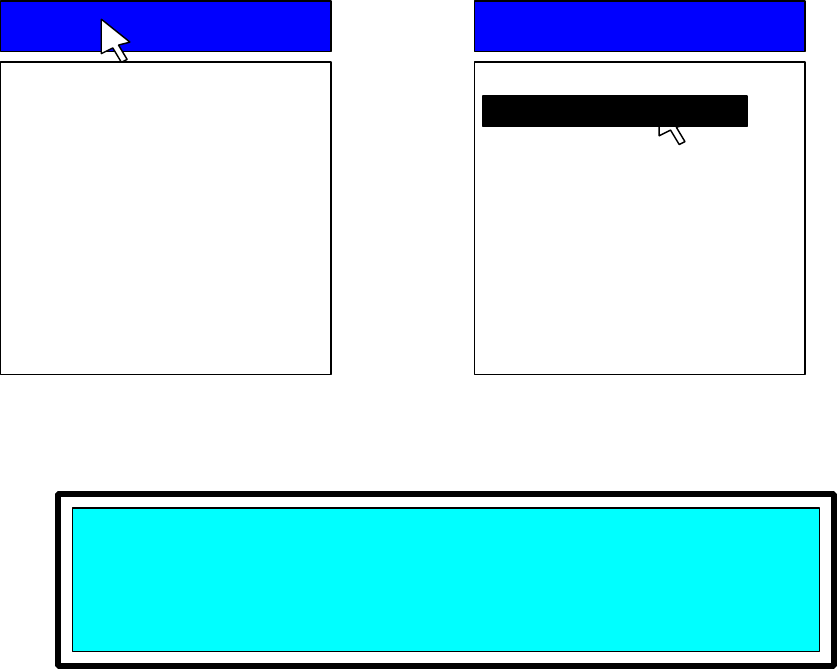
• 移動光標在 Utilities
Utilities
Utilities
Utilities 菜單的上面 , 然后在 Stencil
Stencil
Stencil
Stencil Height
Height
Height
Height 選項上面 .
• 按 Select
Select
Select
Select .
• 机器會顯示下面的提示在屏幕的右下角 :
• 按 NEXT
NEXT
NEXT
NEXT 應答這個信息 .
Utilities
Utilities
Utilities
Utilities
Load Board
Stencil Height
Set Stroke
Squeegee Height
Knead Paste
Cycle Squeegee
Cycle Wiper
Cycle Dispenser
Verify Stencil
Cal Prestop Position
This
This
This
This utility
utility
utility
utility will
will
will
will set
set
set
set the
the
the
the STENCIL
STENCIL
STENCIL
STENCIL height.
height.
height.
height.
Press
Press
Press
Press NEXT
NEXT
NEXT
NEXT to
to
to
to Continue,
Continue,
Continue,
Continue, or
or
or
or EXIT
EXIT
EXIT
EXIT to
to
to
to Quit.
Quit.
Quit.
Quit.
Utilities
Utilities
Utilities
Utilities
Load Board
Stencil Height
Set Stroke
Squeegee Height
Knead Paste
Cycle Squeegee
Cycle Wiper
Cycle Dispenser
Verify Stencil
Cal Prestop Position
Stencil Height